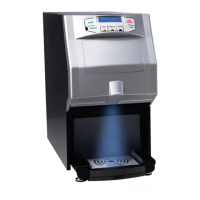
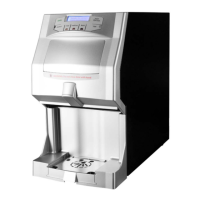
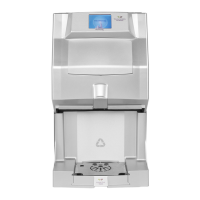
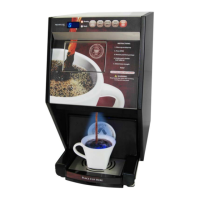
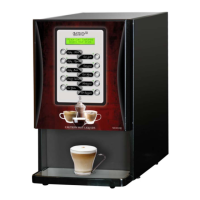
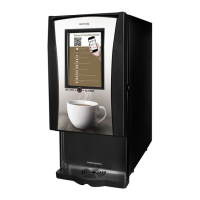
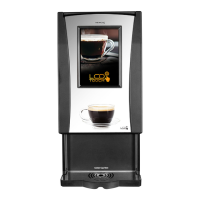
The document describes the NEWCO SINGLE SERVING AUTOMATIC POD MACHINE, model FKP-3, a single-serving coffee brewer designed for convenience and customization.
Function Description
The FKP-3 is an automatic pod machine that brews coffee or tea from single-serving pods. It features programmable brew buttons allowing users to select cup strength (Espresso, Mild, Medium, Bold, Iced) and adjust brew volume, brew time, and pre-infusion settings. The machine also dispenses hot water. After brewing, it automatically removes the used pod.
Important Technical Specifications
Tank Wattages:
- US: 1700W 120V
- Canada: 1400W 120V
- International: 1700W 220V
Capacities:
- Tank Capacity: 1 US Gallon
- Drip Tray Capacity: 8 Ounces
- Pod Waste Tray Capacity: 40 Pods (A thru-counter waste tray, PN 780306, is available for alternative use).
Cup Size:
Dimensions (Approximate):
- Width: 18.88 inches
- Height: 17.62 inches
- Depth: 9.81 inches
Shipping Weight:
Water Pressure:
- Minimum 20 lbs required for operation.
Temperature Range:
- 170-203 degrees Fahrenheit (default 200 degrees F).
Usage Features
Brewing Operation:
- Place a cup under the brew nozzle on the drip tray.
- Press the "DRAWER OPEN" button.
- Unwrap the pod and place it in the center of the brew chamber.
- Press the desired brew button (Espresso, Mild, Medium, Bold, Iced). The drawer will close, and the brew cycle will start.
- Once the pod drying cycle is complete, the pod will eject, and the cup can be removed.
Hot Water Dispense:
- Push and hold the "HOT WATER" button when the drawer is closed to dispense hot water.
Programmable Settings (accessed via programming menu):
- Set Temperature: Adjust the tank temperature from 170 to 205 degrees Fahrenheit.
- Set Energy Save Mode: Choose between "Off Mode" (no energy save), "Partial Power Save Mode" (tank temperature set to 180F after a user-selectable timeout), or "Full Energy Save Mode" (heater disabled after timeout).
- Set Energy Save Time: Configure the duration (1-4 hours) before the power save function activates.
- Set Buzzer Volume: Adjust the beeper volume from 1 to 24 (default 13) or turn it off.
- Set Air Pump Speed: Control the air pump strength (5 to 10, default 9) for pod drying.
- Set Air Pump Time: Set the air pump duration (2 to 10 seconds, default 5) for pod drying.
- Set Pod Count: Define the number of pods the brewer will hold before signaling the waste bin is full (10 to 100 pods, default 40). Setting it under 10 turns off the alarm.
- Flowmeter Adjustment: Fine-tune the amount of liquid dispensed per "tick" of the flow meter (approximately 2/10th of an ounce per tick).
- Recipe Settings: Customize individual brew buttons for:
- Set Pre-Infusion Time: Adjust the pre-infusion pulse of water (1 to 30 tenths of a second, default 15).
- Set Brew Volume: Configure the dispense volume (20 to 160 tenths of an ounce, default 70).
- Set Brew Time: Set the brew time in seconds for a 7-ounce cup (30 to 99 seconds, default 35).
- Select Water Filter: Choose a filter size (OFF, 500 GAL UP TO 3000 GAL) to activate a counter for filter warnings. The machine displays "CHECK FILTRATION" when the filter is at 90% capacity.
- GAL. REMAINING: Displays the gallons left before the filter needs replacement.
- RESET FILTER: Resets the filter use counter.
Initial Setup:
- Install the drip tray grill and place the drip tray into the pod tray.
- Connect the water fitting with a strainer on the rear of the machine.
- Ensure proper plumbing installation according to federal, state, and local codes, using 1/4 inch copper tubing and connecting to a COLD WATER LINE.
- Turn the power switch to "OFF" before plugging into a grounded electrical circuit.
- Turn the power switch "ON" to initiate the WATER FILL CYCLE.
- Allow up to 20 minutes for the tank to reach brewing temperature after filling.
Maintenance Features
Draining the Hot Water Tank:
- Unplug the machine from the power source.
- Remove the pod waste tray.
- The drain tube is clipped to the tank plate in front of the tank.
- CAUTION: Water is extremely hot and can cause burns. Allow the tank to cool before draining.
- Replace the drain plug, ensure the hose clamp is tight, and reposition the drain hose before refilling.
Servicing the Machine (Modular Design):
The machine features modular Water Tank Assembly and Brew Mechanism for easier servicing.
Removing the Brew Mechanism:
- Loosen two acorn nuts and remove two brass knurled nuts from the bottom of the machine.
- Unsnap water and harness fittings to fully remove the brew mechanism.
Side Panel Removal:
- Loosen two screws, then remove the cover panel.
- Remove two screws from the rear of the side panel.
- Slide the panel to the rear of the machine.
- Lift the panel up to release the top flange.
- Slide the panel down.
- Slide the panel forward to release.
Tank Removal & Access Areas:
- Remove three 8-32 nuts (two on top of the tank, one on the bottom of the pump bracket) to prepare the tank for removal.
- Loosen screws to remove top and back covers.
- Loosen (but do not remove) two screws, then lift and pull the control board and bracket out of the machine to access the transformer.
- Remove two 6-32 screws to remove the side panel for pump access (remove the top cover before removing side panels).
Error Messages:
The machine displays specific error messages to aid in troubleshooting:
- "THERMISTOR ERROR": Thermistor is open or shorted; replace PN 151677.
- "HIGH TEMP ERROR": Rapid temperature rise, heater on with low water level; check fill valve or water supply line.
- "UPPER/LOWER MOTOR ERROR": Brew chamber drive motor error; check for jam or obstruction in the brew chamber.
- "BOARD ERROR": Control board write error; replace board if the message does not clear (PN 780602).
- "FILL TIMEOUT ERROR": Water not reaching the level probe; check water supply or for water leak.
- "HEATER TIMEOUT ERROR": Water not heated during the timeout period; check heater relay (PN 110958), heating element (PN 704166-10 for US, 704161-10 for Canada), or hi-limit thermostat (PN 111593).