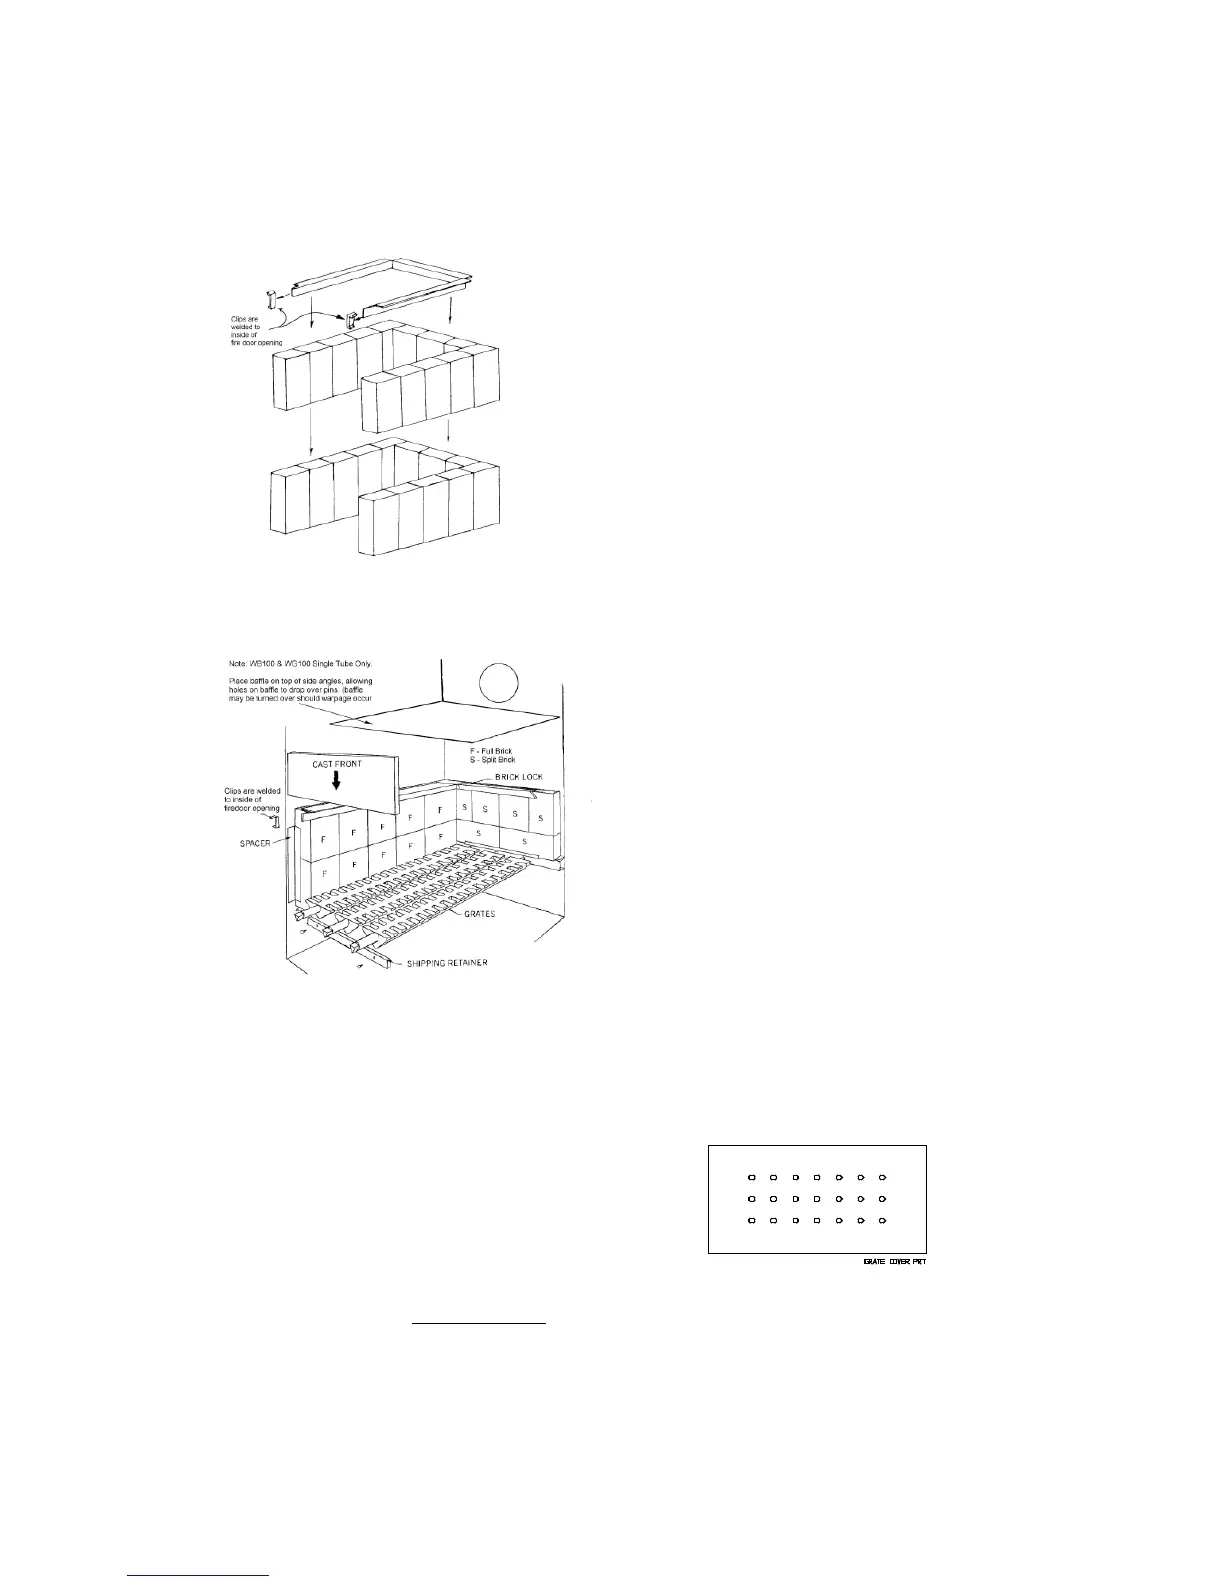
Diagram #1 - WB100 Firebox Installation Procedure
INSTALLING BRICK
1. Place brick lock in furnace brick lock hooks
2. With brick lock in place, raise rear of brick
lock by placing two (2) bricks on end to
support rear of brick lock (WG100). For
WB100 place two (2) brick on end and one
(1) brick on side. Rear now should be 4”
higher than front of brick lock.
3. Install brick by starting at front and working
back.
4. Lower brick lock into place.
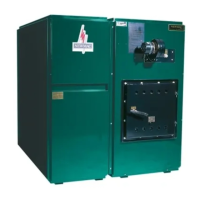
Diagram #2 – WG100 Firebox Installation
GRATES
:
Shipping retainer should be removed to allow
grates to turn and shake freely.
TO REMOVE A GRATE:
1. Remove front casting.
2. Slide grate as far forward as possible.
3. Lift rear end of grate approximately 6 inches.
4. Slide grate back toward rear of firebox and
up.
TO INSTALL A GRATE
:
1. With rear end of grate higher than front end,
slide grate forward so shaft is through grate
retaining hole at front of firebox
2. Lower rear end of grate and slide rear shaft
of grate into rear retaining hole
3. Replace front casting if coal is to be burned.
FRONT CASTING
:
Use for coal burning only.
Installation:
1. Remove top brick lock.
2. Put casting through firedoor and hold tight to
inside front of firebox above the brick.
Square pattern on casting should be facing
into the firebox.
3. Lower casting so it rests on round shaft of
grates.
4. Replace top brIck lock.
NOTE
: This front casting is not required when
burning wood. However, this casting or provided
grate plate should be placed on top of the grates
for more efficient wood burning and to prevent
wood coals from falling through and warping
grates.
Diagram #2A – GRATE PLATE
NOTE: WB100 & WG100 Single Tube Only – Place baffle on top of side angles, allowing holes in baffle to
drop over pins. (Baffle may be turned over should warpage occur).