Program settings
MENU SETTINGS
MENU 1.1.1, 1.1.2 - HEATING AND COOLING
Set the temperature (with room sensor
installed and activated):
Heating
Setting range: 5 – 30 °C
Cooling (accessory is required)
Setting range: 5 – 35°C
The value in the display appears as a temperature in °C, if
the zone is controlled by a room sensor.
Caution
A slow heating system such as underfloor heating
may be inappropriate for controlling with room
sensors.
MENU 1.1.3 - HUMIDITY
Setting range: 30 – 90%
This menu is shown if the accessory is installed and has
been activated in menu 7.1.6.4 - "Limit humidity in heat".
Here, you set the desired value for relative humidity (RH).
MENU 1.3 - ROOM SENSOR SETTINGS
Here, you make your settings for room sensors and zones.
The room sensors are grouped by zone.
Here, you select the zone to which a sensor will belong. It is
possible to connect multiple room sensors to each zone.
Each room sensor can be given a unique name.
The control of heating and cooling is activated by ticking
the relevant option. Which options are shown depends on
which type of sensor is installed. If control is not activated,
the sensor will be the displaying sensor.
Caution
A slow heating system such as underfloor heating
may be inappropriate for controlling with room
sensors.
MENU 1.3.3 - ROOM SENSOR SETTINGS
Name room sensor
Enter a name for the relevant room sensor.
Control room sensor
Setting range: on/off
Here, you select the zone to which a sensor will belong. It is
possible to connect multiple room sensors to each zone.
Each room sensor can be given a unique name.
The control of heating and cooling is activated by ticking
the relevant option. Which options are shown depends on
which type of sensor is installed. If control is not activated,
the sensor will be the displaying sensor.
Caution
A slow heating system such as underfloor heating
may be inappropriate for controlling with room
sensors.
MENU 1.3.4 - ZONES
Here, you add and name zones. You also select the climate
system to which a zone is to belong.
MENU 5.4 – WIRELESS DEVICES
In this menu you connect wireless units, and manage set-
tings for connected units.
Add the wireless unit by pressing "Add unit". For the quickest
identification of a wireless unit, it is recommended that you
put your master unit in search mode first. Then put the
wireless unit in identification mode.
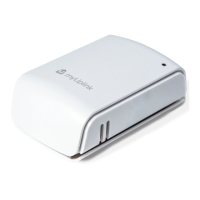
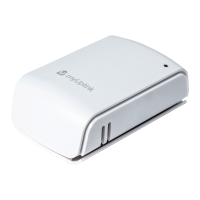
MENU 5.4.2 – INDOOR SENSOR CDS-10
Name unit
Enter a name for the relevant indoor sensor.
Zone
Setting range: zone 1 - n
Delete unit
Setting range: yes/no
Name unit: Here, you name CDS 10.
Zone: Here, you can change the zone to which CDS 10 will
belong.
Remove unit: Here, you can choose to remove the unit.
MENU 7.1.4.4 - DEMAND-CONTROLLED
VENTILATION
Humidity controlled ventilation
Alternative: on/off
CO2-controlled ventilation
Alternative: on/off
Highest fan speed
Setting range: 1 – 100%
Lowest fan speed
Setting range: 1 – 100%
Time interv. change of fan speed
Setting range: 1 – 60 minutes
Controlling zones
Activate zones for demand-controlled ventilation.
Here, you make settings for demand-controlled ventilation.
CDS 10 | EN16
 Loading...