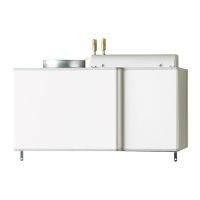
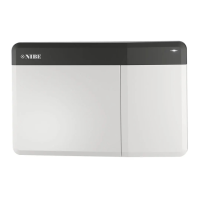
General
All electrical equipment is connected at the factory.
■
Disconnect SAM 40 before insulation testing the
house wiring.
■
For the supply air module wiring diagram, see page
27.
■
Signal cables to external connections must not be
laid close to high current cables.
■
If the supply cable is damaged, only NIBE, its service
representative or similar authorised person may re-
place it to prevent any danger and damage.
NOTE
Electrical installation and service must be car-
ried out under the supervision of a qualified
electrician. Electrical installation and wiring
must be carried out in accordance with the
stipulations in force.
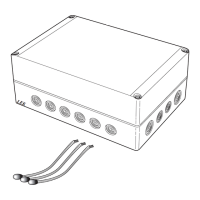
Connections
Connecting to F750
This section describes the electrical connection for
controlling SAM 40 from NIBE F750.
The heat pump switch must be in the " " position and
the switch on SAM 40 in position 0, before any work
is carried out.
1.
Ensure that the products are completely disconnec-
ted from the power source. Remove the front hatch
and protective cover to the input card on the heat
pump according to the instructions in its Installer's
manual.
2.
Connect cable W102 to position X4 on the input
board in the heat pump, according to the electrical
wiring diagram on page 27. Use the cable lead-in
in the heat pump when routing cables.
If several accessories are to be connected or are
already installed, the adjacent wiring diagram must
be followed.
The first accessory board must be connected dir-
ectly to the heat pump's terminal block AA3-X4.
The following boards must be connected in series
to the previous board.
3.
Fix external cable routing.
4.
Install the protective cover and the service cover
according to the heat pump Installation manual.
5.
Connect plug W101.
1
2
3
4
5
6
7
8
AA5-X4
15
A
B
GND
A
B
GND
A
B
GND
A
B
GND
A
B
GND
14
13
AA3-X4
1
2
3
4
5
6
7
8
AA5-X4
Accessory card 1
Accessory card 2
ON
1 2 3 4 5 6 7 8
-X9
-X2
24 20212223 1516171819 1011121314 56789 1
1
N
L
PE
PE
1
2
3
4
5
6
7
8
2
3
4
5
6
7
8
9
234
-X8
-X4
-X10
-X1
ON
1 2 3 4 5 6 7 8
-X9
-X2
24 20212223 1516171819 1011121314 56789 1
1
N
L
PE
PE
1
2
3
4
5
6
7
8
2
3
4
5
6
7
8
9
234
-X8
-X4
-X10
-X1
DIP switch
The DIP-switch (S2) on the accessory board (AA5) is set
in the factory as below.
ON
1 2 3 4 5 6 7 8
-X9
-X2
24 20212223 1516171819 1011121314 56789 1
1
N
L
PE
PE
1
2
3
4
5
6
7
8
2
3
4
5
6
7
8
9
234
-X8
-X4
-X10
-X1
17Chapter 5 | Electrical connectionsSAM 40
5 Electrical connections
 Loading...