12 – ENGLISH
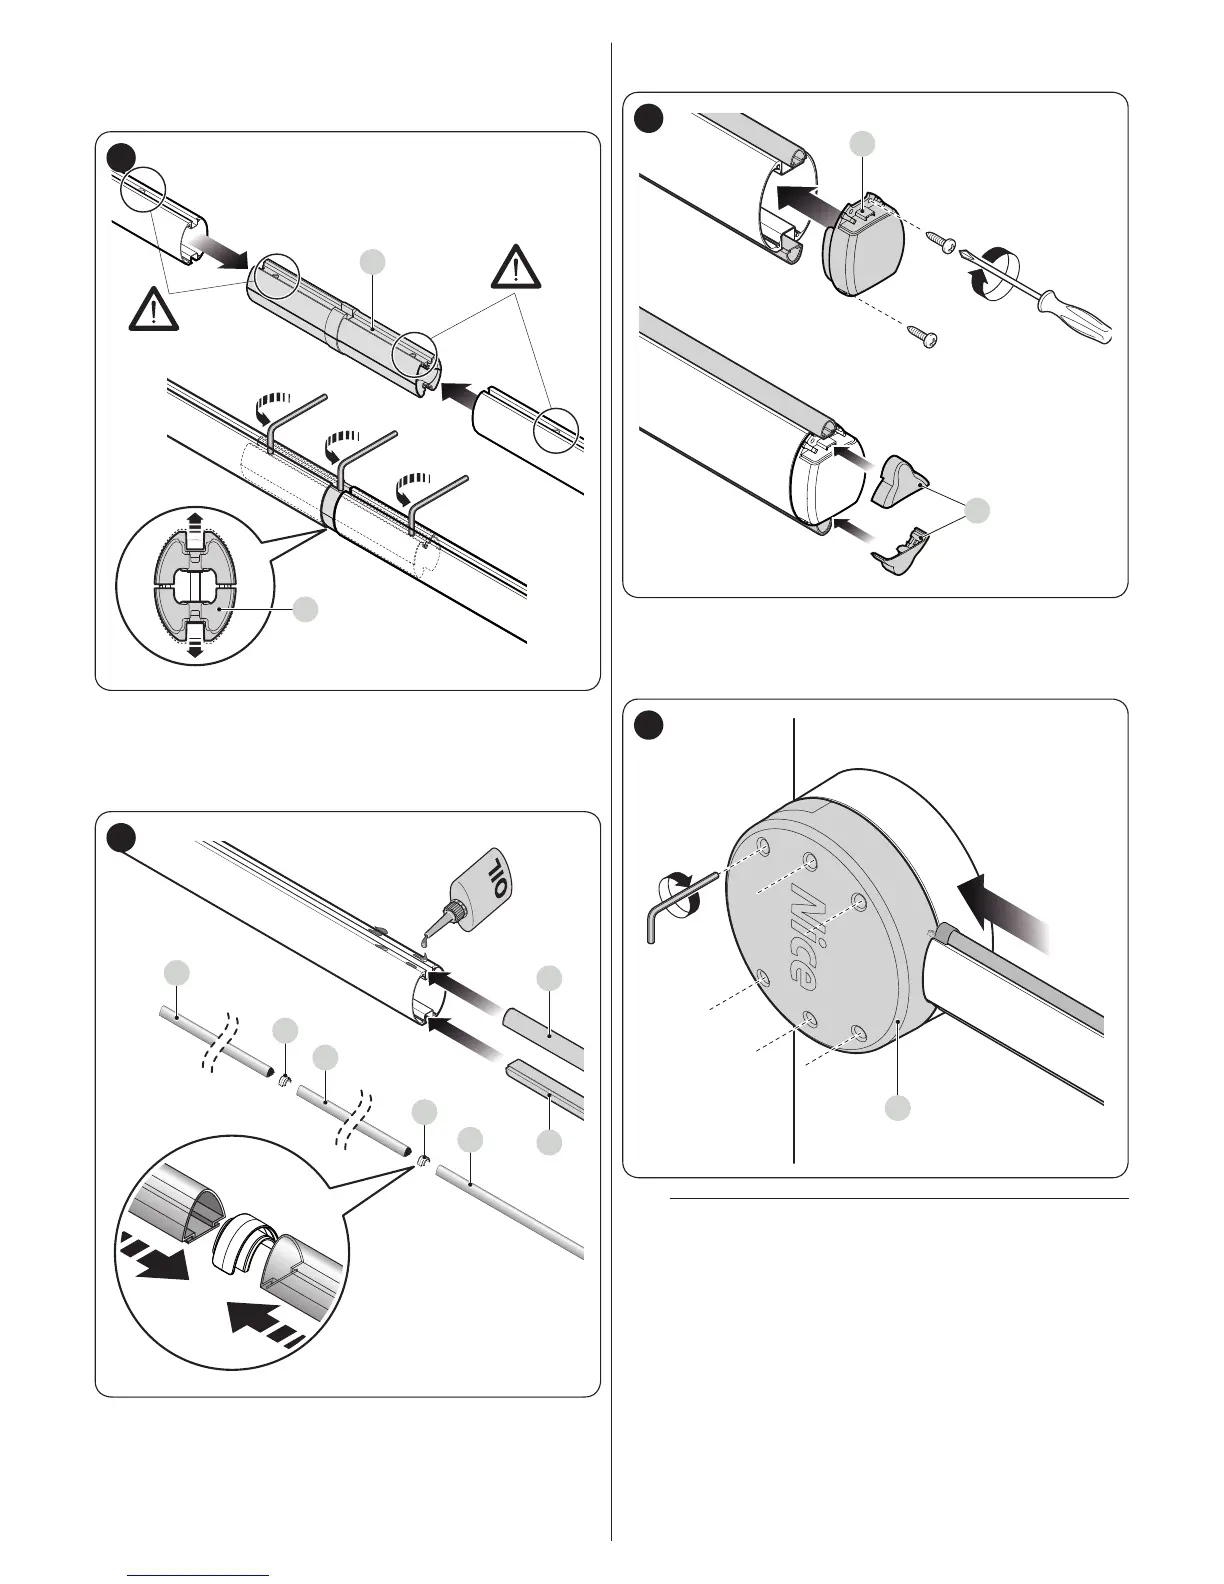
6. only for booms made up of two pieces: connect the uni-
versal joint (E) into the free ends of the two booms, align-
ing the holes correctly; loosen the three screws of the joint
equally so that the latter can be fastened inside the booms
E
E
23
7. lightly oil the aluminium rail on both sides
8. along the entire length of the boom, insert the rubber im-
pact protectors through the slots (F) alternating them with
the relevant joints (G); the rubber protector can protrude
roughly 1 cm from the end of the boom
F
F
F
G
G
F
F
24
9. put on the boom cap (H) and secure it with the two screws
10. position and t together the two rubber protector caps (I)
H
I
25
11. insert the complete boom into the shell (J) of the support
all the way to the end
12. vigorously tighten the 6 screws of the support inserted
previously.
J
26
l
After installing the boom and the rubber impact pro-
tector, before proceeding further, the other acces-
sories – if relevant – must be installed on the boom.
To install them, refer to the respective instruction
manuals.
 Loading...