This document describes the Night Owl BWNIP2 Series Wi-Fi NVR (Network Video Recorder) and its compatible cameras, providing comprehensive instructions for setup, operation, and maintenance.
Function Description:
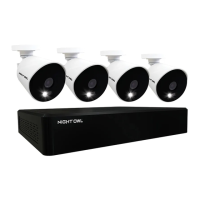
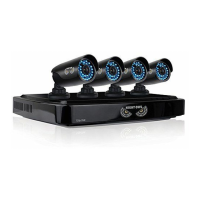
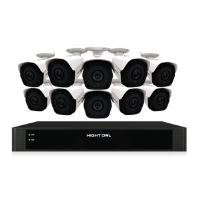
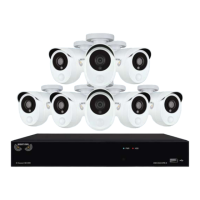
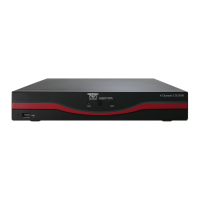
The Night Owl BWNIP2 Series is a wireless security system designed for home and property surveillance. It consists of a Wi-Fi NVR that records video from compatible wireless cameras. The system allows users to monitor live video feeds, playback recorded footage, and receive notifications on smart devices. The NVR creates an independent built-in Wi-Fi network for secure and uninterrupted video transmission from the cameras. Remote viewing is possible by connecting the NVR to a modem/router.
Important Technical Specifications:
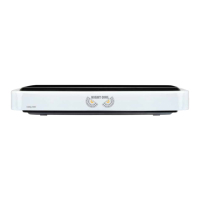
- NVR Compatibility: BWNIP2 Series Wi-Fi NVRs are compatible with WNIP-2LTA-BS, WNIP-2LTA-BS-U, BWNIP-2TA-BS, and DB-WNIP2-SU camera models.
- PC/MAC® System Requirements:
- PC Operating System: Windows® 10 and above
- MAC Operating System: MAC OS X® 10.9 and above
- Mobile Device System Requirements:
- Android™: 8.0 and above
- iOS®: 12.4 and above
- Video Resolution: A TV or Monitor with a minimum 1080p HD resolution and an HDMI input is required for initial setup. VGA/HDMI Resolution can be optimized to best fit the TV/Monitor, with a default of 1920 x 1080.
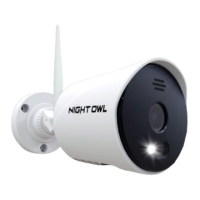
- Wireless Range: Wire-free cameras can reach up to 300 ft wirelessly from the NVR.
- Storage: The NVR uses an internal hard drive for video storage. Recordings can be backed up to a USB Flash Drive or External HDD, which must be formatted to FAT32/ExFAT.
- Camera Power: Cameras require 2 rechargeable batteries but can hold up to 4. Batteries must be installed for charging.
- Video Compression: H.265+
- Network Protocols: DHCP, DDNS, IP, ISP, OSD, SMTP, UPS.
Usage Features:
- System Setup:
- Hardware Connection: Connect antennas to the NVR, HDMI cable to a TV/Monitor, Ethernet cable to a router/modem (for remote viewing), USB mouse to the NVR, and the power adapter.
- Camera Pairing: Cameras must be charged for at least 3 hours and paired locally to the NVR before final mounting. The pairing process involves releasing the battery cartridge, inserting batteries, connecting a USB cable for power, and using the NVR's "Add Camera" menu.
- Startup Wizard: Guides users through firmware updates, device registration, and camera pairing.
- Night Owl Protect App: Downloadable from App Store or Google Play Store for smart device monitoring. Users create an account and log in to the NVR using these credentials.
- Live View:
- Default display mode showing live video feeds from cameras.
- Date and Time OSD: Displays camera date and time.
- Signal Strength: Shows wireless signal strength for each camera.
- Battery Status: Indicates camera battery levels.
- Play Button: Brings cameras out of sleep mode (to save battery) back to Live View.
- Motion Detection Icon: Indicates alarm events like motion detection, video loss, or tampering.
- Wi-Fi NVR Recording Status: Shows when the NVR is recording.
- Channel Control Panel: Allows Zoom In/Out, Picture Settings, Spotlight ON/OFF, and Sleep Mode.
- System Exception Icon: Indicates alarms or exceptions, leading to an event log.
- Right-Click Menu (Tool Bar): Provides quick access to Main Menu, Lock system, Startup Wizard, Multi-Camera View, Slide Show, Audio control, Image Settings, and Video Playback.
- Video Playback:
- Search recordings by date (CALENDAR), specific cameras (CAMERA), and event types (Doorbell ring, Face, Human, Motion, Continuous).
- Timeline shows the presence and progress of video recordings.
- Controls for rewind, fast-forward, pause, and play.
- Menus and Settings:
- General Menu: Network (DHCP, IP Address, Subnet Mask, Gateway, MAC Address, Preferred DNS, Network Bandwidth, Network Status), DDNS (DDNS Function, DDNS Provider, URL, Username, Password, Test, Reset), Time Setup (Date Format, Time Zone, Sync Time, Time Format, Daylight Savings Time).
- Camera Menu: Status (Device Name, Resolution Speed, S/W Version), Add Camera (Protocol, Table 1 & 2, Wireless Add, Add All Cameras, Edit, Advance, Delete, Delete All, Manual Edit, Arrows), Channel OSD (Camera Name, Image Settings, Connect Quality), Video Quality (Encode Mode, Main Stream/Sub Stream, Bitrate Mode, Encode Format, Camera Speed, Framerate), IPC Upgrade (Firmware From, Start, Allow The Device To Downgrade).
- Record Menu: Event Settings (Record by event: Face Detection, Human Detection, Motion Detection, Motion Sensitivity, Pre-Recording, Copy To, Push Notification, Spotlight, Notification Schedule, Area Setup), Status (Continuous, Event, None, Copy To, Time Diagram).
- Hard Drive Menu: Hard Disk List (Model, Capacity, Used, Status), Overwrite, Format, Disable (automatic deletion of old files).
- System Menu: System Settings (Language, VGA/HDMI Resolution, Auto Logout, Slide Show Interval, Menu Transparency, Startup Wizard), Wi-Fi Setup (ESSID, Connect Information, WiFi Channel, Auto Adapt Channel, Update), Device Info (Device Model, UID, H/W ID, S/W Version, Built Time, Support Web, QR Code), Log (Event Type, From Time, Till Time, Search, Table), Camera Speed.
- Mounting Cameras:
- Place NVR in a central location for maximum wireless coverage.
- Avoid high voltage wires or electrical interference sources.
- Consider obstacles (concrete, brick, glass with metal, cinderblock, drywall, wood, glass, mirror) that affect signal strength.
- Mount cameras out of reach to avoid vandalism.
- Avoid direct exposure to weather, sun, or bright light on the lens.
- Mounting surface must hold at least four times the camera's weight.
- PIR cameras should be placed at least 7 ft above ground, angled slightly down, and positioned for 'side-to-side' movement across the field of view for optimal motion detection.
- Installation steps include marking screw positions, drilling, inserting anchors, securing the base, and adjusting camera housing.
Maintenance Features:
- Firmware Update: Available via Network or USB.
- Factory Default: Restore settings for network, user, or all configurations (including cameras).
- Auto Reboot: Schedule automatic reboots (e.g., Every Week).
- Troubleshooting Guide: Provides solutions for common issues like power problems, mouse detection, audio issues, and system noises.
- Support Website: www.NightOwlSP.com offers manuals, troubleshooting guides, FAQs, and video tutorials.
- Warranty: One (1) year warranty covering manufacturing defects. Requires product registration, proof of purchase, and contact with technical support. Exclusions apply for misuse, unauthorized repairs, or use of non-approved accessories.