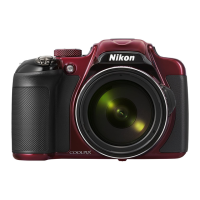
What to do if Nikon Coolpix P90 Digital Camera settings reset?
- Eerin83Jul 26, 2025
If your Nikon Digital Camera settings have been reset, it is likely that the backup battery is exhausted. Replace the backup battery to resolve this issue.
What to do if Nikon Coolpix P90 Digital Camera settings reset?
If your Nikon Digital Camera settings have been reset, it is likely that the backup battery is exhausted. Replace the backup battery to resolve this issue.
Why are the monitor and electronic viewfinder blank on my Nikon Coolpix P90 Digital Camera?
If the monitor and electronic viewfinder on your Nikon Digital Camera are blank, first ensure that the camera is turned on. If it is on, check the battery; it may be exhausted and need replacing or recharging. The camera might also be in standby mode to save power; press the power switch, shutter-release button, or the c button, or rotate the mode dial to cancel standby mode. Remember that the monitor and electronic viewfinder cannot be used simultaneously, so press the x button to switch between them. Also, disconnect any USB or audio/video cables connected to a computer or TV. Finally, if time-lapse movie recording is in progress, wait for it to finish.
Why is the date not appearing on Nikon Coolpix P90 pictures when Date imprint is enabled?
If the date is not appearing on your Nikon Digital Camera pictures even with Date imprint enabled, it might be because you are using a scene mode like Museum or Panorama assist. Try changing the scene mode. Also, dates cannot be imprinted when Continuous or BSS is selected for Continuous, so select a different shooting mode. Ensure that Auto bracketing is set to Off, y (blink proof) is deselected, and you are not in sport continuous mode. Finally, dates cannot be imprinted when recording movies, so switch to still photo mode.
How to improve monitor readability on Nikon Coolpix P90 Digital Camera?
If the monitor on your Nikon Digital Camera is hard to read, the ambient lighting might be too bright. Try using the electronic viewfinder or moving to a darker location. You can also adjust the monitor brightness. Finally, ensure that the monitor is clean.
What does it mean when the monitor turns off and the power-on lamp blinks rapidly on my Nikon Coolpix P90 Digital Camera?
To resolve this, turn off your Nikon Digital Camera and allow the battery to cool down before resuming use. The high battery temperature is causing the monitor to turn off and the power-on lamp to blink rapidly.
Why can't I reset file numbering on my Nikon Digital Camera?
If you cannot reset file numbering on your Nikon Digital Camera, it may be because the folder number has reached 999 and there are images in the folder. Try changing the memory card or formatting the internal memory/memory card. Also, reset file numbering cannot be done if scene mode is set to Panorama assist or Voice recording, so change the scene mode. Finally, if Continuous is set to Intvl timer shooting when A, B, C, D, E, or F shooting modes are used, change the shooting mode.
How to improve electronic viewfinder readability on Nikon Coolpix P90?
To improve the readability of the electronic viewfinder on your Nikon Digital Camera, adjust the diopter adjustment control.
General safety warnings and precautions to prevent damage or injury when using the device.
FCC interference statement and California Proposition 65 warning.
Compliance information for Canadian digital apparatus and European WEEE directives.
Explains manual purpose, symbols, notations, and screen sample conventions.
Details on Nikon's learning commitment, accessory use, and pre-shooting checks.
Legal notices on copyright, prohibited copying, and safe disposal of data storage devices.
Identifies and describes the main external components and controls of the camera body.
Instructions on adjusting the camera's monitor for optimal viewing angles.
Procedures for raising/lowering the built-in flash and attaching the camera strap and lens cap.
Explanation of indicators and icons shown on the camera's monitor during shooting.
Describes the function of each shooting mode selectable via the camera's mode dial.
How to use the command dial for menu navigation and function selection.
Detailed usage of the multi selector for menu navigation and option selection.
Steps to access the menu, navigate between tabs, and select options.
How to access help information and switch between the monitor and electronic viewfinder.
Controls for cycling through different information displays on the camera's screen.
Step-by-step guide for charging the camera's rechargeable battery using the supplied charger.
Important notes and warnings for safe battery and charger usage.
Procedure for inserting the battery, ensuring correct orientation and secure placement.
Steps for removing the battery and managing camera power, including auto-off functions.
Guide to selecting the camera's display language and setting the date and time.
Detailed steps for modifying date, time, and the order of date elements displayed.
Instructions for inserting and removing memory cards correctly.
Procedures for formatting memory cards and using the write-protect switch.
Guide to powering on the camera and selecting the Auto mode for basic shooting.
Explanation of indicators and icons visible on the monitor in Auto mode.
Instructions on positioning the camera and framing the subject for a shot.
Details on operating the zoom control for optical and digital zoom magnification.
Steps for focusing on the subject and capturing the image by pressing the shutter button.
Explanation of autofocus behavior, focus area indicators, and using focus lock.
Procedures for reviewing captured images and removing unwanted ones.
Overview of playback features like zoom, thumbnail display, and switching modes.
Guidance on when and how to use the camera's built-in flash for various shooting conditions.
Steps to select and configure the desired flash mode from the camera's menu options.
Information on flash indicators, settings, and the advanced red-eye reduction feature.
Instructions for using the self-timer for delayed shooting and preventing camera shake.
Explanation of available focus modes and their application in different shooting scenarios.
Steps to select and adjust the camera's focus mode, including AF and manual options.
Detailed guide on manually adjusting focus using the camera's controls for precise sharpness.
How to adjust exposure compensation to control the brightness of the final image.
Instructions for selecting scene modes that automatically optimize camera settings for specific photographic situations.
Explanation of features and icons used in various scene modes like Portrait and Landscape.
Details on using Portrait and Night Portrait modes for capturing people in different lighting.
Guidance on using scene modes optimized for specific lighting conditions and environments.
Instructions for using Night Landscape and Close-up modes for specific photographic subjects.
Guidance on using Food mode for close-ups and Museum mode for indoor settings.
Explains scene modes for fireworks, copying text, and shooting backlit subjects.
Instructions for using Panorama Assist mode to capture images for panoramic photos.
Specific steps and settings for effectively using the Food scene mode.
Important notes on Food mode, including flash and white balance adjustments.
Step-by-step guide for capturing images to create a panoramic photograph.
Details on Panorama Assist operation, exposure lock, and using Panorama Maker software.
How the camera automatically selects the optimal scene mode based on the subject.
Important considerations and restrictions for using the Scene Auto Selector mode.
How the camera detects and shoots smiling faces using face priority.
Explanations and notes related to using the Smile Timer and Blink Proof features.
Details on using Sport Continuous mode for high-speed shooting of moving subjects.
Important points for Sport Continuous mode, including image quality and flash usage.
Description of settings within the Sport Continuous menu, like high-speed modes.
Explanation of the pre-shooting cache feature for capturing moments before the shutter is fully pressed.
Introduction to the four primary exposure modes and their general usage.
How shutter speed and aperture influence exposure, motion blur, and depth of field.
Guide to using the Programmed Auto mode, including flexible program adjustments.
Instructions for controlling shutter speed in S mode to capture motion effectively.
Guidance on using Aperture-Priority Auto mode to control depth of field and background blur.
Instructions for full manual control of shutter speed and aperture for precise exposure.
How to save and recall custom shooting settings using the U1 and U2 modes.
Step-by-step process for saving current camera settings to user modes.
Procedure to revert saved user settings back to default values.
Explanation of the Active D-Lighting feature for preserving highlight and shadow detail.
How to display multiple images in thumbnail or calendar view for browsing.
Explanation of icons on thumbnails, including print set, protect, and movie frames.
Instructions for zooming, moving the display, and navigating playback.
Overview of in-camera editing functions: retouch, D-Lighting, crop, etc.
Guide to applying quick retouch for enhanced contrast and saturation.
How to use D-Lighting to improve brightness and contrast in images.
Steps to crop a picture to a specific portion and save it as a new file.
Process for creating smaller copies of pictures for web or email usage.
Instructions for adding a black border frame to pictures.
Steps for recording, playing, and deleting voice memos attached to pictures.
Guide to shooting movies with sound, including start/stop and settings.
Explanation of movie menu options like size, frame rate, and format.
Information on movie length limits and autofocus modes for video recording.
Details on enabling Electronic VR for stabilization and setting up Time-Lapse movies.
How to choose intervals for Time-Lapse movies and power/recording notes.
Procedures for playing movies, controlling playback, and deleting movie files.
Steps for recording voice memos using the camera's microphone.
How to select and play recorded voice memos.
Navigation and management of voice recording playback, including deleting sound files.
Instructions for copying voice recordings between storage locations.
Message displayed when no images are found and how to proceed with copying.
Guide on connecting the camera to a TV for playback using an audio/video cable.
Instructions for connecting the camera to a computer to transfer images and software.
Step-by-step process for transferring photos using Nikon Transfer software.
Alternative methods for file transfer using card readers or opening files on a computer.
Instructions for connecting the camera directly to a PictBridge printer.
Steps for establishing a direct USB connection between the camera and printer.
Guide to selecting individual pictures and printing them.
Instructions for selecting paper size and printing multiple photos.
How to select images and specify print quantities for DPOF printing.
Overview of settings available in the Shooting Menu for various shooting modes.
Steps to access and navigate the Shooting Menu and its tabs.
Explanation of image quality options and their impact on file size and print quality.
Details on available image resolutions and their suitability for different uses.
Table showing approximate picture capacity based on image size and quality.
Guide to adjusting image optimization settings like contrast and sharpening.
Instructions for customizing contrast, sharpening, and saturation settings.
How to shoot in black-and-white, including standard and custom options.
Explanation of white balance settings to match different lighting conditions.
Procedure for setting custom white balance using a reference object.
Guide to adjusting ISO sensitivity and its effect on image noise.
Explanation of different metering modes for measuring scene exposure.
Details on Continuous, BSS, Multi-shot 16, and Interval Timer Shooting modes.
Important considerations for continuous shooting modes, including potential image artifacts.
How to use Auto Bracketing for capturing multiple exposures for better control.
Options for determining focus points, including Face Priority, Auto, and Manual.
Explanation of center focus and Face Priority functionality.
Important notes regarding Face Priority detection limitations and alternative autofocus methods.
Description of autofocus modes for movies, like Single AF and Full-time AF.
How to adjust flash output to balance subject and background brightness.
Settings for reducing noise at slow shutter speeds and correcting lens distortion.
How to set up and view an automated slide show of stored pictures.
Controls for managing slide show playback and important usage notes.
Procedures for reviewing captured images and removing unwanted ones.
How to protect selected pictures from accidental deletion and formatting.
Instructions for rotating picture orientation and hiding images from playback.
Steps for copying pictures between internal memory and a memory card.
Message displayed when no images are found and how to proceed with copying.
How to access and navigate the camera's setup menu interface.
Options for customizing the welcome screen displayed upon camera power-on.
Setting the camera's clock, time zones, and daylight saving time.
How to imprint date and time on pictures and printer compatibility notes.
Adjusting vibration reduction to minimize blur from camera shake.
Enabling motion detection to reduce effects of camera shake and subject movement.
How to enable or disable the AF-assist light for focusing in low light.
Options to enable, disable, or crop digital zoom to maintain image quality.
Configuring button sounds, shutter sounds, and the auto power-off timer.
How to reactivate the camera from standby mode.
Instructions for formatting internal memory or memory cards to erase all data.
Choosing the display language for camera menus and messages.
Adjusting video output settings for TV connection, selecting NTSC or PAL.
Enabling or disabling the warning for subjects with closed eyes during shooting.
Procedure to restore all camera settings to their default factory values.
How to reset file numbering and create new folders for image organization.
How to view the current camera firmware version.
List of recommended accessories for the Nikon COOLPIX P90 camera.
List of tested and approved Secure Digital (SD) memory card brands and capacities.
Explanation of file naming, identifiers, and folder structures used by the camera.
General precautions for using and storing the camera to ensure longevity and performance.
Instructions on how to safely clean the camera's lens, monitor, and body.
Recommendations for storing the camera properly to prevent damage from environmental factors.
Information about monitor characteristics, potential issues, and service contact.
Explanation of image smear and recommendations to avoid it.
Comprehensive list of error messages and their corresponding solutions for troubleshooting.
Solutions for common shooting problems like focus errors, blurred images, and flash issues.
Solutions for problems related to the camera display, settings, and power supply.
Solutions for date imprint errors, camera settings reset, and monitor problems.
Further solutions for shooting issues like no picture, focus errors, and flash problems.
Solutions for playback errors, transfer problems, and printer connectivity.
Steps for unboxing the camera and verifying all included accessories.
Detailed diagram identifying all external camera buttons, controls, and features.
Initial setup step: charging the camera's rechargeable battery.
Instructions for attaching the camera strap and lens cap for safe handling.
Guide for correctly inserting the battery and memory card into the camera.
Procedure for powering on the camera and checking for initial errors.
Steps for selecting language and setting the camera's date and time.
How to check essential camera indicators like battery level and exposure count on the monitor.
Instructions on using the built-in flash and the monitor/display buttons.
Steps for focusing on the subject and taking a picture.
Procedures for reviewing captured images and deleting unwanted ones.
Minimum system requirements for installing Nikon Transfer software.
Step-by-step guide for installing Nikon Transfer from the CD-ROM.
Instructions for installing additional software like Panorama Maker from the CD.
Recommendations for power source and connecting the camera via USB cable.
Steps for connecting the camera and starting the picture transfer process.
Procedure for disconnecting the camera after the transfer process is complete.
Overview of manual exposure modes allowing control over shutter speed and aperture.
How to save and recall custom shooting settings using the U1 and U2 modes.
Choosing scene modes and letting the camera automatically select the best mode.
Pictures taken continuously at high speeds for capturing action.
Printing pictures directly from the camera to a PictBridge-compatible printer.
Information on potential image artifacts ("smear") when shooting bright subjects.
| Megapixel | 12.1 MP |
|---|---|
| Sensor type | CCD |
| Image sensor size | 1/2.33 \ |
| Maximum image resolution | 4000 x 3000 pixels |
| Optical zoom | 24 x |
| Focal length range | 4.6 - 110.4 mm |
| Interface | USB 2.0 |
| Digital SLR | No |
| Built-in flash | Yes |
| Effective sensor resolution | 12.7 pixels |
| Focal length (35mm film equivalent) | 26 - 624 mm |
| Focus adjustment | Auto |
| Closest focusing distance | 0.01 m |
| ISO sensitivity | 64, 100, 200, 400, 800, 1600, 3200, 6400 |
| Light exposure modes | aperture priority AE, auto, manual, shutter priority AE |
| Internal memory | 47 MB |
| Compatible memory cards | sd |
| Maximum video resolution | 640 x 480 pixels |
| Display diagonal | 3 \ |
| Display resolution (numeric) | 230000 pixels |
| USB version | 2.0 |
| Product color | Black |
| Flash modes | auto, Flash off |
| Depth | 99 mm |
|---|---|
| Width | 114 mm |
| Height | 83 mm |
| Weight | 460 g |
