IV. Assembly
49
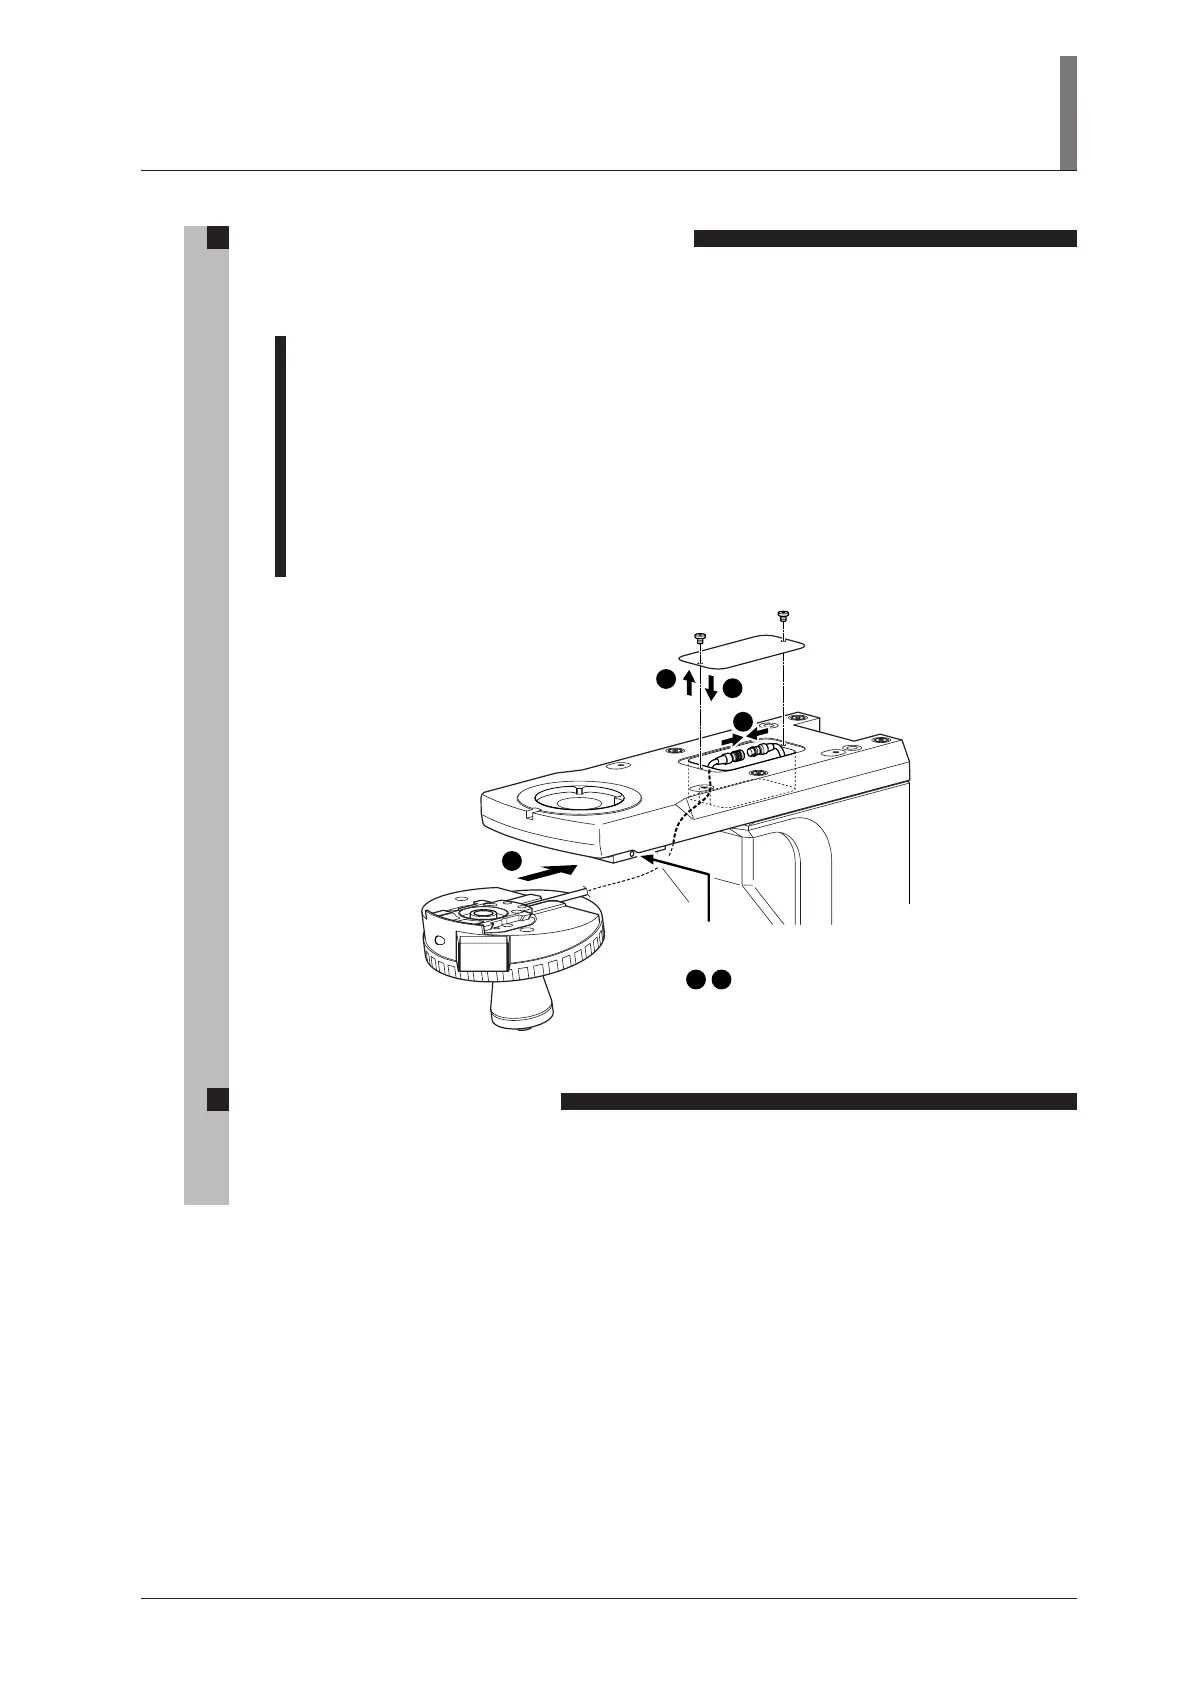
2. Assembling the motorized nosepiece
For the LV150A, the motorized nosepiece must be attached.
The motorized nosepiece should be assembled before attaching the illuminator.
1 Remove the cover from the connection block by unscrewing the two M4 screws on the top of
the microscope arm.
2 Loosen sufficiently the nosepiece clamp screw on the right side of the microscope arm using
the hexagonal screwdriver.
3 Fit the nosepiece from the front by aligning it to the groove in the bottom of the microscope
arm and push it all the way.
Pass the signal cable of the nosepiece through the bottom hole of the arm into the microscope.
4 Secure the nosepiece by tightening its clamp screw.
5 Connect the signal cable of the nosepiece to the cable in the arm.
6 Close the cover over the connection block and secure it with the two M4 screws.
Nosepiece clamp
screw
2
1
4
5
3
6
3. Removing the nosepiece
Removing the nosepiece is the reverse order of the above procedure. When removing the nosepiece,
lower the stage completely, remove the sample and all objectives, and hold the nosepiece in your
hand so that it does not fall when you remove it.