D
f
sNil i
k
AL
T
O
B
u
d
y
/
Aer
o
_
V r
.1.0_17 1
06d e 0
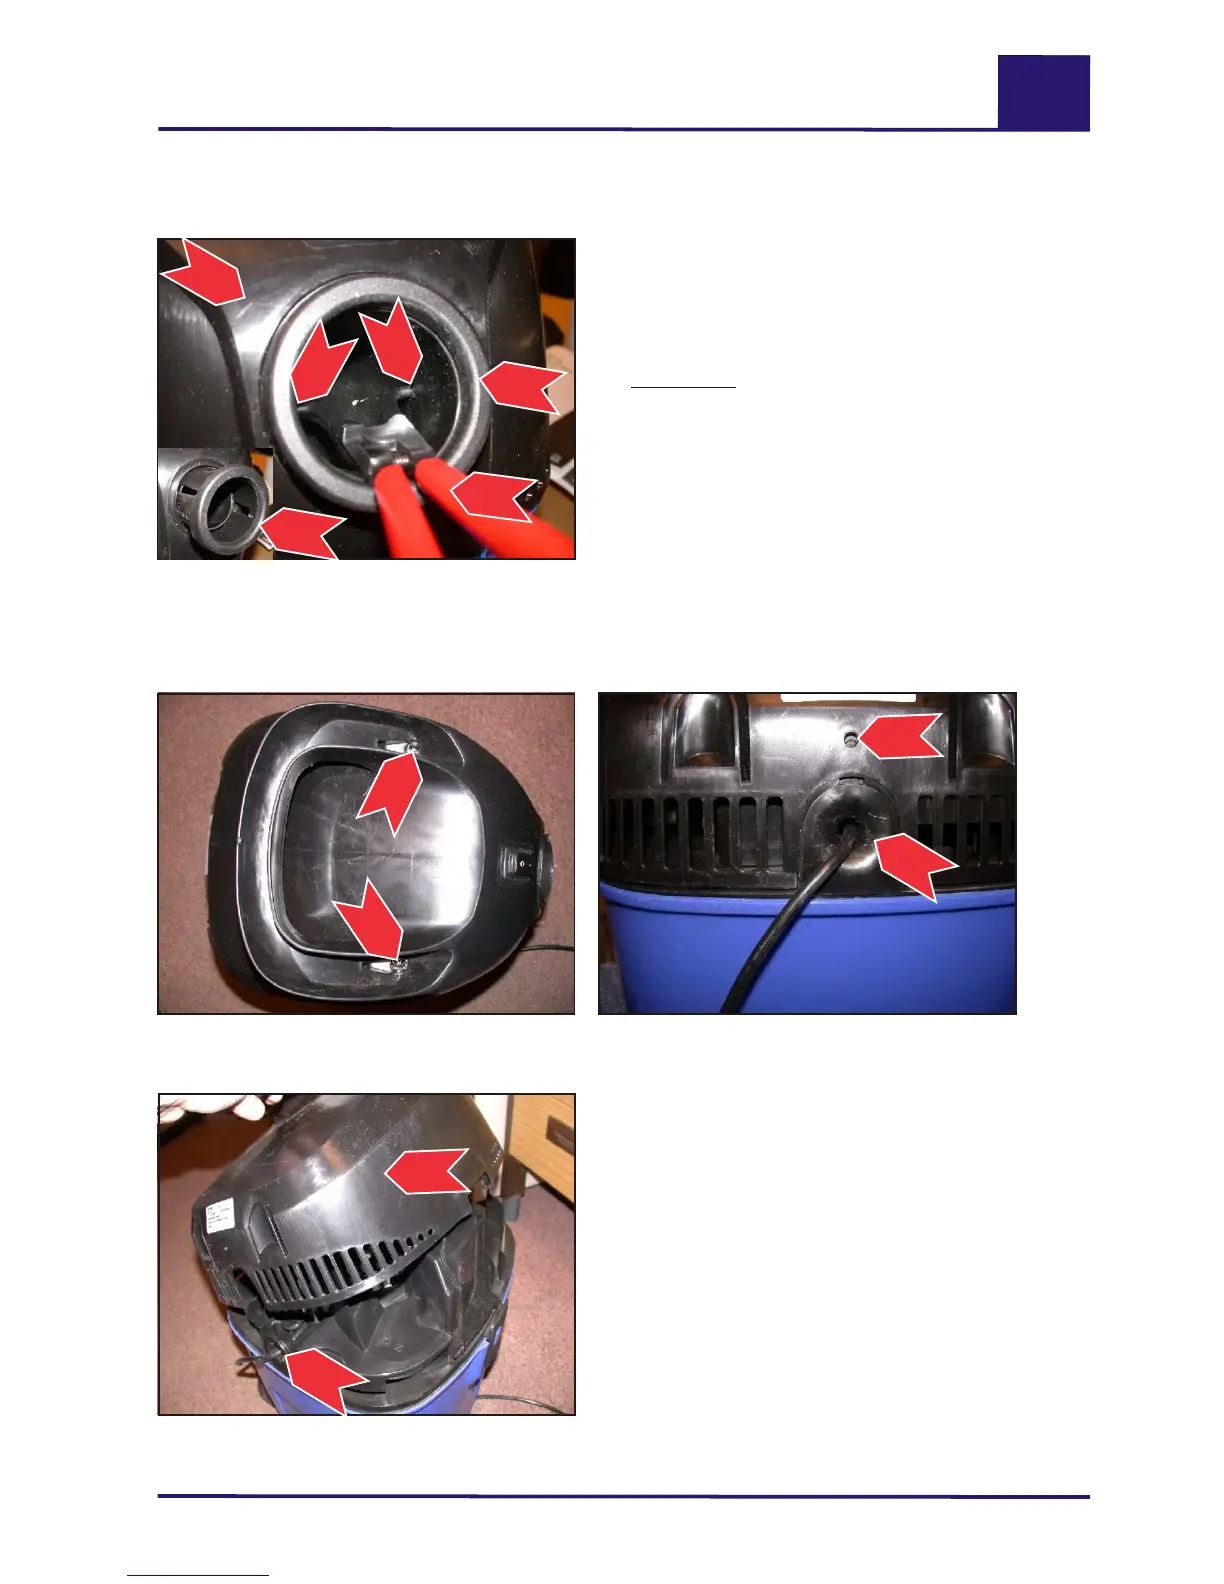
1.1 Disassembling/assembling the intake fitting
1.2 Disassembling/assembling the cover
1.) Press the two snap-in lugs (3) of the intake
fitting (1) outwards with special pliers (2) (see
E/1, page 19) while pulling the intake fitting (1)
frontally out of the suction head.
2.) Assembly:
Hold the intake fitting (1) correctly positioned and
push it into the container head (4) until the fitting
(1) audibly clicks into place.
1.) Remove the intake fitting (see D/1.1, page 11)
2.) Undo the two screws (1) with a Phillips
screwdriver.
3.) Press the locking button (2) located above the
cable entry (3) inwards with a small screwdriver
and lift off the cover (4).
4.) Assemble in the reverse order.
Cover / intake fitting
Intake fitting (1) in cover (4) .
Retaining screws (1) of Buddy cover.
Lifting off cover (4).
1 Suction head (Buddy)
Locking button (2) and cable entry (3) at
rear part of cover (4).
Aero 4040
3
2
Aero 4036
1
1
Aero 4034
3
4
Aero 4031
1
3
2
3
4
1
Se
vice
r

 Loading...