D
f s
Nil i
k
AL
T
O
Bud
y/A
e
ro_
V
r.
1.
0_
1
7
106
d
e
0
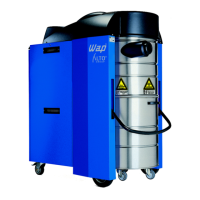
3.4 Disassembling/assembling the switch
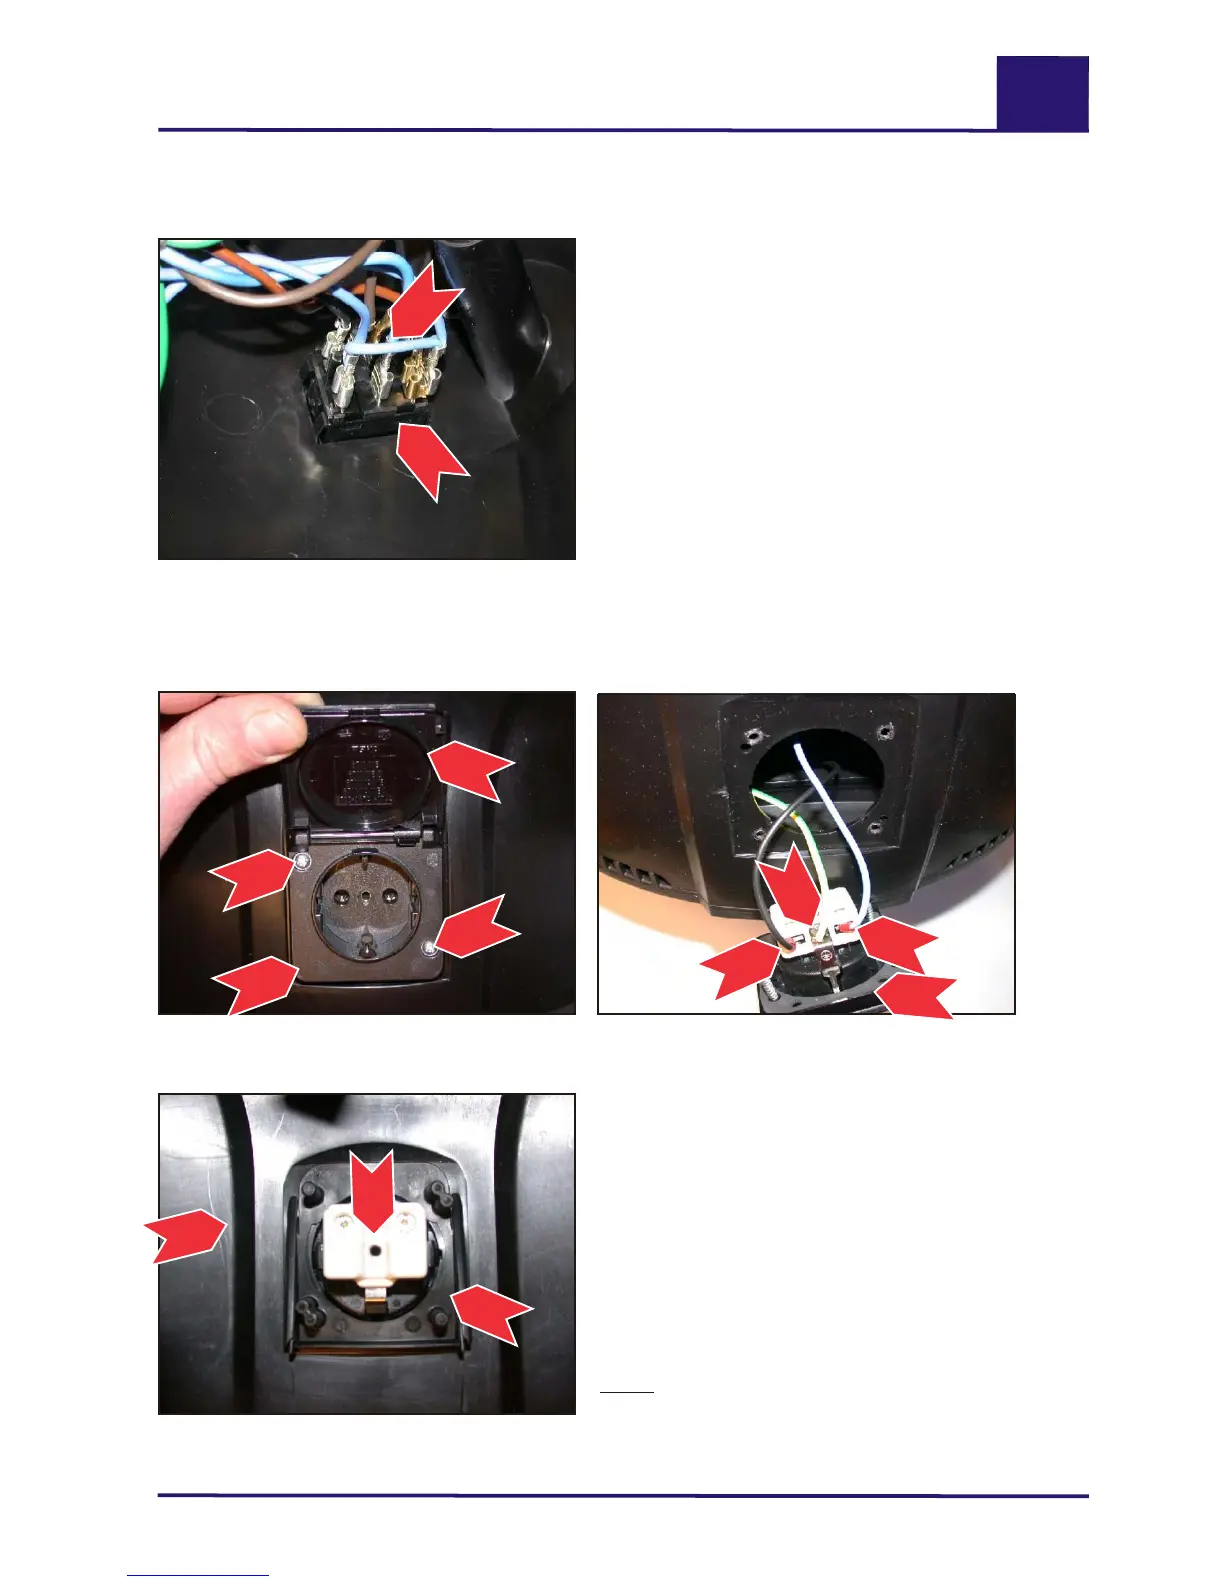
3.5 Disassembling/assembling the socket ( Aero 20/25-11/21 only)
1.) Remove the cover (see D/3.1, page 14).
2.) Mark the position of the cable lugs (1) and
disconnect all lugs from the switch (2).
3.) Press the switch (2) downwards and out of
the shell opening.
4.) Assemble in the reverse order.
Switch / socket
1.) Open the hinged cover (1), undo the two
screws (2) with a Phillips screwdriver and
remove the socket (3) frontally from the cover.
2.) Mark the position of the leads (4), disconnect
them from the socket (3) and take off the socket
(3)
3.) Assemble in the reverse order, making sure
the socket dome plate (5) is correctly positioned
inside the cover (6).
Note:
The cover (6) must be removed to check the
dome plate (5) (see D/3.1, page 14).
Cable lugs (1) connected to switch (2).
Cable connections (4) at socket (3).
Two retaining screws (2) of socket under
hinged cover (1).
Dome plate (5) mounted correctly inside
cover (6).
Aero 4252
2
2
1
3
Aero 4257
4
4
4
3
Aero 4271
3
6
5
Aero 4100
2
1
evc
S
r
i
e

 Loading...