EN
ENGLISH
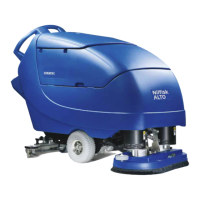
-8- FORM NO. 71492A Nilfi sk ALTO Operator’s Manual (EN) - SCRUBTEC 866, 871, 866, Boost 8 and 871C
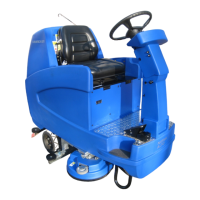
MACHINE CONTROL PANEL
Key Switch (See Figure 1, Item “A”)
The key switch turns “ON” the power to the control panel. “O” is “OFF” and “I” is “ON”.
Traverse Speed Switch (See Figure #1, Item “B”)
The speed control varies from low to high speed. To increase the speed, turn the knob to the right. To decrease the speed, turn the knob to the left.
One Touch Control Button (See Figure 1, Item “C”)
The one touch control button raises and lowers the brush head assembly, starts and stops the vacuum motor automatically. Press the one touch
control button once and the brush head assembly lowers to the fl oor and the vacuum motor turns “ON” (brush head and vacuum LEDs illuminate
green). The brush motors start when the brushes are down and the forward palm button is depressed. Press the one touch control button again and
the brush head assembly raises, the vacuum motor will remain on for 10 seconds and then shut “OFF”.
Increase Brush Pressure Button (See Figure 1, Item D)
This button is used to increase the brush pressure. Increased brush pressure may be required when stripping or cleaning heavily soiled fl oors. To
increase brush pressure, fi rst lower the brushes by pressing the one touch control button (Item “C”). This will lower the brushes to the normal scrub
position. To increase brush pressure, press the button (Item “D”). The LED above the button will illuminate yellow. Press the button (Item “D”) again
and the brushes will return to normal scrub (yellow LED will turn “OFF”). NOTE: Increase brush pressure is not available on cylindrical machine.
Vacuum Motor Button (See Figure 1, Item “E”)
The vacuum motor button turns the vacuum motor “ON” or “OFF”, regardless of brush head assembly position. The green LED will illuminate when
the vacuum motor is “ON”.
Solution Control Buttons (See Figure 1, Item “F & G”)
The solution control buttons regulate the fl ow of cleaning solution to the fl oor. The normal scrub solution setting is indicated by two green bars on the
meter. On cylindrical machines, with most fl oor conditions, the solution setting should be set one step higher. To increase the fl ow, press the solu-
tion fl ow button “G” (+) until the desired fl ow is reached. To decrease the fl ow, press the solution fl ow button “F” (-) until the desired fl ow is reached.
To shut off the solution, press the solution fl ow button “F” (-) until no indicators are visible on the display. NOTE: No solution will fl ow when the
machine does not traverse.
Forward Palm Buttons (See Figure 1, Item “H”)
The forward palm buttons turn the traverse motor “ON” and if the brush motors are in the down position, it also activates the brush motors and solu-
tion control module. Either the right or the left palm button can be used.
Reverse Push Button (See Figure 1, Item “I”)
The reverse push button, when used in conjunction with one of the forward palm buttons, causes the machine to reverse direction. The reverse
speed is 67% of the forward speed.
Charge / Battery Meter (See Figure 1, Item “J”)
The charge / battery meter indicates the battery is being charged when the charger is plugged into an AC outlet. It also indicates the amount of
charge that is left in the batteries while the machine is in use. When the charge gets too low the brush/pad motors will shut off.
Circuit Breakers (See Figure 1, Item “K & L”)
The circuit breakers for the brush motors are located on the control panel. If a circuit breaker trips, determine which motor is not operating and turn
the key switch “OFF”. Wait fi ve minutes and push the reset button back in. Turn the key switch “ON”, and try again. An authorized service person
should be contacted if the breaker trips again.
Hour Meter (Optional) (See Figure 1, Item “M”)
The hour meter indicates the number of hours the machine has operated. It runs only when the machine is moving forward or reverse.
Chemical Mixing Control (Optional) (See Figure 1, Item “N”)
The chemical mixing control regulates the amount of concentration of cleaning chemical mixed with the clear water from the solution tank. Turning
the chemical mixing knob clockwise increases the concentration of chemical.
 Loading...