15
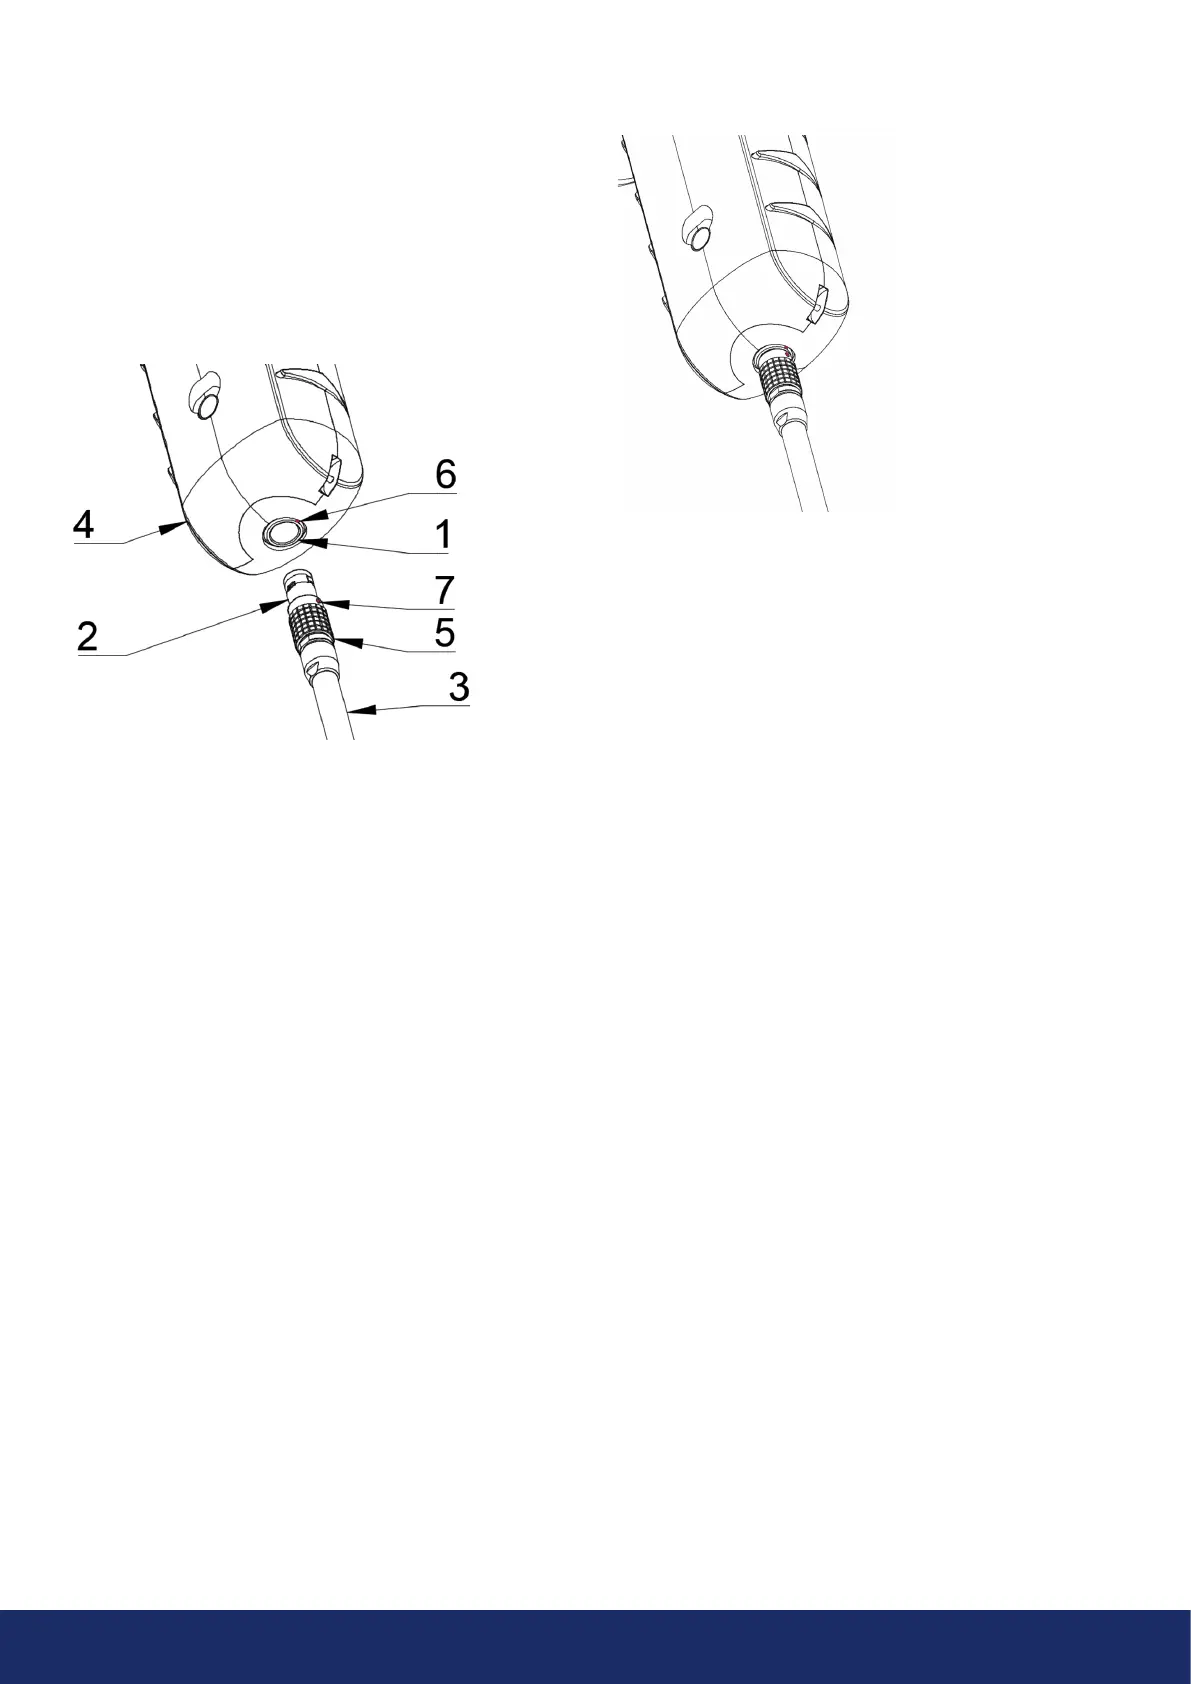
3.2.2 Startup with Tracer external battery
1. Attach the battery cable to the battery. There is only
one way to attach the connector of the battery cable
to the battery output connector. Push the connector
downwards all the way.
2. Attach the connector to the LF10 by following the
instructions in Image 8, with the orientation markings
facing the same way:
Both the LF10 and the battery cable have red alignment
markings (Item 6 and 7 in Image 8). They indicate the
position of the key and the slot of the connectors, thereby
ensuring proper alignment for connection. Secure the
battery cable connector using the locking ring (Items
6 and 7 in Image 8), and make sure that the alignment
markings of both connectors are neatly aligned before
inserting the battery cable. Then carefully insert the
battery cable connector into the LF10. The connectors
should lock audibly.
1: Input connector
2: Battery cable connector
3: Battery cable
4: LF10 handle
5: Connector lock ring
6: Input alignment Marking
7: Cable alignment Marking
Image 8: The various parts to consider when starting the
LF10 camera
Image 9: Battery cable inserted in the LF10 camera.
When the power is ON, the red Power LED of the
camera is lit (Item 6 in Image 2). The system starts aer
approximately 10 to 15 seconds. The startup logo will
appear on the screen. Once the system setup has
completed, the LF10 camera’s user interface starts
automatically, and the camera is now ready to use.
- NOTE: Hold the LF10 firmly by the handle. -
The LF10 has internal system backup batteries which the
main battery charges while the LF10 is in use.
At the first system startup, it is recommended that you
leave the camera ON, powered by the main battery, for at
least 45 minutes so that the internal backup batteries are
fully charged.