Nomadic Cooling Co 11 NC-S
1
Install & Operations Guide Ver. 240411
INSTALLATION INSTRUCTIONS
Part 3: Connecting the Units
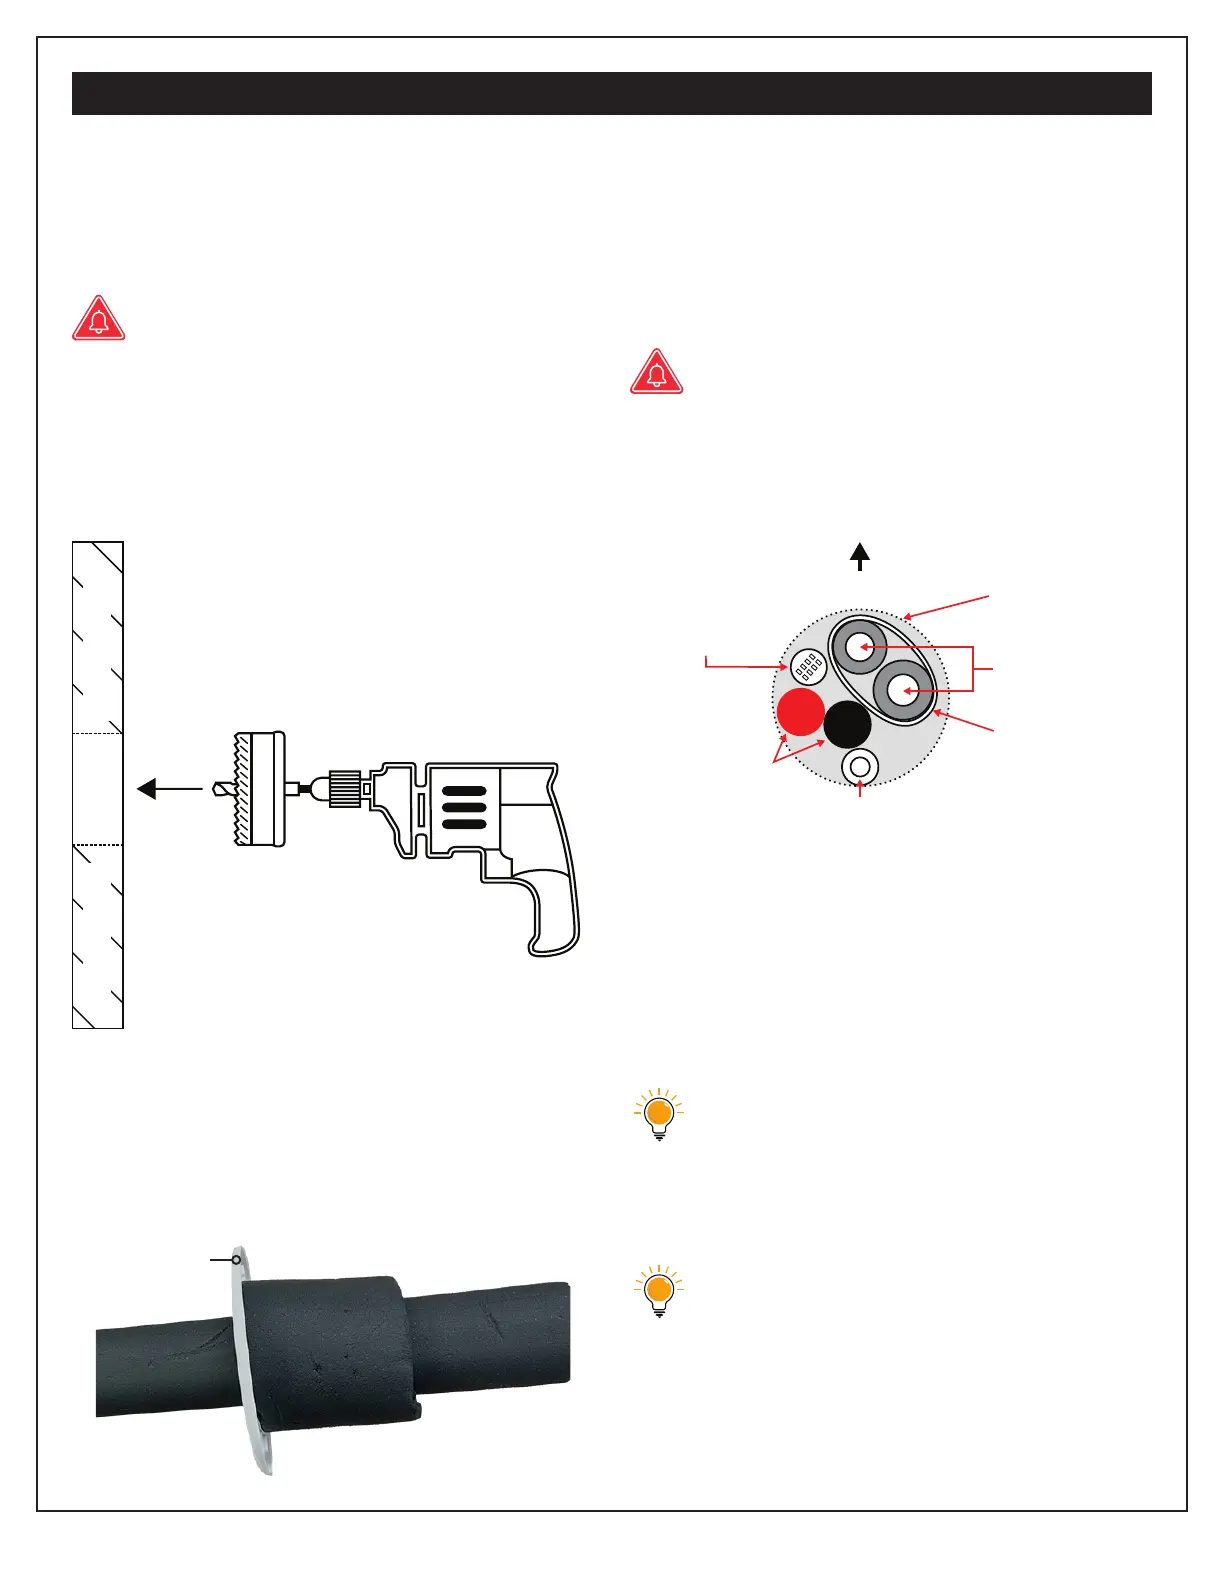
1. Create the wall opening.
If using the white sleeve provided, drill a 2.25"
hole through the wall below the controller.
If you use individual cable gands
(purchased separately) for your pass
throughs, the number and size of the
hole(s) you will drill will vary, and you
should follow the instructions for in-
stalation included with the product.
Skip to Step 3.
2. Insert the wall sleeve.
Pace the foam ring (Part N) around the
wall sleeve (Part O) and insert into the wall
opening from the interior of the vehicle.
3. Tape the exterior refrigerant hoses.
Bundle the two refrigerant hoses together
and wrap them using the heat instuating tape
provided (Part L) from end to end. As you
wrap the hoses, overap half of each previous
tape turn.
Do not wind the tape as tightly as
possible around the hoses, as this will
decrease the heat insuation effect.
4. Pass the refrigerant hoses through first.
Feed refrigerant lines through the long foam
sleeve (Part M). Then pass the foam sleeve
through the opening you created in Step 1.
5. From the interior unit, pass the drainage
hose through the wall to the outside.
Keep the drainage hose at the bottom
of opening for optimal drainage.
6. From the exterior unit, pass the communi-
cations and power cables through.
Where the conduit bundle passes
through the wall, you can pull it out a
few inches and add ayers of tape at the
pass-through point. The goal is to fill
the hole space in the wall before using
optional foam or putty into the hole
(purchase separately).
Drainage hose must be positioned at the bottom of
the wires and hoses passing through hole in the wall.
Heat resistant
Refrigerant
hoses
Pass-through
hole in wall
Rooftop
wiring bundle
Power cables
Vehicle WallVehicle Wall
N
M
O