NC-S
1
Install & Operations Guide Ver. 240411 8 Nomadic Cooling Co
Part 1: Mounting the Exterior Unit
1. Determine the ideal locations for exterior
and interior units, and the wall opening(s).
A. EXTERIOR UNIT: Position the outdoor
unit at least 3' away from vehicle exhaust,
heavily trafficked, dusty, or hot areas.
Allow 12" of space around the exterior
unit for proper ventiation and peak
performance. Allow 10' of space away from
any radio or television antennas.
The location should be firm and solid, with
minimal vibration, and it needs to be strong
enough to support the weight of the unit.
Unit should be flush with the wall of the
vehicle for top performance, and it cannot be
installed at an angle greater than 5°.
Favor a location that can provide any
additional protection from sunlight, wind, and
dust to help maintain maximum efficiency.
B. INTERIOR UNIT: Choose an unobstructed
wall location that permits easy passage for
the connecting pipes to the outdoor unit.
Allow at least 6" of open space around the top
of the unit for air intake. Maintain a minimum
distance of at least 36" from antennas, power
lines, or devices reated to television, radio,
security systems, intercoms, or telephones to
prevent electrical interference.
Favor a location that will be shielded from
direct sunlight (windows, skylights) and heat,
steam or combustible gas. It should not be
near fammable items such as curtains. It
should not be near doorways.
Select a central location for optimal
airflow, or position it by your bed to
provide maximum sleeping comfort.
C. WALL OPENING: Determine vehicle wall
opening location. The conduit should be
below the interior controller and allow
for the attachments of hoses and cable
between the interior and exterior units.
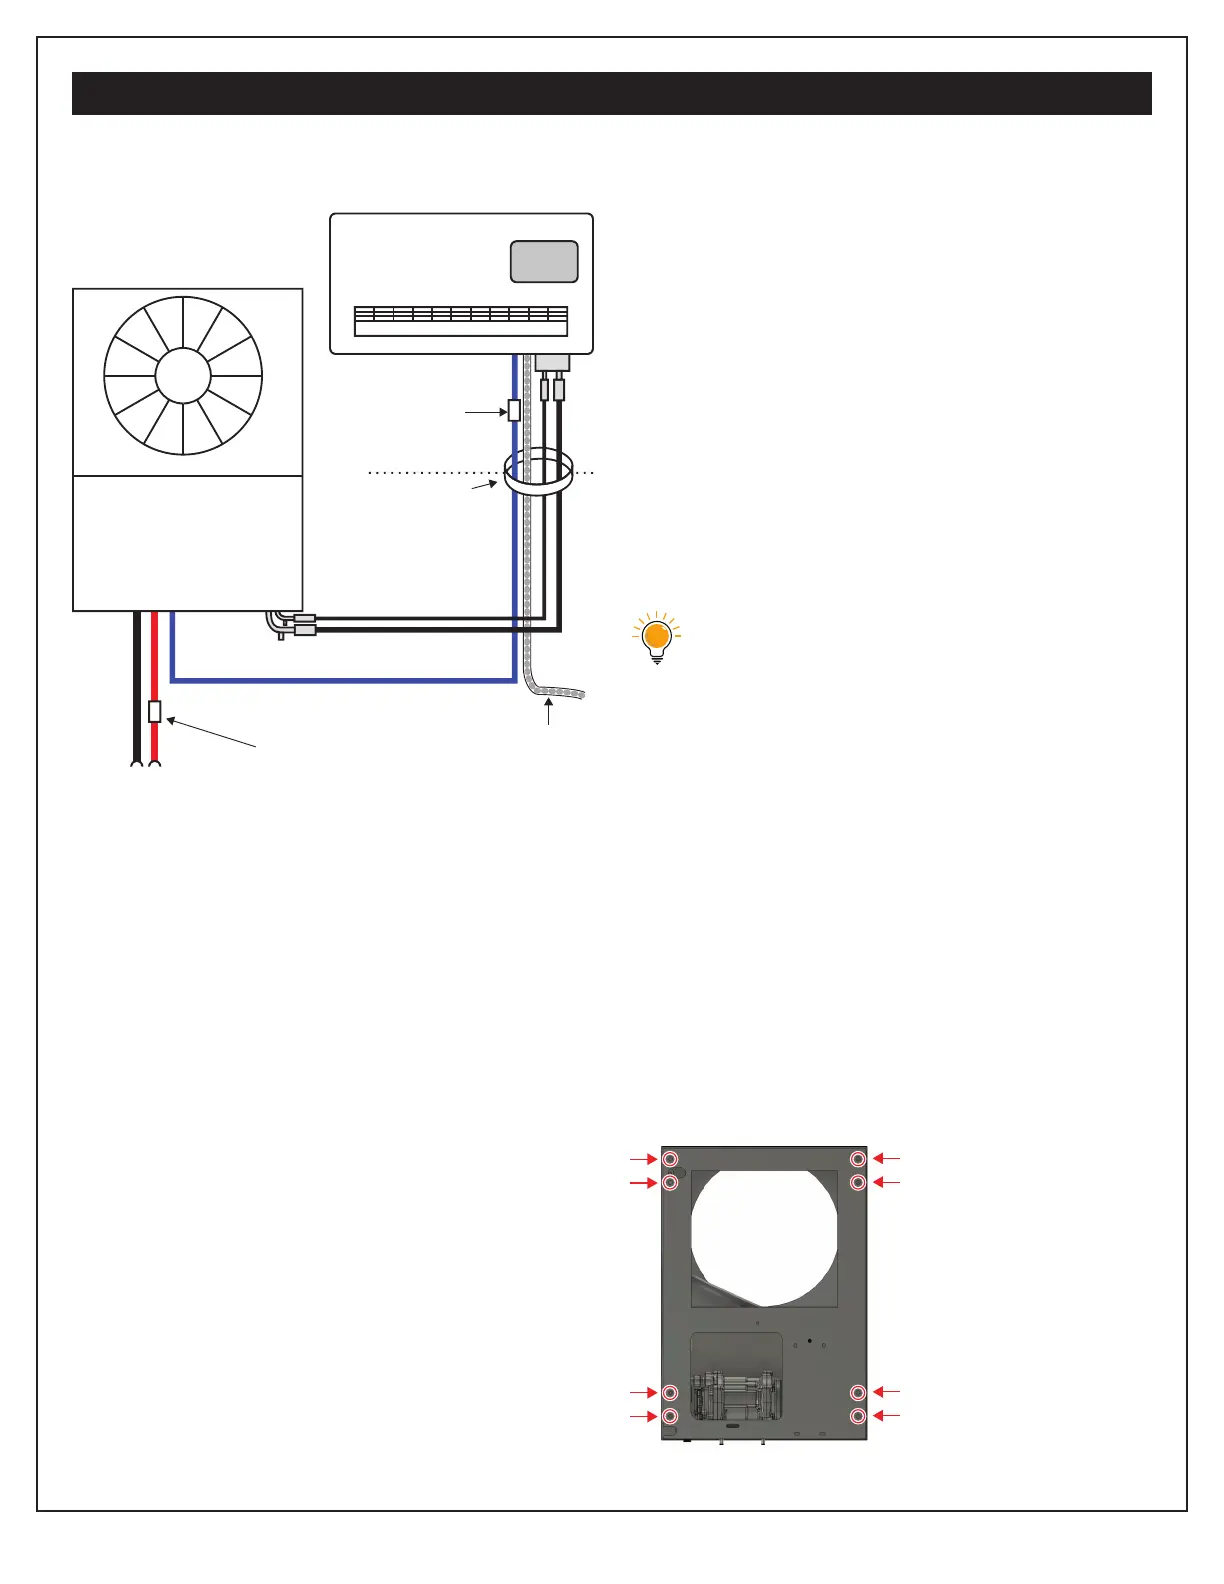
1. Connect the mounting brackets to the
back of the exterior unit.
Use the 8 short bolts with washers and lock
washers to connect brackets to the threaded
holes in the rear of the exterior unit.
8 bolts recommended
4 bolts minimum
INSTALLATION INSTRUCTIONS
Back of
Exterior Unit