NC-S
1
Install & Operations Guide Ver. 240411 10 Nomadic Cooling Co
Part 2: Mounting the Interior Unit
1. Consider your mounting options.
A. Every vehicle build is different, but
most instalations will require a mount-
ing surface. A mounting board has been
provided, which can either be used be-
hind the wall as an anchor for the pro-
vided wood screws, or it can be finished
or upholstered to match the vehicle
interior walls. You can then mount the
board to your wall and the controller to
the board.
Because of the variety of vehicle wall
surfaces, if the hardware provided won’t
work, you need to purchase fasteners
that will work for your situation.
B. You may not need to use a mounting
board if you have a location where the
mounting bolt holes line up with exist-
ing beams, or a mounting surface that is
already capable of holding 12 lbs.
Enlist a friend’s assistance in holding
the unit in pace while marking and
securing the location.
A bubble level is not ideal for making
sure the unit is straight, because the
vehicle itself may not be level. Instead,
use a focal point (such as a rooftop or a
door) to measure and mark distances.
2. If NOT using a mounting board:
A. Position the controller at your chosen
location and mark the hole locations.
B. Mark and drill pilot holes for the 4 nuts
and bolts provided (parts R and S).
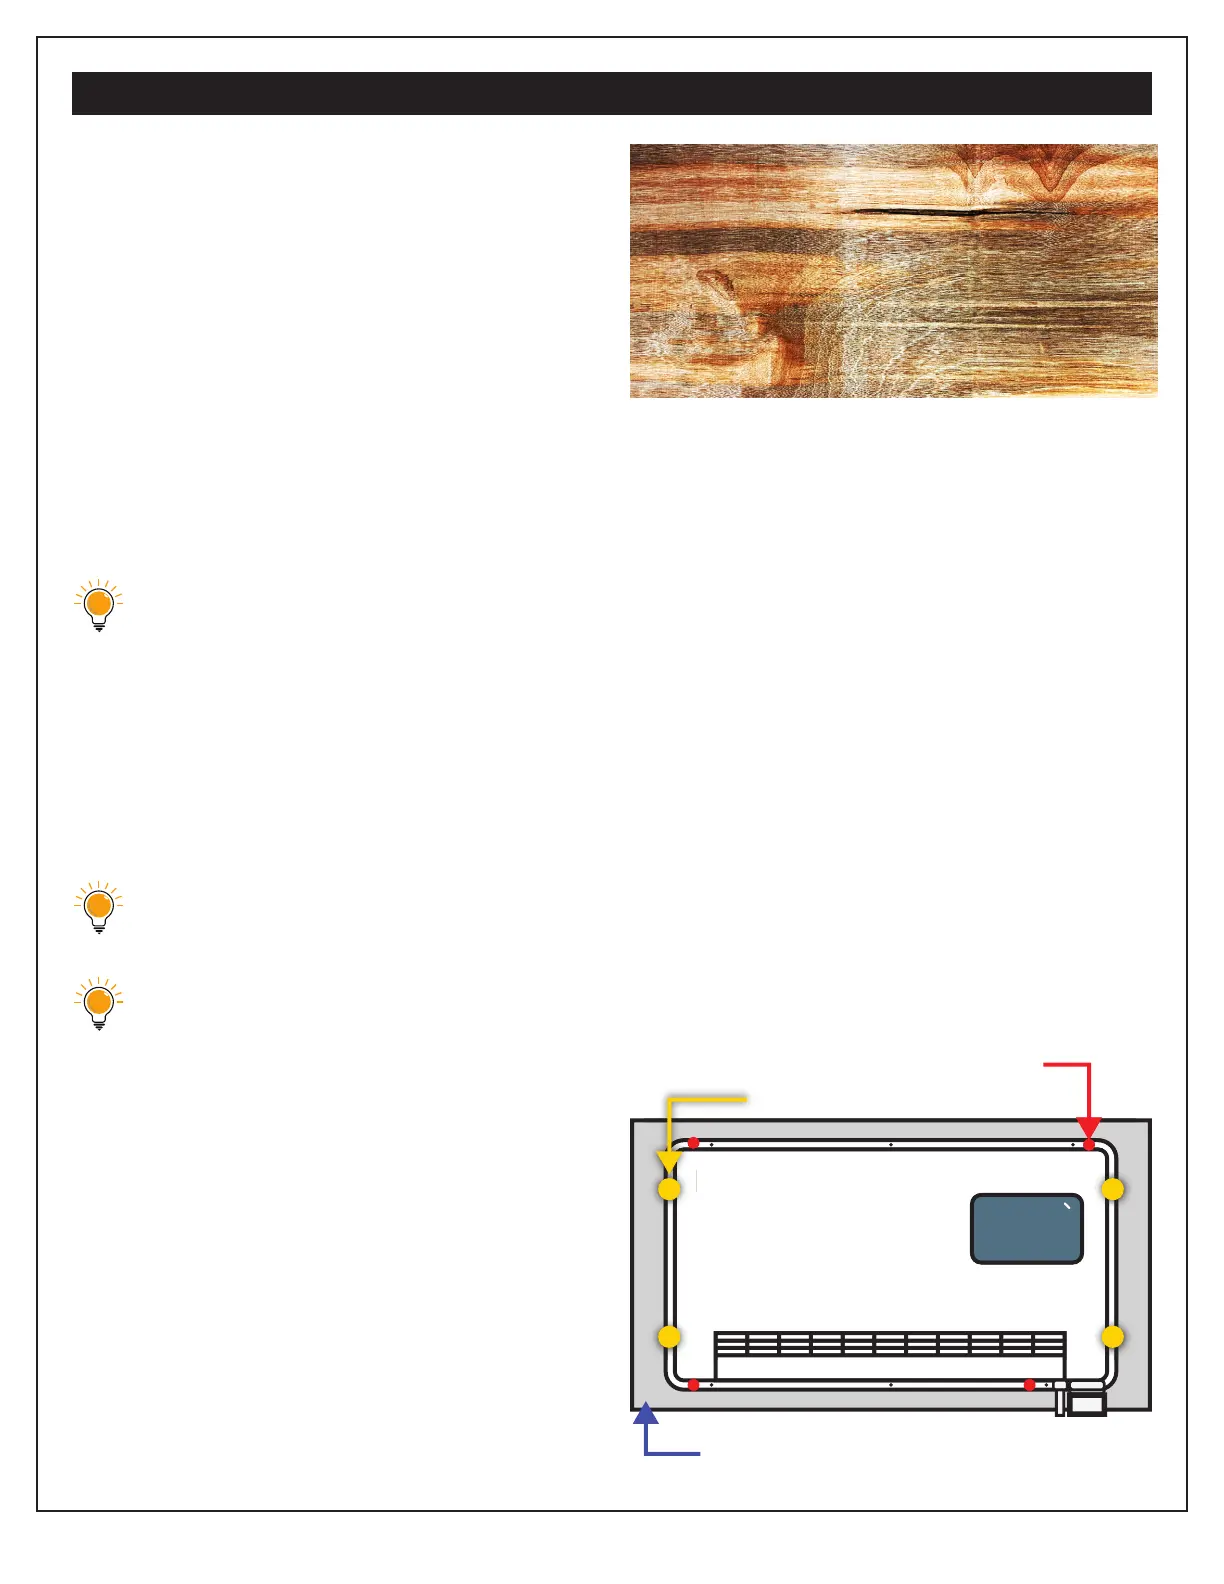
C. Attach the controller using the mount-
ing bolt holes. Locations shown in yel-
low in the graphic (right).
3. If using a mounting board:
A. Position the mounting board at your
chosen location and mark the desired
hole locations.
B. Make sure the panel sits flush against
the wall. Any space between the
wall and the unit can cause noise
and vibration.
C. Use a drill to create holes for fasteners.
D. Fasten the board to your vehicle wall,
using the 4 nuts and bolts provided, or
your own fasteners if necessary.
E. Attach the controller to the mounting
board using the four wood screws pro-
vided (Part Q). Mounting locations are
shown in red (below).
INSTALLATION INSTRUCTIONS
Interior Unit
Optional Mounting Board
(Fasteners Purchased Seperately)
Mounting Bolt Holes (4)
Wood Screw Holes (4)
n
ri
r
ni
Mounting Bolt Holes (4