Nomadic Cooling Co 9 NC-S
1
Install & Operations Guide Ver. 240411
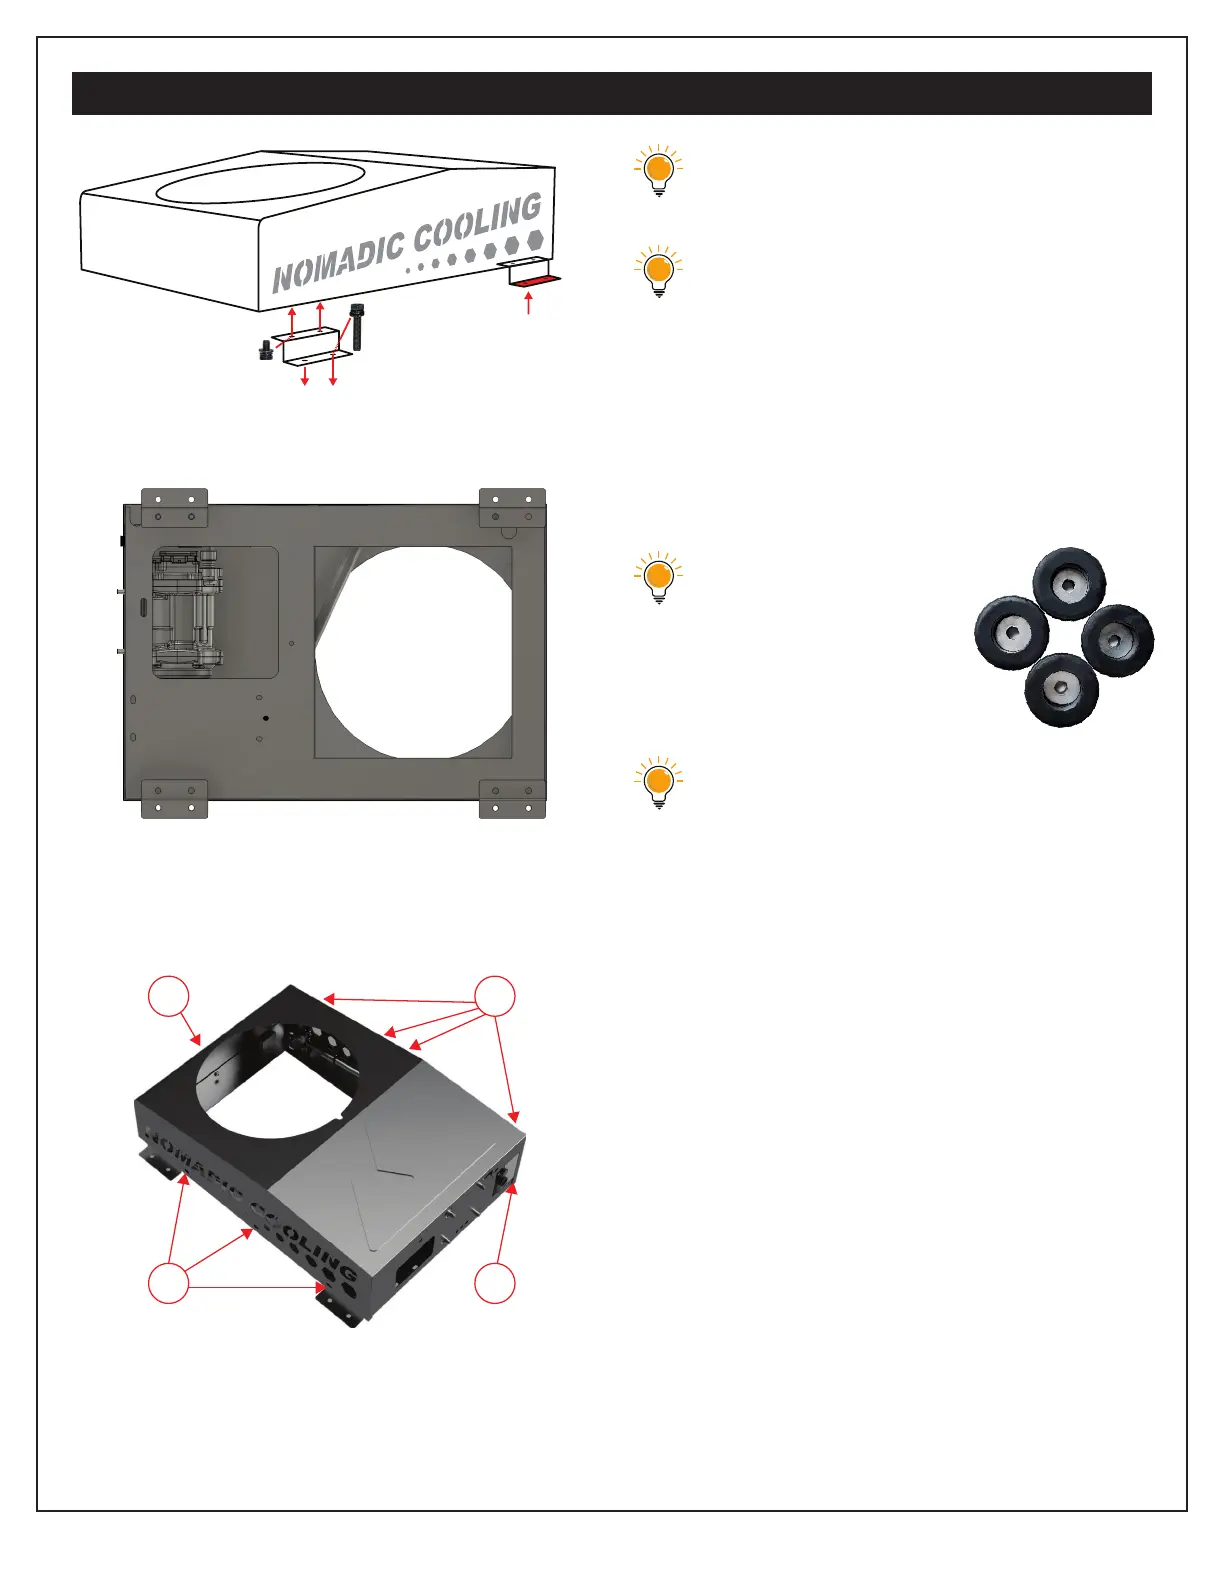
The brackets should be mounted so the
fanges extend outward, away from the unit.
2. Remove the exterior shroud.
There are 8 bolts and 1 screw to be removed
from the shroud. Set these safely aside.
3. Use a permanent marker to mark the
8 punch holes for the brackets by
positioning the bracketed unit on the
vehicle where it will be installed.
Enlist a friend’s assistance in holding
the unit in pace when marking and
securing the location.
A bubble level should not be used
because the vehicle may not be level.
Use a focal point (such as a rooftop or a
door) to measure instead.
4. Secure the exterior unit to the vehicle.
Secure the unit to the vehicle wall using eight
long bolts, washers, lock washers and nuts.
Vibration dampening foot
pads can be added
between the brackets
and the vehicle
wall (sold separately).
If the the vehicle does not allow for
attaching the mounting brackets using
the provided fasteners, you will have
to use expansion bolts or plugs, spring
toggles or simiar fasteners (sold sepa-
rately). The type of fastener will depend
on your needs, considering the thick-
ness, structure and material used in the
vehicle wall. The fasteners must be ca-
pable of supporting at least 50 lbs (the
exterior unit weighs 40 lbs, excluding
cables and mounting hardware).
INSTALLATION INSTRUCTIONS
3
1
Large bolts
attach unit to
vehicle wall
Flange faces
outward from
back of unit
Small bolts
attach to back
of exterior unit