Nomadic Cooling Co 13 NC-S
1
Install & Operations Guide Ver. 240411
the pipes. This can create leak points.
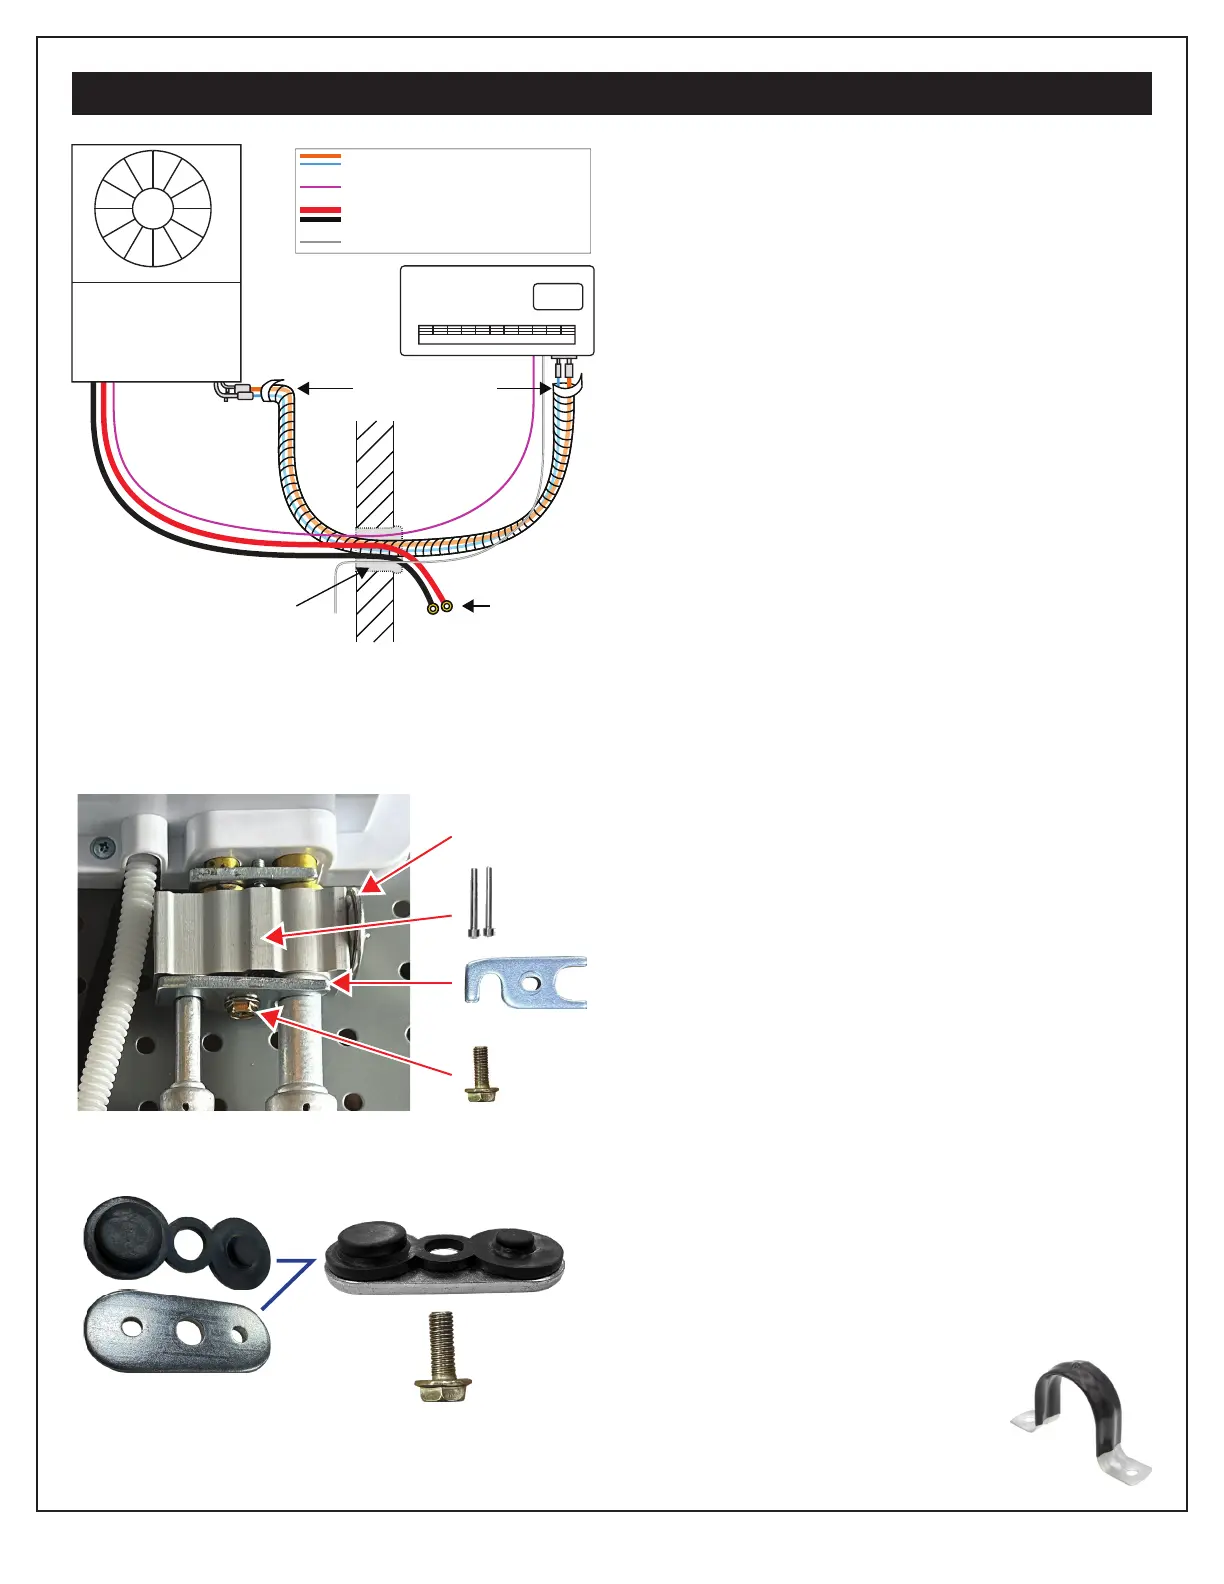
11. Add the valve pate below the expansion
valve and secure it with the copper bolt
using 8 ±1 lbs (11 ±1 nm) torque.
12. On the exterior unit, remove bolt, pate
and rubber plugs from the valves.
The compressor is not pre-filled with refriger-
ant, so there is no danger of pressure releas-
ing when removing the caps. When uncap-
ping, there may be a small amount of nitrogen
that escapes. This is normal and perfectly safe.
13. Connect the refrigerant hoses from the
interior unit to exterior valves.
A. Align pipe ends with the valves and
hand tighten.
B. Use a fixed or adjustable wrench to
support the valve.
C. While supporting the body of the valve,
tighten the nut to 8 ±1 lbs (11 ±1 nm)
with a torque wrench.
14. Repace the exterior shroud using the bolts
and screw removed previously.
15. If desired, seal the opening with
polyurethane foam (not included).
• Putty or silicone can also be used.
• Apply according to manufacturer’s in-
structions and allow to completely dry
before activating your AC unit.
• Goal is to ensure the opening in the
wall is sealed to prevent the ingress of
hot air, moisture, or insects.
Additional Considerations:
• Insuation wrap can be added to suction
valves on the exterior unit (primarily the
cold pipe).
• If desired, you can use attachment straps
or camps (not included) to affix the ca-
bles to the exterior wall. This can help
prevent them from shifting
or disconnecting. Use rubber
or pastic coated camps, not
bare metal camps, which can
INSTALLATION INSTRUCTIONS
±
Drainage hose positioned
at bottom of pass-through
hole in vehicle wall
Power cables
connected to
power source
Refrigerant hoses
taped together
The optional foam
wrap can be used
around the cables
as they pass
through the wall.
Valve
2 Long
Bolts
Valve Pate
Bolt