10.4.3 User Manual Contents April 17, 2020
Firmware: 5.2.1 Page 15 of 142
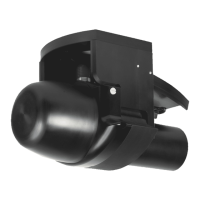
Hardware Installation
For well-seasoned multibeam users, a quick setup plan is found in Quick Start. All first-time NORBIT
WBMS operators, however, are strongly encouraged to fully review this manual prior to commencing
a survey project. The warning boxes may not cover all critical notices.
CAUTION: Properly Seal Wet-End Connection
Inspect O-Ring each time before connecting wet-cable and replace as
needed. Apply a thin coat of synthetic grease (e.g. Molykote 55) to the O-
Rings. Strongly hand-tighten wet-connector (push in and tighten repeatedly
until firmly connected). If connector sticks when tightening, apply a very thin
coat of grease to the threads.
CAUTION: Voltage Limitation on DB9
The DB9 connection on the SIU is not rated for voltages higher than 5V.
Application of voltages on any pin of the connector over 5V will damage the
system. Check all potential connections for unexpected voltages.
2.1
Power Requirements
The WBMS family of systems requires clean power for proper operation. As most vessels utilize an
inverter for this purpose it is important that it be a true sine wave inverter. A modified sine wave
inverter may cause unexplained issues even when using the included power brick. In general,
inexpensive inverters are likely modified sine wave. Use high quality inverters for providing power to
the WBMS family of systems. If dirty power is assumed, connect the system directly to a 12-24VDC
battery and test.
Additionally, power can be provided directly from a 12V deep cycle battery using the included pigtail
that plugs into the power port on the SIU.