Page 01/09
Product:MS4/ PerfectTilt
™
G4
Version:2019.6.28
User Manual(Motorized Shutters)
1.Notices
1. Please read the user manual before operating the product.
2. Please DO NOT dismantle the products, including PerfectTilt
™
Motor Module, Remote, Norman
®
Hub, or Repeater.
3. The products, including PerfectTilt
™
Motor Module, Remote, Norman
®
Hub, and Repeater are for shutters control only.
4. Please DO NOT force the louver to move if it gets stuck. When motors do not operate correctly, please review the
troubleshooting procedures.
5. Please DO NOT obstruct the louver while it is moving to avoid damaging the product.
6. Product operation is intended for temperatures between 0℃/32°F ~55℃/131°F.
7. In order to improve the user experience and function improvement, the firmware and software of this product will be
automatically updated from time to time. (When the Norman
®
Hub is installed)
8. When the PerfectTilt
™
motor module detects temperatures above 60°C/140°F, the louvers will be automatically opened to
position 1 for air convection to cool down, to avoid damage caused by high temperatures.
9. The PerfectTilt
™
Motor Module and Remote contain Lithium batteries, the battery contains flammable materials such as organic
solvents. Please read the Safety Instructions before use the product.
2.Installation and Settings
˙PerfectTilt
™
Motor Module Installation (Two batteries are included in each module.)
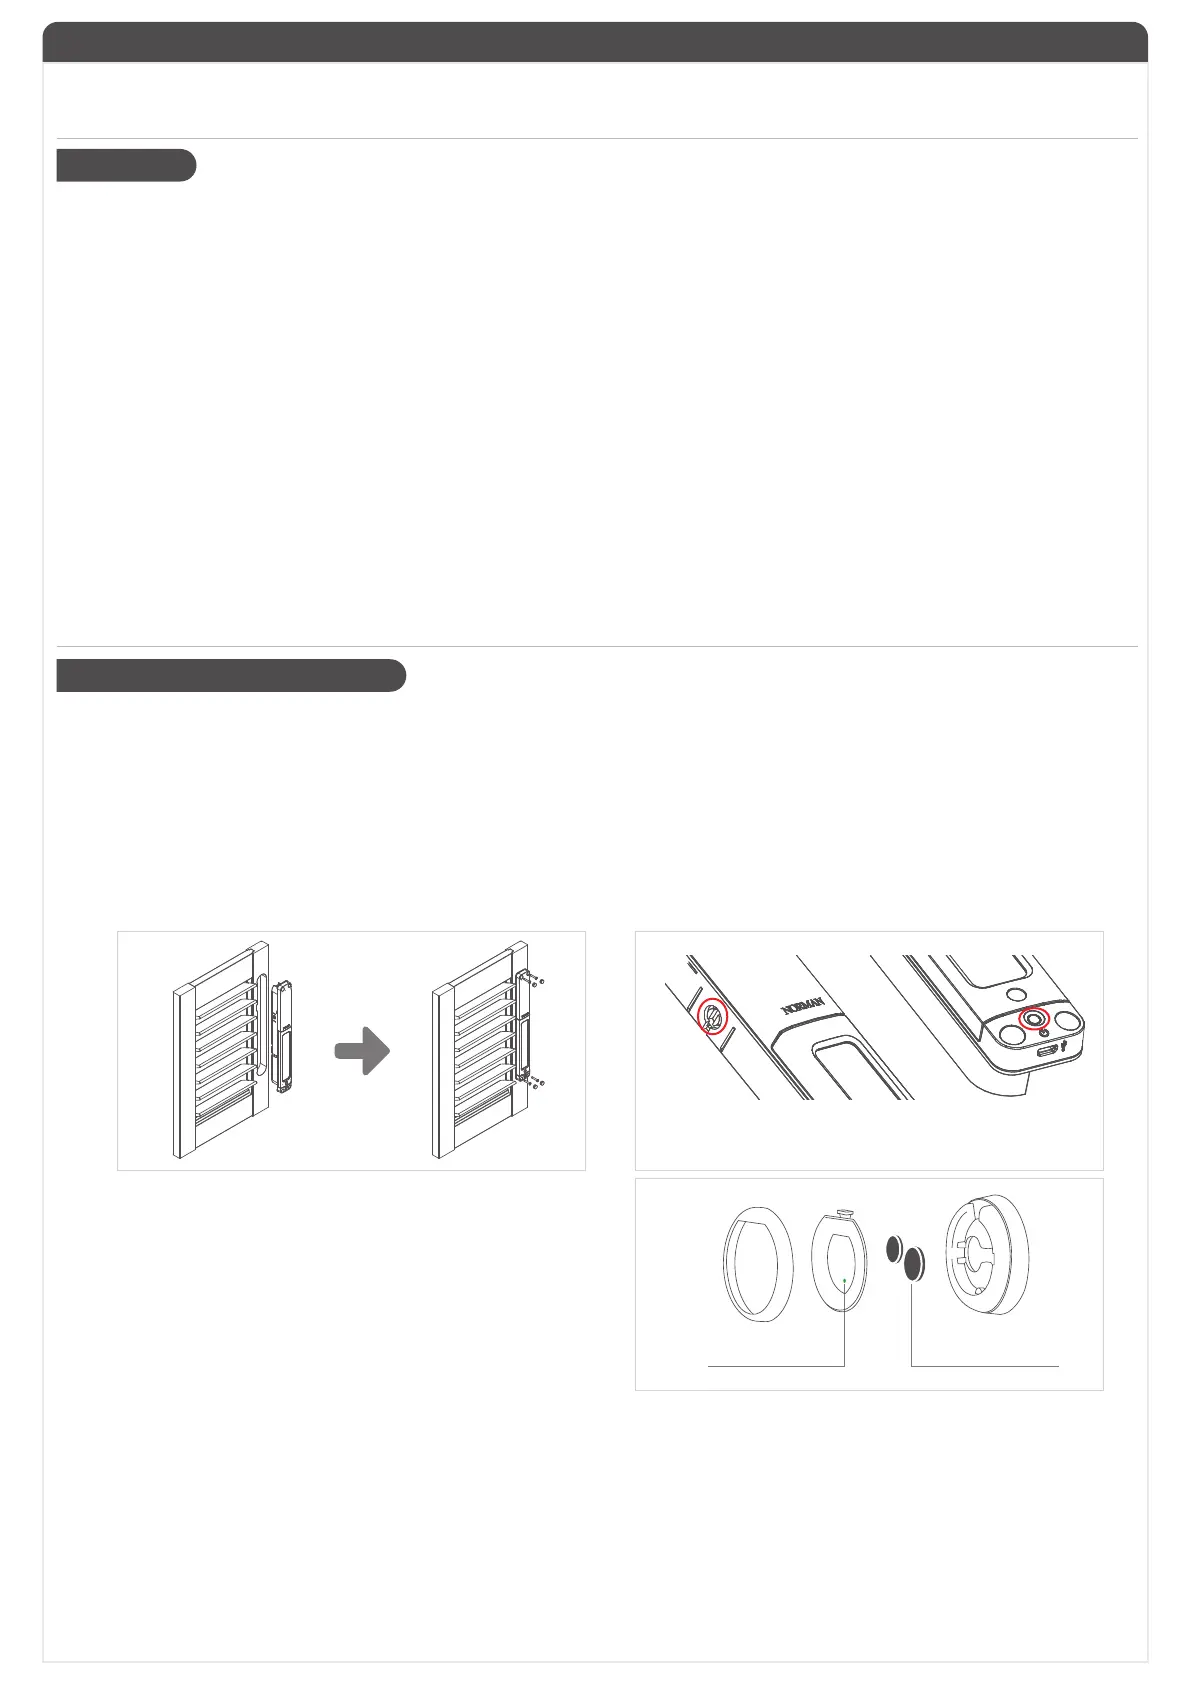
1. Please move the louvers to horizontal position.
2. Insert PerfectTilt
™
Motor Module into panel. Please make sure the slotted key is contacted horizontally.
3. After installation, make sure the shutters moves smoothly. If not, please adjust or re-install them.
4. Tighten the screw of 4 corners.
5. Power on the PerfectTilt
™
Motor Module by holding down the module button for 3 seconds.
Then the green LED will start flashing and PerfectTilt
™
Motor Module will start calibration for around 45 seconds.
【Note: Please DO NOT obstruct louvers movement during calibration.】
6. The louvers will move to a horizontal position after calibration.
Please make sure the slotted groove and the slotted
key are aligned horizontally.
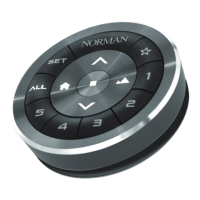
˙Remote Battery Installation
1. Remove color ring from the remote.
2. Open battery cover.
3. Insert two CR2032.
4. Put battery cover and color ring back into place.
5. Remote LED will enable to light up after successful completion
of installation.
˙Pair PerfectTilt
™
Motor Module to Remote
This process lets you 1)Add a shutter to a Group 2) Remove a shutter from a Group.
1. With the PerfectTilt
™
Motor Module powered on, press the button on PerfectTilt
™
Motor Module(s). The LED will blink,
and louvers will move to a horizontal position.
2. Hold SET button on Remote for 3 seconds to put it into Setup Mode. The middle buttons will start to blink.
3. Press the Group button number (1 to 5) you want to assign to the panel(s) currently in the pairing mode.
4. Motor Module(s) will signal accordingly.
a. Paired: Louvers move up and down once, and LED will blink in green for 1 second.
b. Un-Paired: Louvers move up and down twice, and LED will light in green for 1 second.
5. Hold SET button of Remote for 3 seconds to exit Setup Mode.
CR2032
RESET
Button
10. The PerfectTilt
™
motor module Lithium battery will age after long-term use, which will lead to a decrease in battery health and a
decline in power storage and performance. It is recommended to replace the new Lithium battery to ensure a normal and safe
operating environment. (It should be replaced if the performance is obviously degraded)
11. The PerfectTilt
™
motor module can reach the preset angular position in general operation. However, under repeated operation,
the angle may be due to the gap of the mechanism (unavoidable due to the clutch mechanism), and the wireless signal delay
or leakage. Causes some angular error or inconsistency. At this time, the angle error can be automatically corrected by simply
pressing the Best privacy or the Best view. (requires that the horizontal correction is done and correct)
 Loading...