FunctionNO. Description
1. Select the group(s) you want to setup bottom position, and hold down for Tilt Upward button
( ) 1 second.
2. Move the louvers to bottom position by hand. [NOTE: The direction of operation MUST be from
up to down. If direction was reversed, please start over.]
3. Initiate Remote Reset Mode.
4. Select the group(s) you want to setup bottom position.
5. Press Tilt Downward button ( ), group LED will turn off and middle buttons will blink
3 times. [NOTE: Tilt Downward button won’t work if no groups are selected.]
6. Louvers move up and down once.
7. Exit Remote Reset Mode.
Setup Louver Bottom
Position (Down Limit)
11
1. Initiate Remote Reset Mode.
2. Select the group(s) you want to delete bottom position.
3. Press Tilt Upward button ( ), group LED will turn off and middle buttons will blink 3 times.
[NOTE: Tilt Upward button won’t work if no groups are selected.]
4. Louvers move up and down twice.
5. Press Remote Reset button for 1 second to exit Remote Reset Mode.
Delete/Clear
louver Bottom Position
12
˙Preparation Notes
1. Finish shutter assignment of each room to corresponding Remote first.
2. Each room needs a Repeater installed. If the signal needs to pass to a different floor, you will need Repeater installed
around the stairs as well.
˙Hub Installation
1. Connect the Micro USB to the Norman
®
Hub and connect it to the power source.
2. Support two network connection settings, please choose one of them.
► Option 1 : Connect Norman
®
Hub and home AP router via Ethernet route.
1) Connect one end of the Ethernet route to the LAN port of the AP router and one end to the Ethernet port
of the Norman
®
Hub.
2) The mobile phone is connected to the home AP router WiFi.
3) Open the App and select Connect to Hub to connect to the Norman
®
Hub.
► Option 2 : Connect Norman
®
Hub and home AP router via WiFi.
1) The Norman
®
Hub is AP Mode without any network connection. You can find the SSID of NORMANHUB_OOOOOO
(the last six codes of the MAC is the same as the label number on the Hub) through the mobile phone, and can
be connected.
2) Norman® Hub WiFi password: norman1974
3) Open the Norman
®
App and select Connect to Hub > Menu > Hub Info > Home AP Settings and follow the
instructions to connect the Norman® Hub to your home WiFi.
4) When the Norman
®
Hub is connected to the home AP router via WiFi, it will automatically switch to Station Mode.
The SSID of NORMANHUB_OOOOOO will not be visible at this time. The phone will automatically switch back to the
commonly used and connected AP router (basically the home AP router)
5) Open the App and select Connect to Hub to connect to the Norman
®
Hub.
˙Join Remote to Hub Network
1. Power on Norman
®
Hub, orange LED will blink while it boots up.
2. Once booted up, LED will light on in white.
3. Initiate Remote Reset Mode in close proximity to the Hub. (You can do multiple Remotes joining at same time)
4. Press Hub button once.
5. LED of Remote will light for 3 seconds once network sync completes.
6. Press Remote button ( ) for updating data to all shutters(Motor Modules).
7. Do Manual Search for adding shutters. [Same as Norman
®
Hub Function No.1]
1) Hold Norman
®
Hub button for 3 seconds to initiate User Setting mode.
The LED will turn blue.
2) Press once within 5 seconds right after step 1).
3) LED will blink in blue and white as it searches
shutters status.
4) Once it finishes searching, LED will light on
in white to indicate normal status.
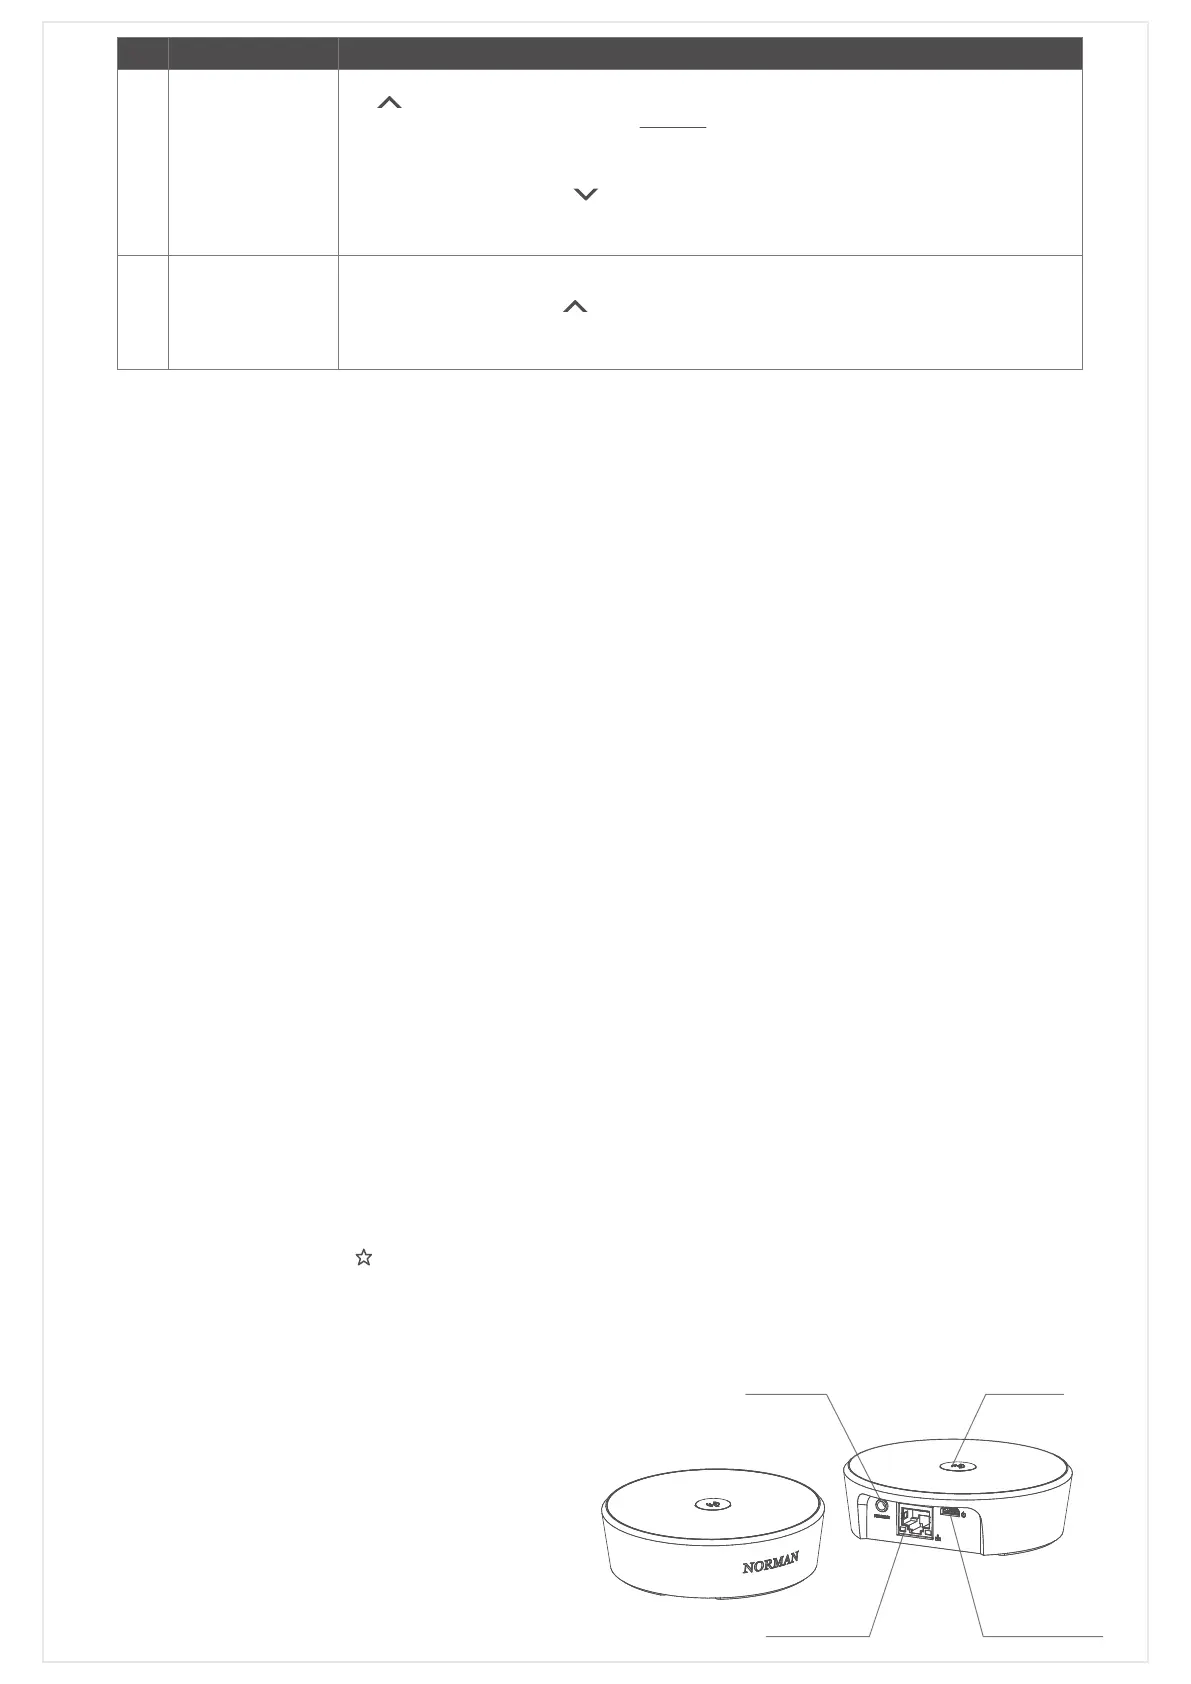
Norman
®
Hub
Hub ButtonRS-232 Port
Ethernet Port
Power Input
(Micro-USB Port)
Page 05/09
 Loading...