14
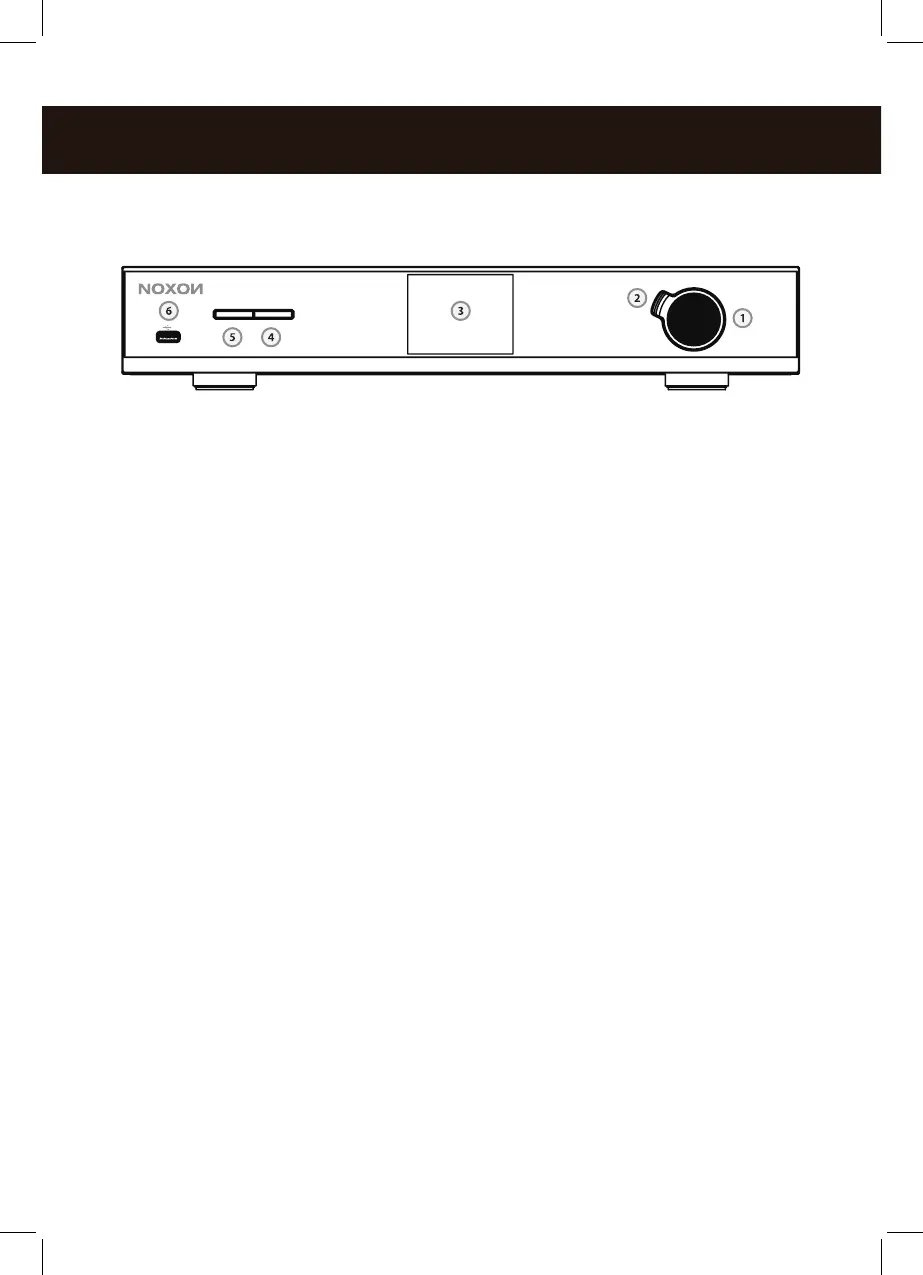
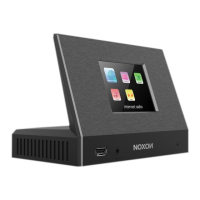
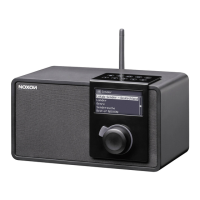
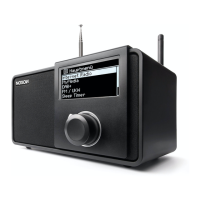
Overview: front
1. Navigation dial with push function for selection: Scroll through the men by
turning the dial in the list view. To select a menu item, press the dial once.
2. Back button:This takes you one step back the selection.
3. Display
4. Menü: Here you can reach the main menu quickly.
5. Standby On/Off – here, you can wake up the A560+ or put it back to sleep.
6. USB-Port – Here, you can connect USB mass storage media.
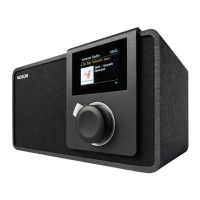
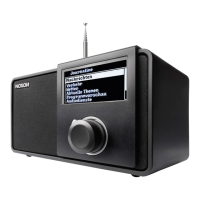
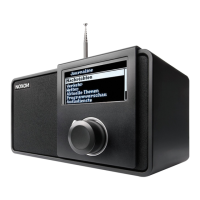
back
1. DIGITAL OUT: Connect this optical jack (TOSlink) to a digital amplier that
understands the S/PDIF protocol.
2. DIGITAL COAXIAL OUT: Connect this coaxial jack to a digital ampli
er that understands the S/PDIF protocol.
3. ANALOG OUT: Connect this analog jack (RCA) with a analog amplier.
4. LAN: For wired network operation, use this RJ45 jack.
5. POWER: Connect the provided power adapter to this jack.
6. WLAN antenna: For wireless reception, you have to connect the WLAN anten
na provided here.
7. Bluetooth antenna: For Bluetooth reception, you have to connect the Blue-
tooth antenna provided here.
8. FM/ DAB Antenna:You can connect the provided telescopic antenna
here. If you want to connect a cable here instead, please use the provided
antenna adapter.
STANDBY/ MODE MENU