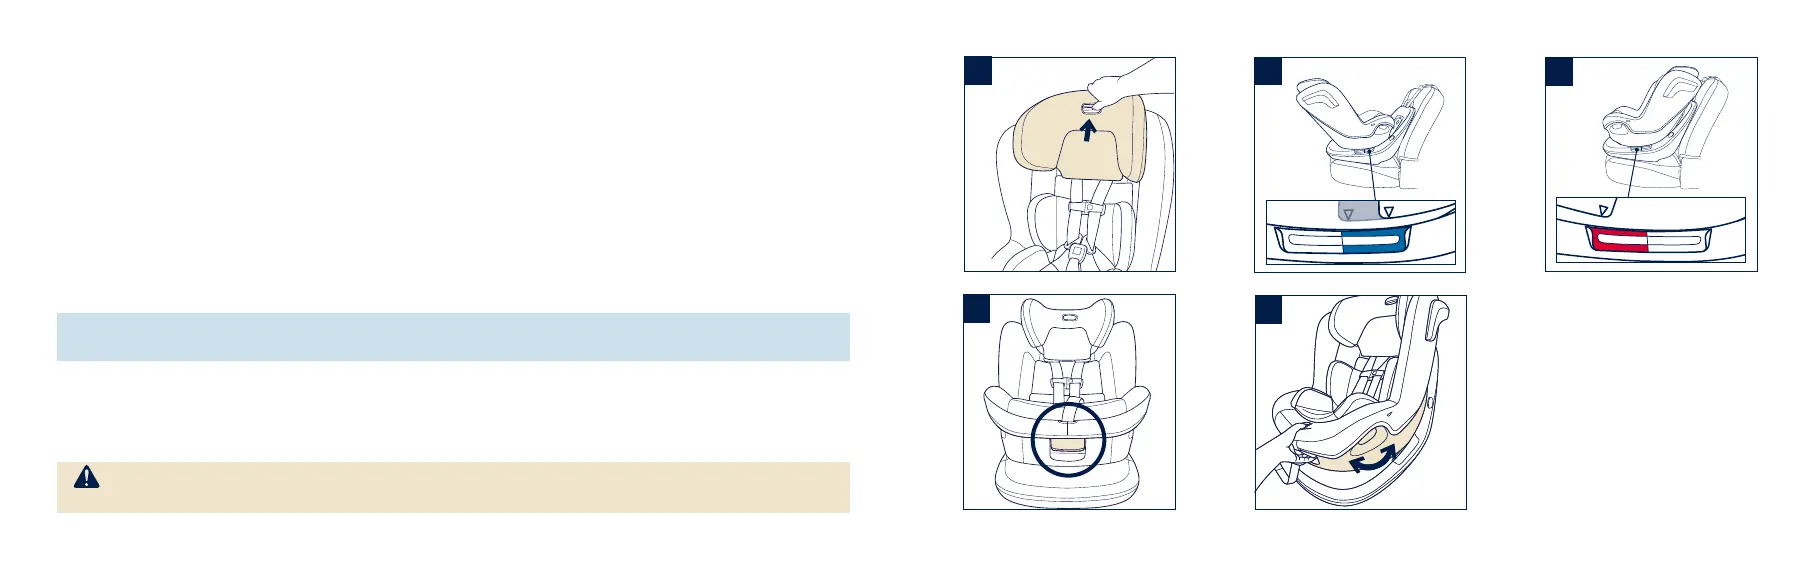
Head Support Adjustment
There are 10 head support positions.
1 - With harness loose (p.22), squeeze head support button and move head support up or
down to desired position.
Release head support button and slide head support slightly up or down until locked into
position. The head support will click when it locks.
CHECK that head support is locked on both sides by pulling firmly up and down.
Recline
There are 10 recline positions.
2 - Positions 1–5 (BLUE) are for rear facing use with children 5–40 lb (2.3–18 kg).
3 - Positions 1–5 (RED) are for forward facing use with children 25–40 lb (11.3–18 kg).
4 - Squeeze the recline handle at the front of the child restraint.
5 - Tilt seat to desired recline position 1-5 (BLUE rear facing or RED forward facing). Release
recline handle and check that child restraint is locked in desired recline position.
forward facing
5 4 3 2 1
1 2 3 4 5
rear facing
5
2
forward facing
5 4 3 2 1
1 2 3 4 5
rear facing
3
4
rear facing
5 4 3 2 1
1 2 3 4 5
forward facing
rear facing
5 4 3 2 1
1 2 3 4 5
forward facing
If infant's head falls forward, child restraint must be reclined more. Use infant insert with
infants 5–11 lb (2.3–5 kg) to increase recline angle.
WARNING: If you are using a lap only belt, you MUST use recline position 5 in both
rear facing and forward facing modes.
32 REVV
™
instructions
33REVV
™
instructions
51