7O
2
user guide O
2
user guide 8
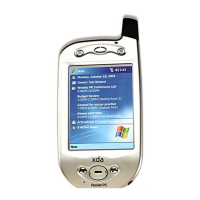
Navigation bar
The navigation bar, located at the top of the
screen, displays the active program and current
time. Below are some of the icons you may see.
Status icon
Meaning
Tur ns all sounds on and off
Battery low
Battery very low
Data connection is active
Synchronisation is beginning or ending
Over the air synchronisation is occurring
Notification that one or more instant messages were received
Notification that one or more email/SMS messages were received
Indicates the phone connection is on and the strength of the signal is strong
Indicates the phone connection is on and the strength of the signal is weak
Indicates the phone connection is switched off
Please note
If there is not enough room to display all the
icons that are needed, the notification icon, ,
can be seen in the navigation bar. Tap to view
all icons.
Step one:
Insert your SIM card
• Use your stylus to open the rubber flap to the
SIM card compartment
• Insert the SIM card into the narrow horizontal
slot towards the top of the compartment with
the gold contacts facing down
• Once in place, clip the rubber flap down
making sure both corner catches are firmly
in place
• For help on removing your SIM card please
refer to page 42
Please note
There is a micro switch that is only activated when
the cover is fully and firmly in place, otherwise
your Xda will not operate. This ensures that the
SIM cannot be removed while the Xda is on.
2. Get started
Step two:
Charge the battery
Your Xda contains a rechargeable
Lithium-Polymer battery housed permanently
in your device.
Your Xda has been supplied with a cradle.
The cradle is used to hold your Xda when it is
charging or synchronising with your PC
(explained later).
• To charge the battery, insert the AC adaptor
into the back of the cradle and connect to
an external power source. Place your Xda
in the cradle
• An amber light indicates charging and a
green light indicates your Xda is fully charged.
Wait until your Xda is fully charged. This will
take approximately 4 hours. The battery must
be fully charged before using your Xda for
the first time
Please note
Remembering to charge your battery is
extremely important as in the event that all
power is lost all your data and any new
programs you have installed will be erased.
Only the default programs installed when you
bought the device will remain.
Please note
Using your Xda whilst charging will significantly
increase charging time.

 Loading...