Email
O
2
user guide 32
31 O
2
user guide
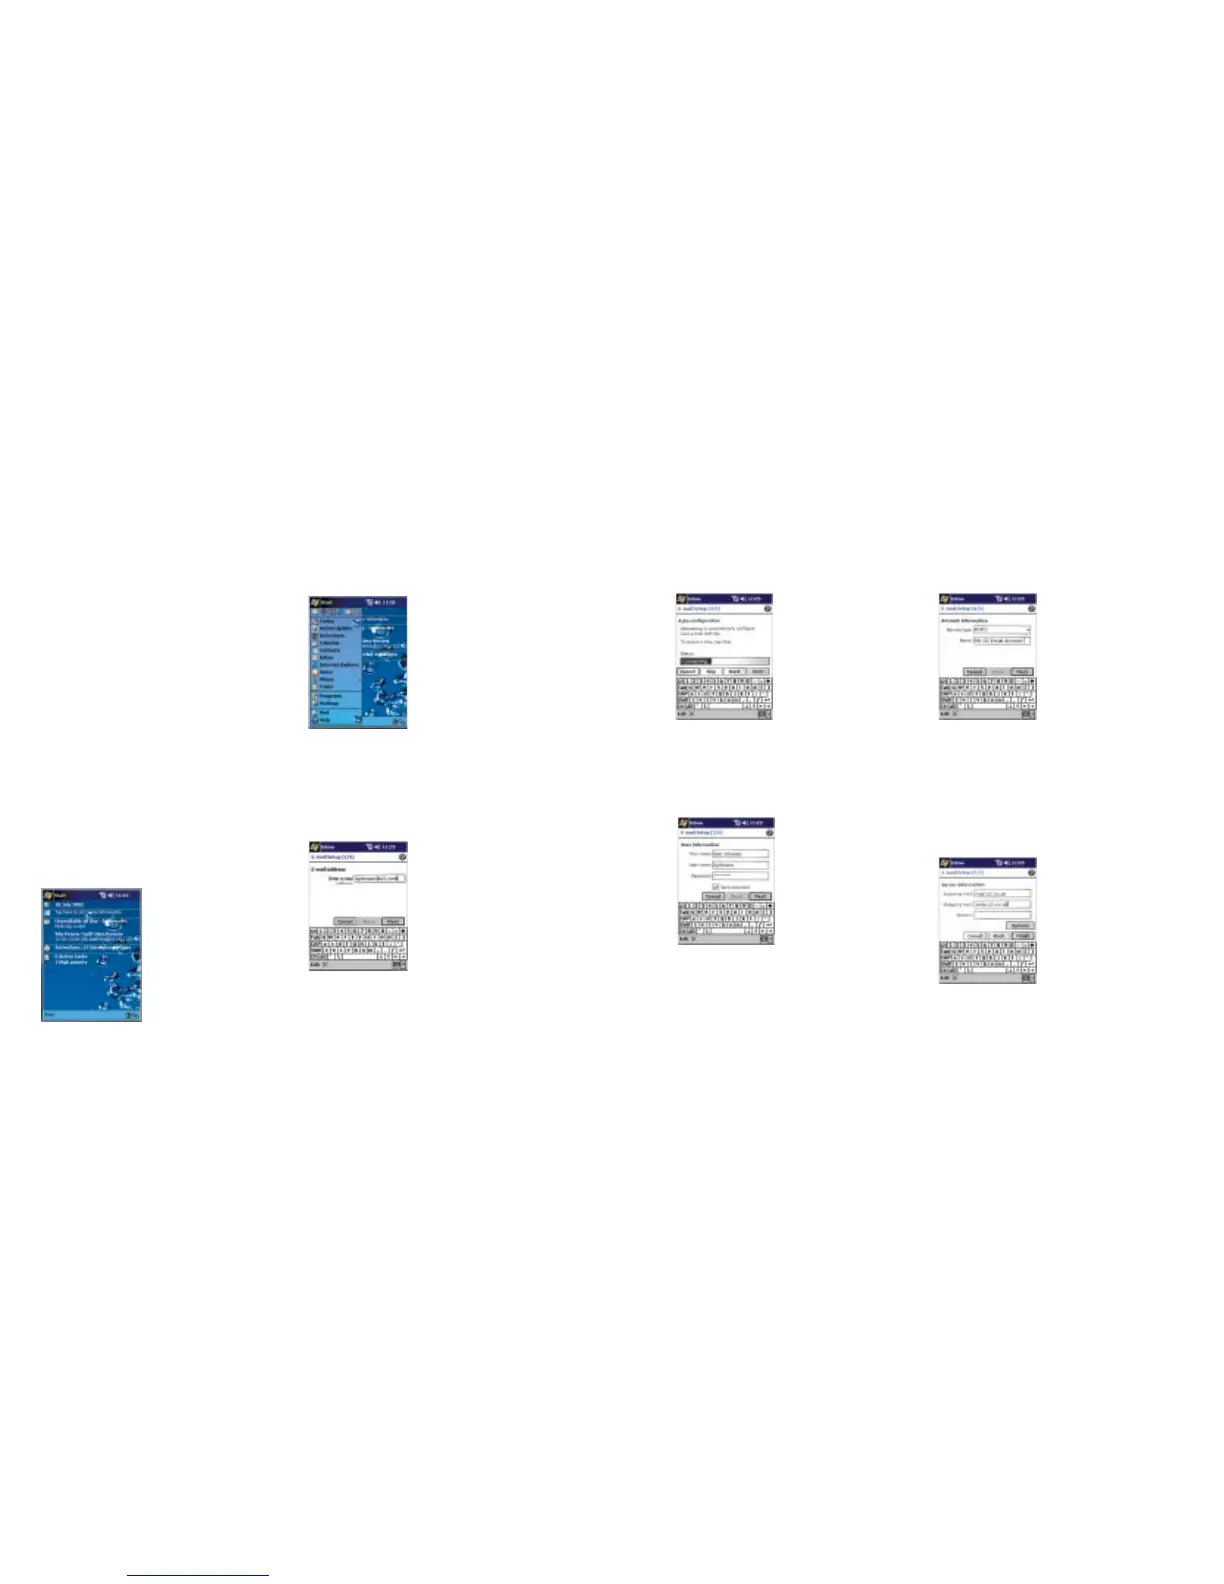
• Tap ‘Inbox’
• Tap ‘Services’
• Tap ‘New Service’
• Enter your ‘Email Address’
• Tap ‘Next’
Note: Your screen may appear phased out below the words
‘enter email’ – your set up process will still work
so please continue to follow the instructions. Check our email
settings table for the correct way to enter your email address.
How to manage
POP3 email
It can be quicker and more convenient to use
your Xda’s Inbox to manage your email. Most
email providers enable you to do this. This type
of email access is referred to as POP3.
Before you start
Before you begin ensure that your email service
provider offer POP3. Do this by simply locating
your email provider on our ‘Email settings’ table
on pages 31 and 32.
Set up your Inbox to manage your
POP3 email
The following instructions show you the
set-up process for using your Xda’s Inbox for
POP3 email.
• Tap ‘Start’
• Your Xda will attempt to download settings
• Once the word ‘Completed’ appears
underneath ‘Status’, tap ‘Next’
• Enter ‘Your Name, Username*
and Password’
• Please double check your username and
password.
• Tick the
‘Save Password’ box if required
• Tap
‘Next’
*Note: It is important to check the email settings table
on the inside back cover for the correct way to enter
your username.
• Choose the ‘Service Type’ (usually POP3)
• Enter a ‘Name’ for this email account (Note:
We recommend using your email provider’s
name. e.g. O
2
, Yahoo). This will be the name
shown in your inbox, so make it memorable
• Tap
‘Next’
• Enter ‘Incoming mail’ server address
Note: Check our email settings table for the correct way to
enter your incoming mail server address.
• For ‘Outgoing mail’ server address, enter
‘smtp.o2.co.uk’
• Leave Domain empty – this is for company
email services, not personal email
• Tap
‘Finish’
Your set-up process is complete.