OMC-160-3 Manual Page 13
5 Commissioning
5.1 Commissioning procedure
1) Check the connections.
2) Install the interface and (if applicable) the display instrument. Normally the OMC-160 anemometer is
powered through the interface unit.
3) Align the wind vane.
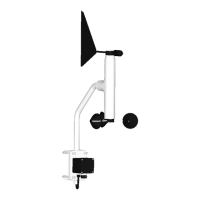
5.1.1 Alignment of the wind vane
The wind direction sensor needs to be aligned:
- To North; usually for land based or fixed applications.
- To the bow; usually for shipborne installations.
Procedure:
- Sensor needs to be powered
- Vane needs to be tightened
- Open the junction box.
- Direct the vane exactly to North or the bow; whichever is applicable.
- Press the alignment button, after approx. 3s until the alignment LED’s start flashing,
release the button.
- Check alignment: when correct, the middle LED (N) should lit. Repeat procedure if a
correction is required.
- Close the junction box and tighten carefully.
Note that the accuracy of the wind direction reading of the OMC-160 anemometer depends fully on
the alignment of the vane!
It is impossible to calibrate the OMC-160 anemometer in the field. However, the following procedure
makes sure that the installation was successful.
4) Check the direction readings. A various wind directions, make sure that the change in reading
corresponds to the direction of the vane. For interpretation of the wind direction reading, remind that
the wind direction is defined as the direction where the wind comes from. The readings should be
reasonable.
5) Check the wind speed reading. Table 4 can be used for estimation of the actual wind speed. The
reading should be reasonable.