7.2. Installation for sauna heater
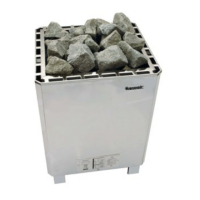
i. Refer the installation drawings on the previous page, Fix screws and hang sauna heater on
wall
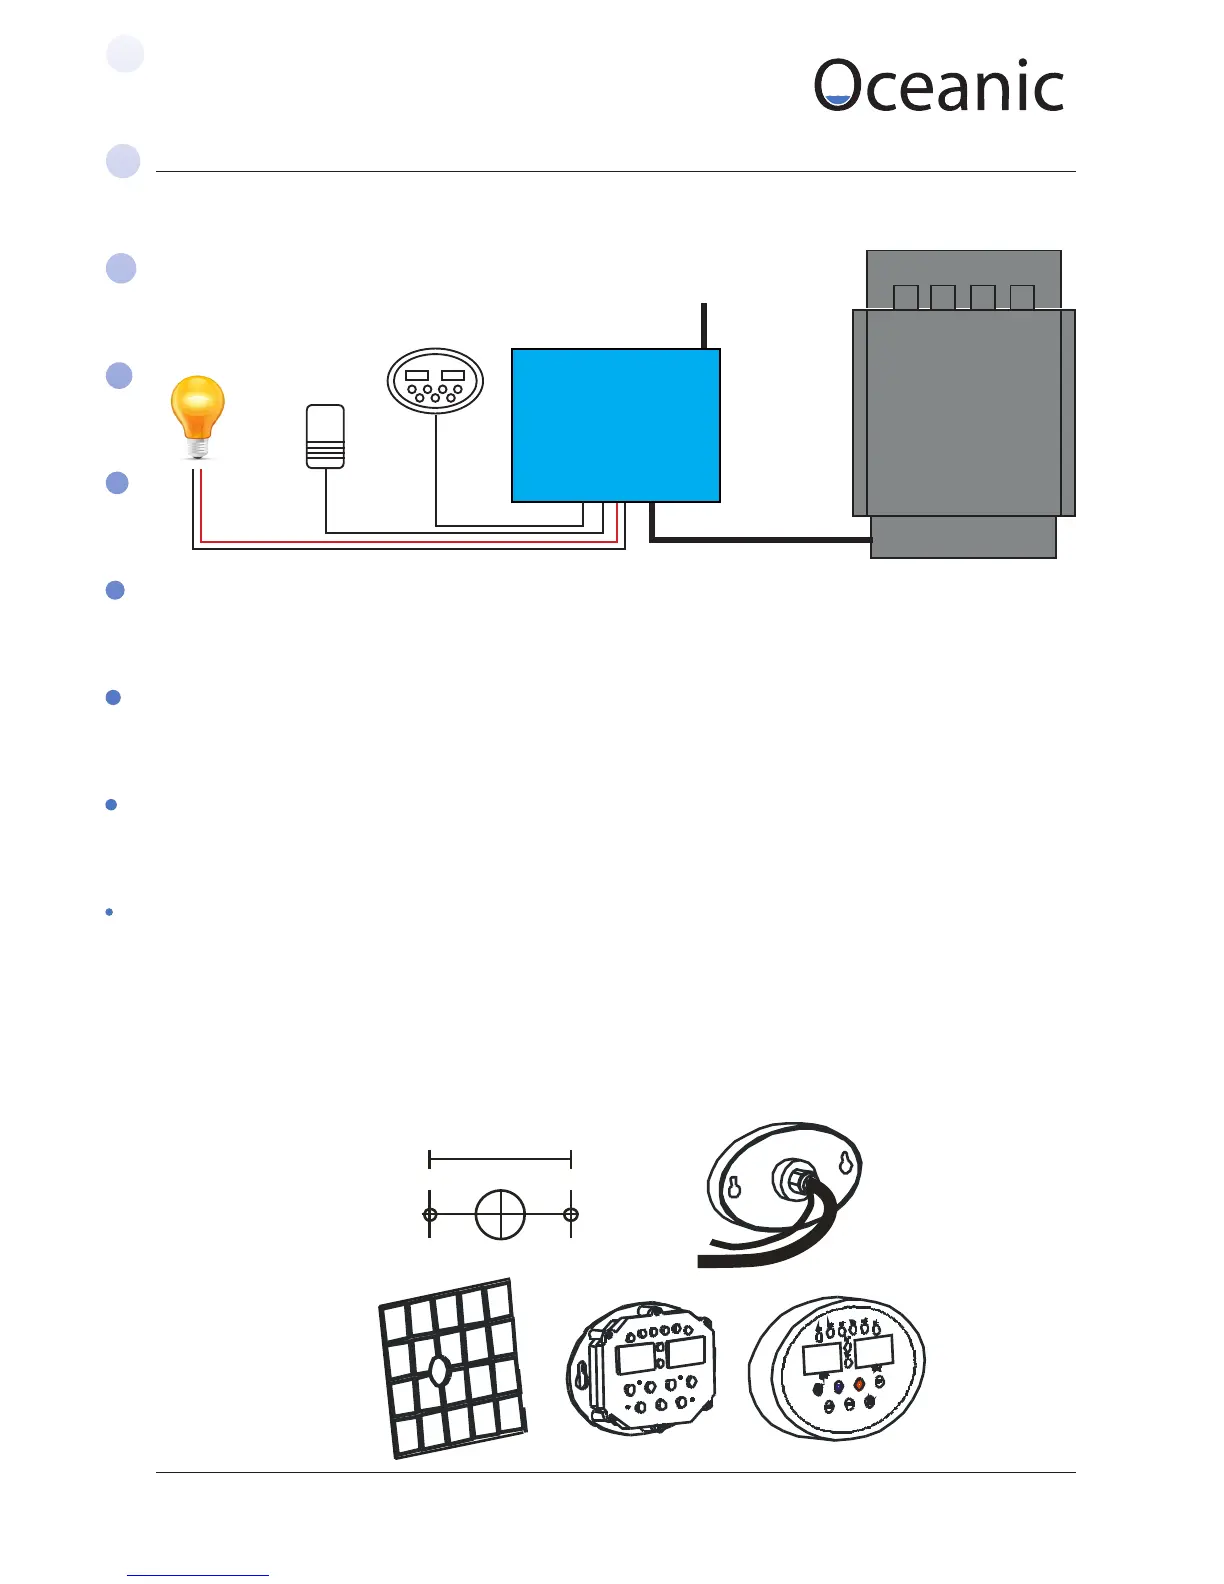
ii. Remove the cover panel & connect power supply wire & control cable through the knock-
out holes to the Terminal as in the diagram above and replace the cover panel.
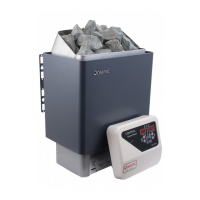
7.3. Installation for controller
Ideally the control box should be installed at a height of approximately 1200mm for ease of use.
Installation method:
• Drill a 40mm diameter hole through the wall.
• Pull the front o the keypad, you may nd it easier with a small at electrical screw driver.
• Pin the control cable (6 cores) to the relevant ports.
• Install the control so it sits at on the wall. Fix using the screw holes 118mm apart.
• Put the keypad cover back on, check the cover is completely on so that all the buttons click
when pushed.
OCSB Controller
5V DC
Temperature
Sensor
Lighting
OC Wall Hung
Heater
OCSB/LB Contol Box
Mains Power in
If using single phase link
across L1, L2, L3 with copper
bridges or pieces of cut wire
5 core (or 4 core for 3kw and 4kw units) heat proof
silicon cable must be used between the controller and
heater unit. This is because the controller heats three
elements individually when the temperature in the
room is reached two will turn o.
240 V AC mains power
supply for the lights
LN