3-5
REMOVING THE PISTON
1.Remove:
·Piston pin clips“1”
·Piston pin“2”
·Piston“3”
NOTICE
Do not use a hammer to drive the piston pin out.
TIP
·Before removing the piston pin clips,cover the
crankcase opening with a clear rag to prevent the
piston pin clips from falling into the crankcase.
2.Remove:
·Top ring
·2nd ring
·Oil ring
TIP
When removing a piston ring,open the end gap
with your fingers and lift the other side of the ring
over the piston crown.
CHECKING THE TIMING CHAIN GUIDE
1.Check
·Timing chain guide(exhaust side)
Damage/wear→Replace.
CHECKING THE CYLINDER AND PISTON
1.Check:
·Piston wall
·Cylinder wall
Vertical scratches→Replace the cylinder,and replace the piston and piston rings as a set.
2.Measure:
·Piston-to-cylinder clearance
CHECKING THE PISTON RINGS
1.Measure:
·Piston ring side clearance
Out of specification→Replace the piston and piston rings as a set.
TIP
Before measuring the piston ring side clearance,eliminate any carbon deposits from the piston ring grooves and
piston rings.
2.Install:
·Piston ring
(into the cylinder)
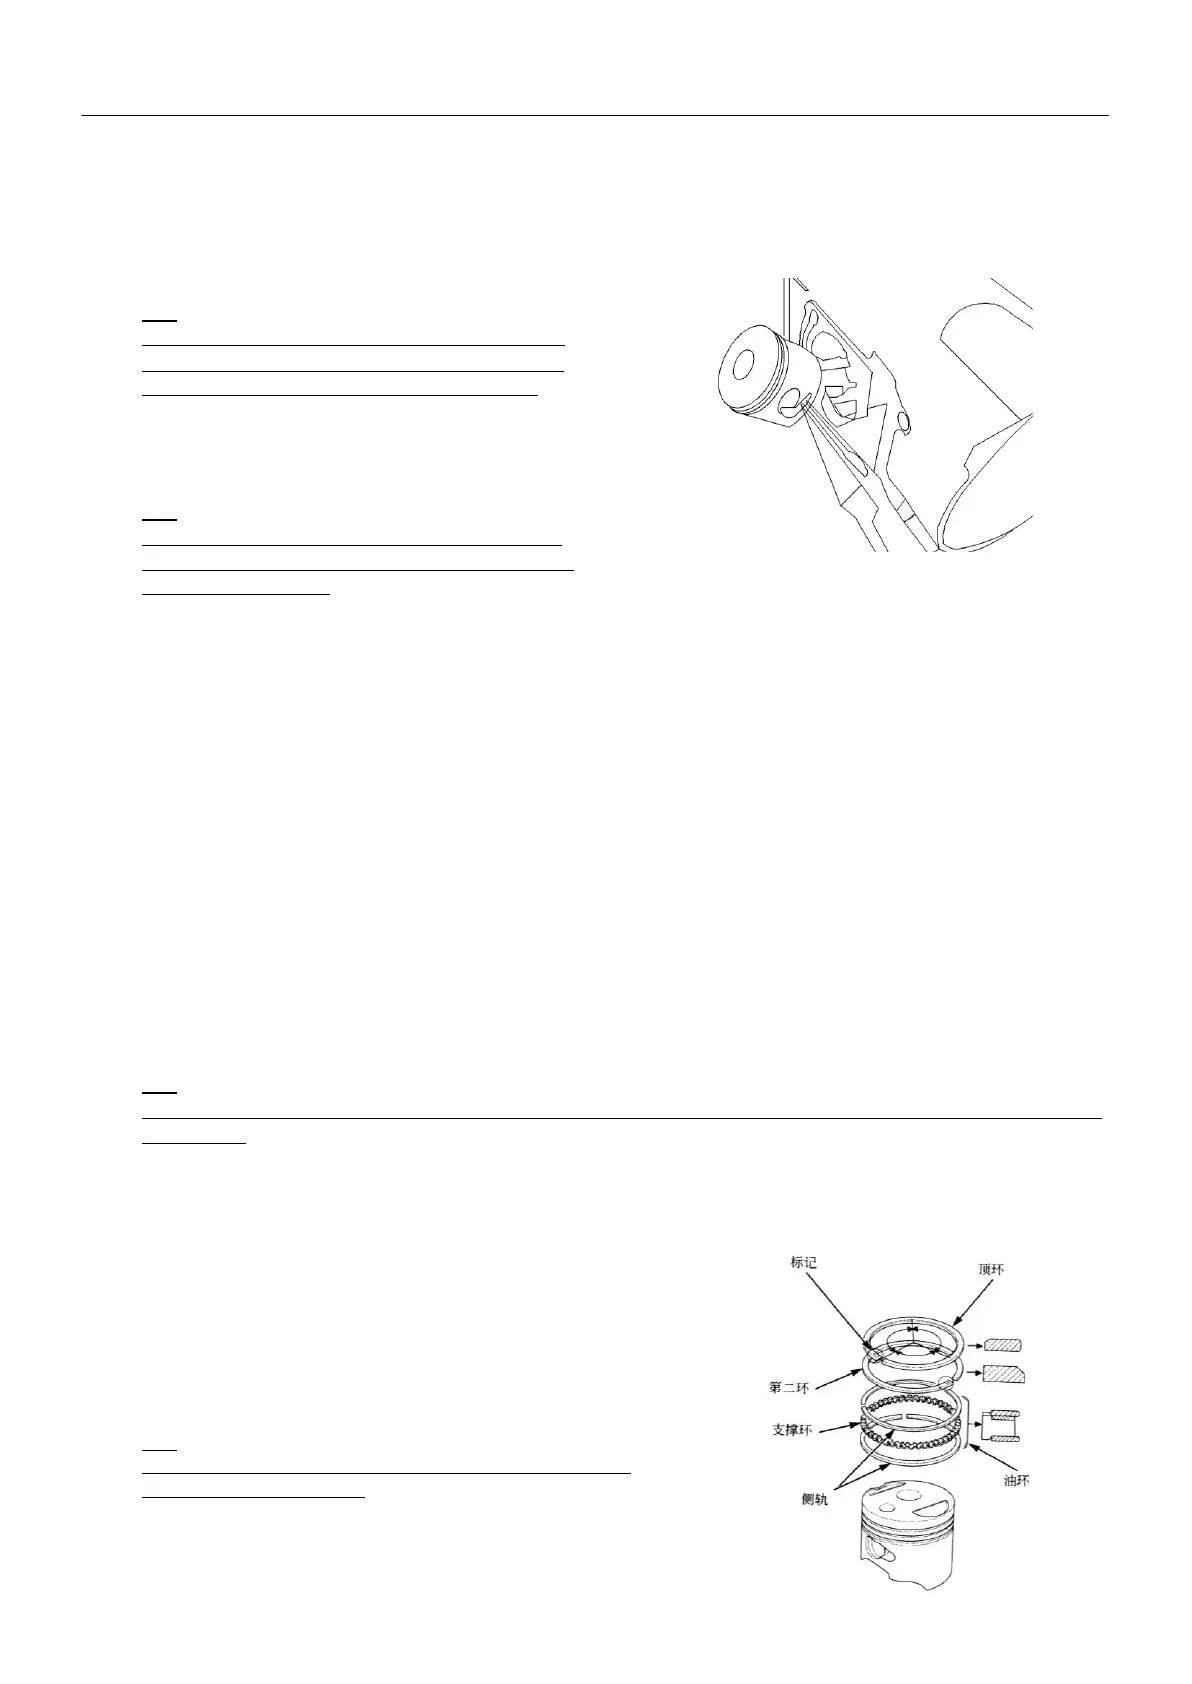
INSTALLING THE PISTON AND CYLINDER
1.Install:
·Lower oil ring rail“1”
·Oil ring expander“2”
·Upper oil ring rail“3”
·2nd ring “4”
·Top ring
TIP
Be sure to install the piston rings so that the manufacture
marks or numbers face up.