3-12
ASSEMBLING THE MAIN AXLE
1.Install:
·Primary driven gear
·Washer“1”
·Circlip“2”
TIP
Be sure the circlip sharp-edgde corner “a”is positioned
opposite side to the washer and gear.
2.Install:
·Clutch dog
TIP
Install the clutch dog“1”so that the recessed portion“a”of the clutch dog faces the recesses“b”in the primary
driven gear“2”.
3.Install:
·Reverse wheel gear
·Washer
·Collar“1”
TIP
·Face the cutouts “a”in the collar inward.
·Press the collar into the main axle/1st pinion gear“2”,as show in the illustration.
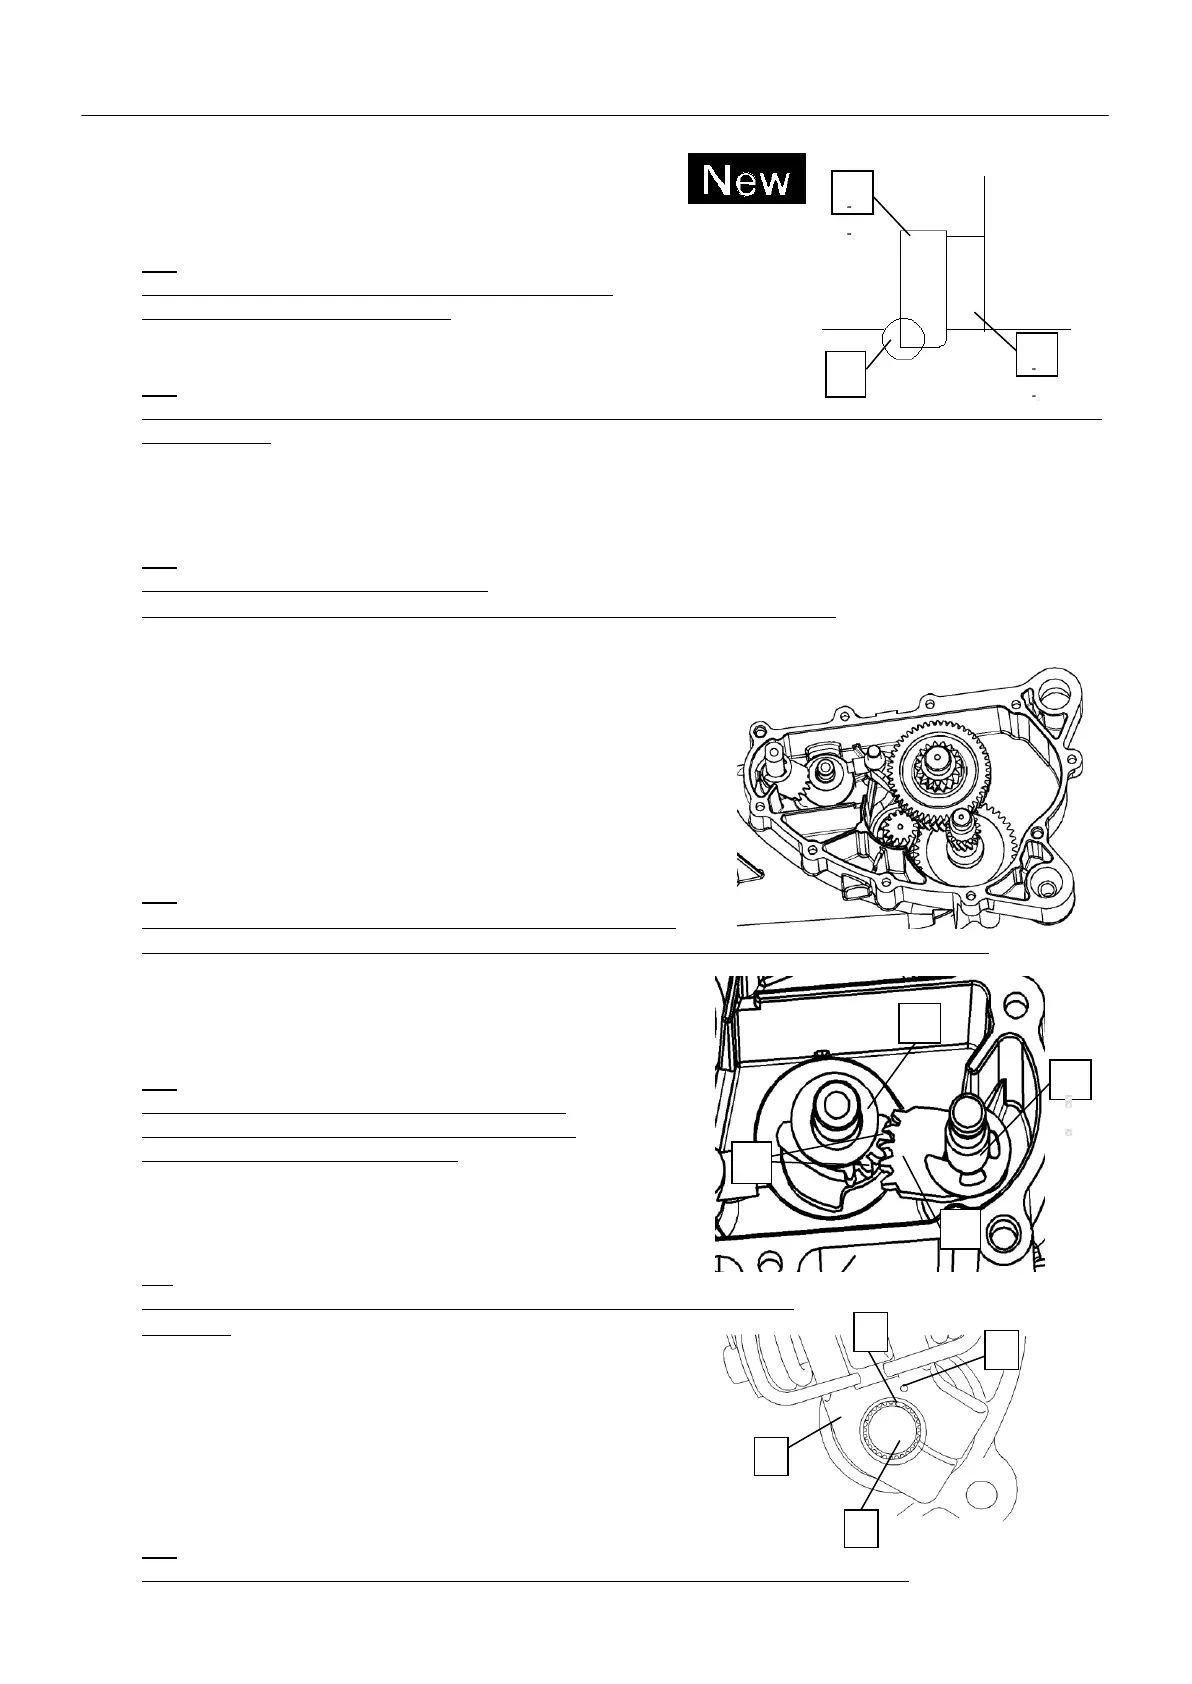
INSTALLING THE SHIFT FORK AND SHIFT DRUM
1.Install:
·Transmission“1”
·Shift fork“2”
·Shift drum“3”
·Shift fork guide bar“4”
2.Check:
·Shift cam operation
Rough movement→Repair
TIP
·Apply engine oil to each gear,shift,and bearing thoroughly.
·Check the transmission and shift fork for smooth operation by turning the shift cam with your hand.
INSTALLING THE SHIFT LEVER
1.Install:
·Shift shaft“1”
TIP
Position the center tooth“a”on the cam portion of
the shift shaft “1”between the teeth identified with
punch marks“b”on the shift drum“2”.
2.Install:
·Transmission case gasket.
·Transmission case cover
·Transmission case cover bolt
TIP
Tighten the transmission case cover bolts in stages and in a crisscross pattern.
3.Install:
·Shift lever guide
4.Install:
·Shift lever holder “1”
·Shift lever shaft
·Shift lever spring
·Shift lever
·Washer
·Cotter pin
TIP
Align the punch mark“a”on the shift lever holder “1”with the cutout“b”in the shift shaft“2”