3-9
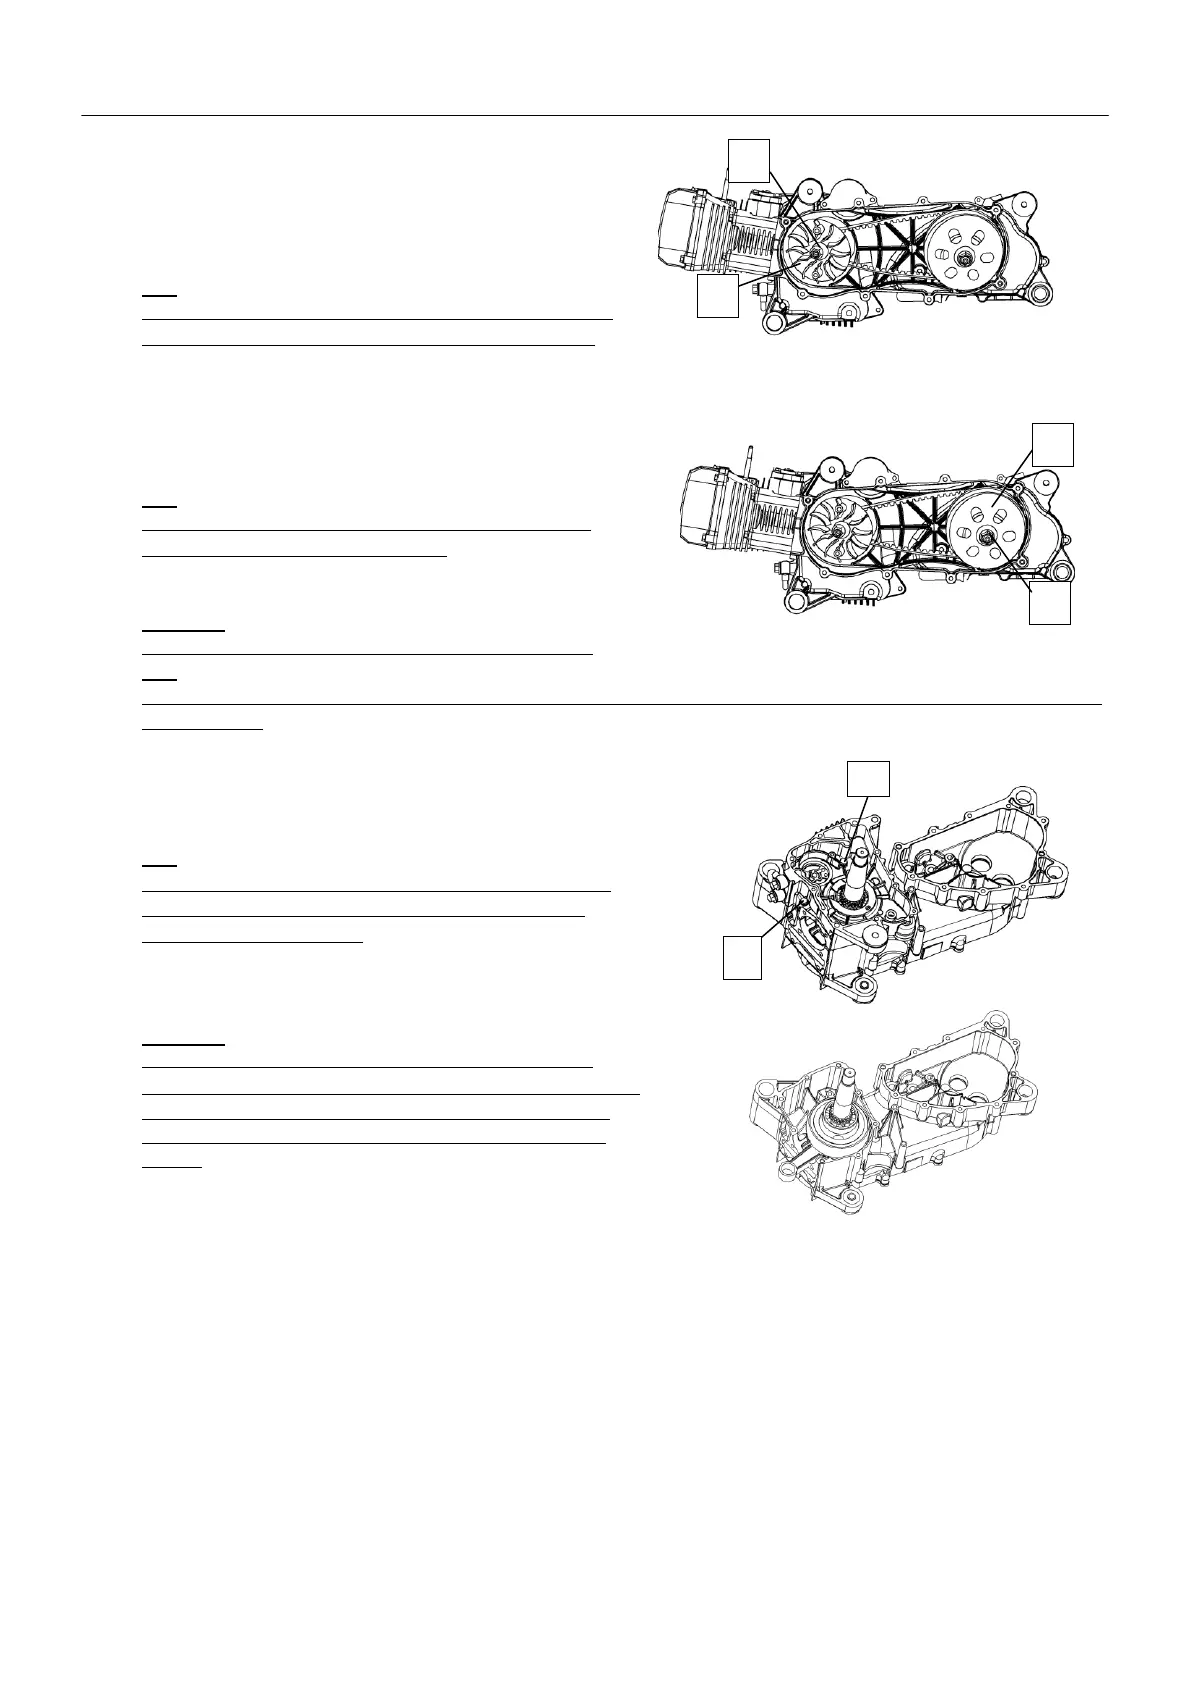
REMOVING THE PRIMARY SHEAVE
1.Remove:
·Primary fixed sheave nut“1”
·Washer
·Primary fixed sheave“2”
·CDI magneto rotor cover
TIP
While holding the CDI magneto rotor“3”with the rotor
holding tool,loosen the primary fixed sheave nut“1”
REMOVING THE SECONDARY SHAEAVE
1.Remove:
·Clutch housing nut“1”
·Clutch housing“2”
TIP
While holding the clutch housing with rotor holding
tool,loosen the clutch housing nut.
2.Loosen
·Secondary sheave nut“1”
NOTICE
Do not remove the secondary sheave nut at this stage.
TIP
While holding the secondary sheave with the rotor holding tool,loosen the secondry sheave nut one full with the
socket wrench
SEPARATING THE CRANKCASE
1.Remove:
·Crankcase bolts
TIP
Loosen each bolt 1/4 of a turn at a time,in stages and
in a crisscross pattern.After all of the bolts are fully
loosened,remove them.
·M6×50mm bolts“1-2”
2.Remove:
·Crankcase
NOTICE
Tap on the one side of the crankcase with a soft-face
hammer. Tap only on reinforced portion of the crankcase,
not on the crankcase mating surfaces.Work slowly and
carefully and make sure the crankcase halves separate
evenly.
CHECKING THE CRANKCASE
1.Throughly wash the crankcase halves in a mild solvent.
2. Throughly clean all the gasket surfaces and crankcase mating surfaces.
3.Check:
·Crankcase
Cranks /damage→Replace.
·Oil delivery passages
Obstruction→Blow out with compressed air.
CHECKING THE TIMING CHAIN AND TIMING CHAIN GUIDE
1.Check:
·Timing chain
Damage/stiffness→Replace the timing chain and camshaft sprocket as a set.