- 108 -
Printing from a Computer
5
Printing
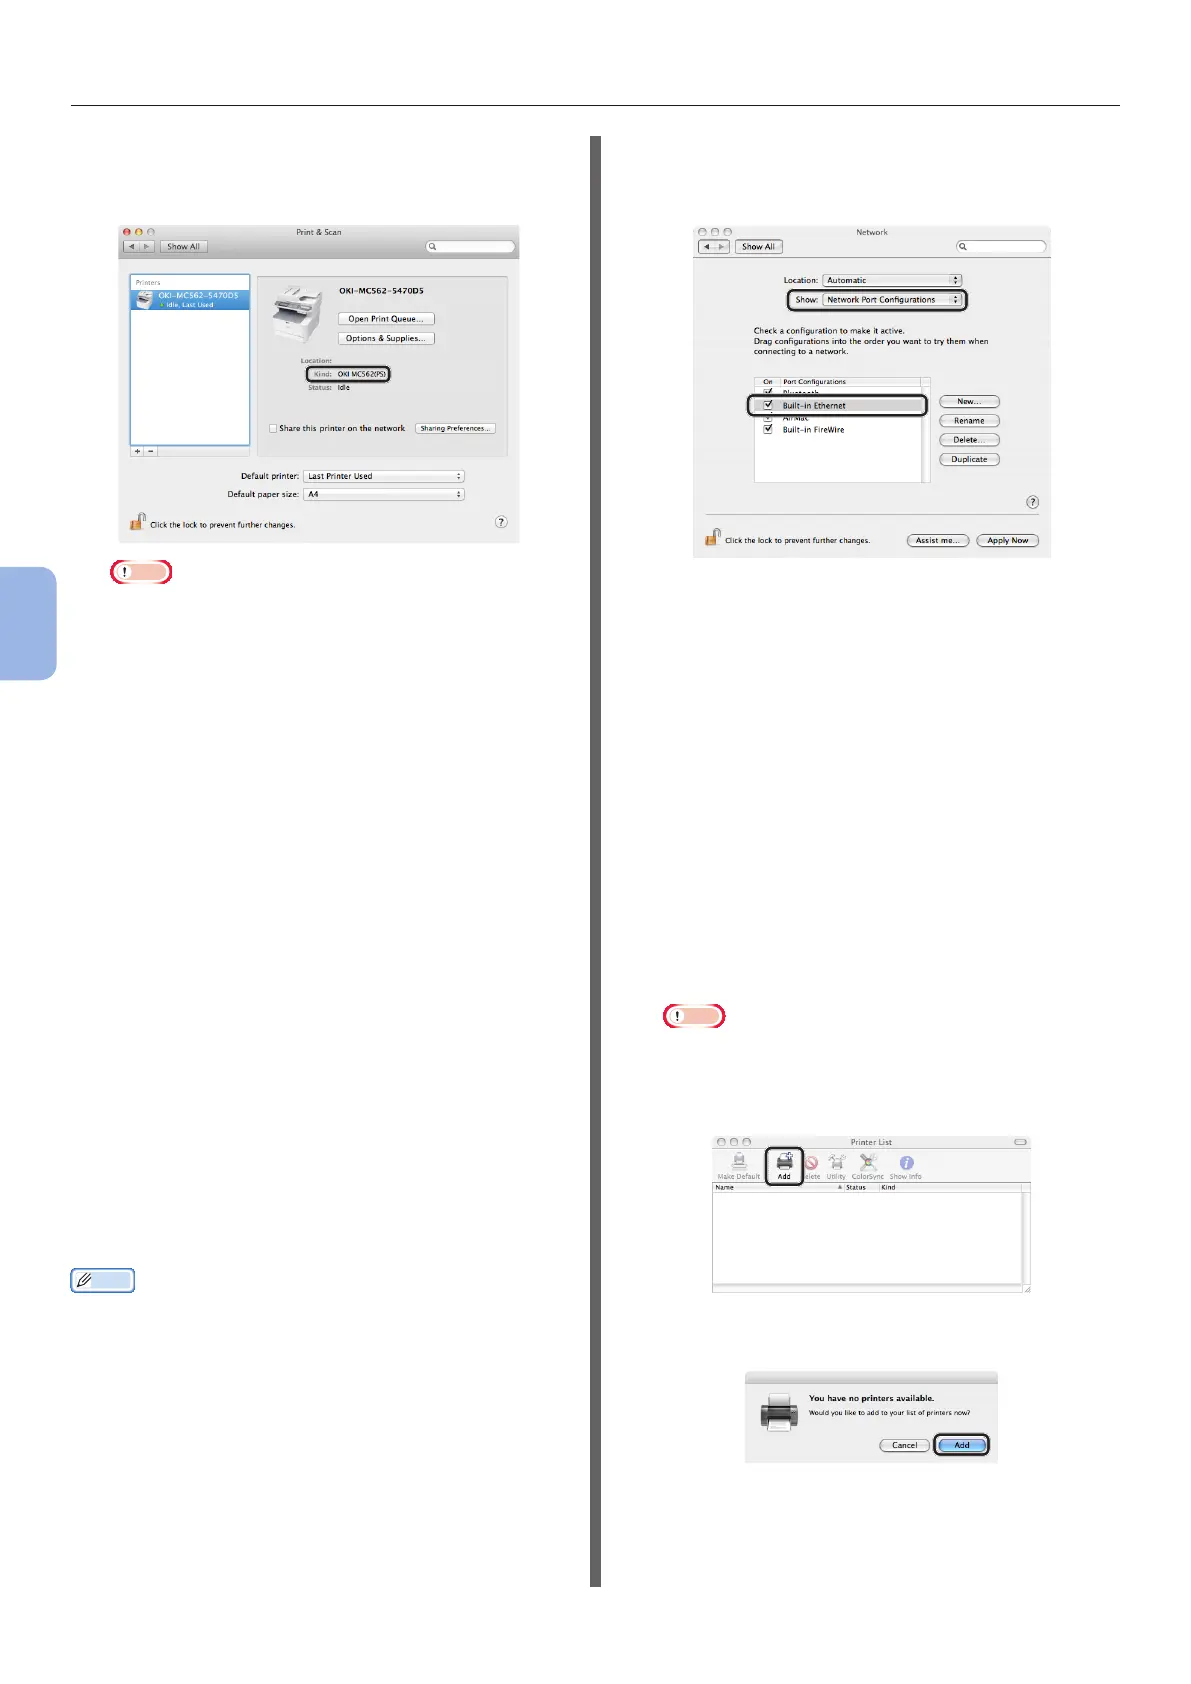
12 Check that your machine is displayed in
[Printers] and [OKI MC562(PS)] is
displayed in [Kind].
Note
● If [OKI MC562(PS)] is not correctly displayed
in [Kind], click [-] to remove your machine from
[Printers] and then redo the procedure from step 8
to 12.
13 Close [Print & Scan] (For Mac OS X
10.5 and 10.6: [Print & Fax]).
14 Remove “Software DVD-ROM” from the
computer.
The installation is complete.
◆ Print a test page to check that the printer
driver is successfully installed on the
computer.
1 From the [Go] menu, select
[Applications] > [TextEdit].
2 Select the [File] menu > [Print].
3 Select the name of your machine from
[Printer].
4 Click [Print].
◆ For Mac OS X 10.3.9 to 10.4.11
Memo
● The following procedure uses Mac OS X 10.3.9.11 as an
example. The description may be differ depending on the
OS.
1 Check that your machine and the
computer are turned on and connected.
2 From the Apple menu, select [System
Preferences].
3 Select [Network].
4 Select [Network Port Congurations]
from [Show], and then check that
[Built-in Ethernet] is selected.
5 Close [Network].
6 Insert “Software DVD-ROM” into the
computer.
7 Double-click the [OKI] icon on the
desktop.
8 Double-click [Driver] folder > [PS]
folder > [Installer for Mac OSX].
Follow the instructions displayed on the screen to
complete the installation.
9 From the [Go] menu, select [Utilities]
and then double-click [Printer Setup
Utility].
Note
● If [Printer Setup Utility] is already running, close it
once and reopen.
10 Click [Add].
If the [You have no printers available] dialog
box is displayed, click [Add].