EasyManuals Logo

Oki ML3390 User Manual

Oki ML3390
45 pages
To Next Page IconTo Next Page
To Previous Page IconTo Previous Page
Page #8 background imageLoading...
Page #8 background image
English
7Read Me First
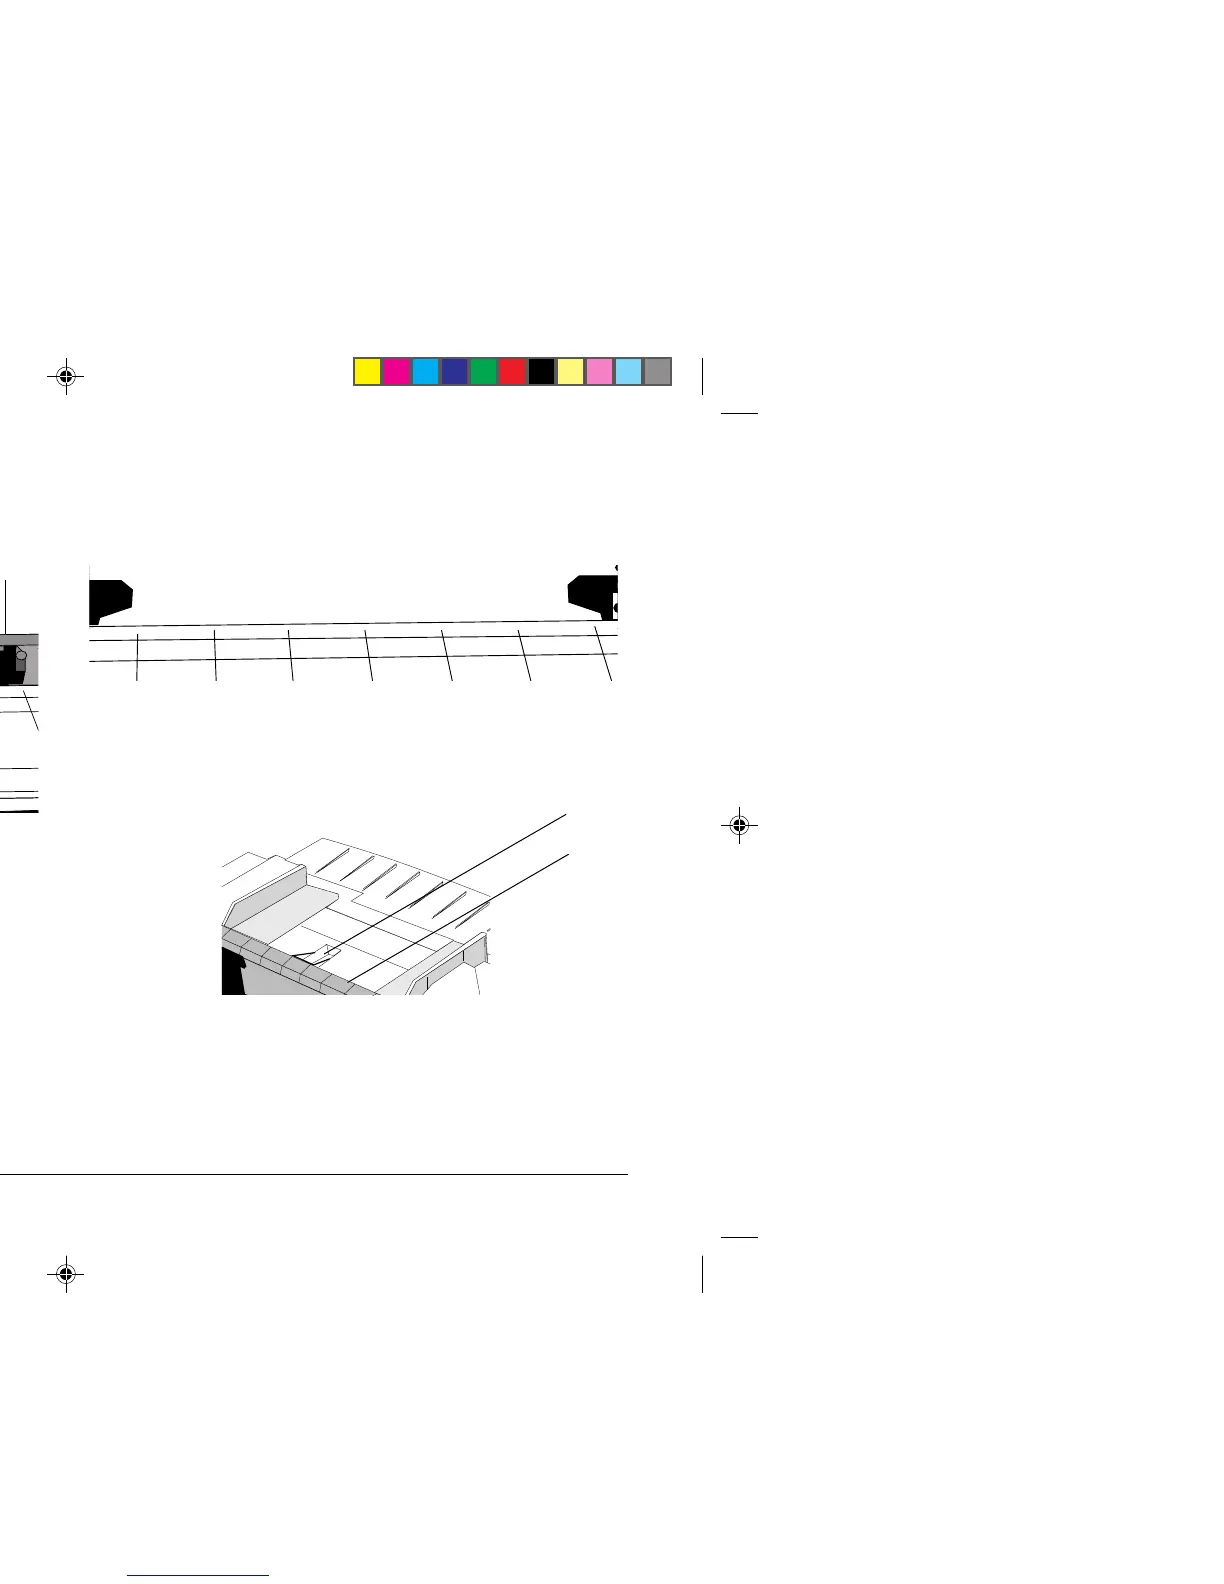
5. Place the first two holes in the paper over the tractor pins
on either side and close the tractor covers.
7. Adjust the right tractor to centre the paper holes on the
pins, and push back the lock lever.
6. Move the left tractor to align the edge of the paper with
the appropriate reference mark (), and push back the
lock lever.
8. Lower the paper separator and place the wire guide ()
on the pull-up roller assembly ().
9. Press FF/LOAD. The paper feeds into the printer.
Note: The standard setting for the Top of Form (where
the printing begins) is 2.54cm down from the top of
the page. To change the setting, see page 9.
3320rmf3.pm6 13/03/96, 16:087

Questions and Answers:

Question and Answer IconNeed help?

Do you have a question about the Oki ML3390 and is the answer not in the manual?

Oki ML3390 Specifications

General IconGeneral
ColorNo
Built-in barcodesCode 39, UPC-A, UPC-E
Maximum resolution360 x 360 DPI
Maximum printing width (columns)160
Media thickness165 x 91 mm
Print technologyDot matrix
Dimensions (WxDxH)398 x 345 x 116 mm
Power requirements220/230 VAC, 240V AC
Connectivity technologyWired
Recommended media weight45 - 90 g/m²
Sound pressure level (printing)57 dB
Mean time between failures (MTBF)10000 h

Related product manuals