40
Fig. 49
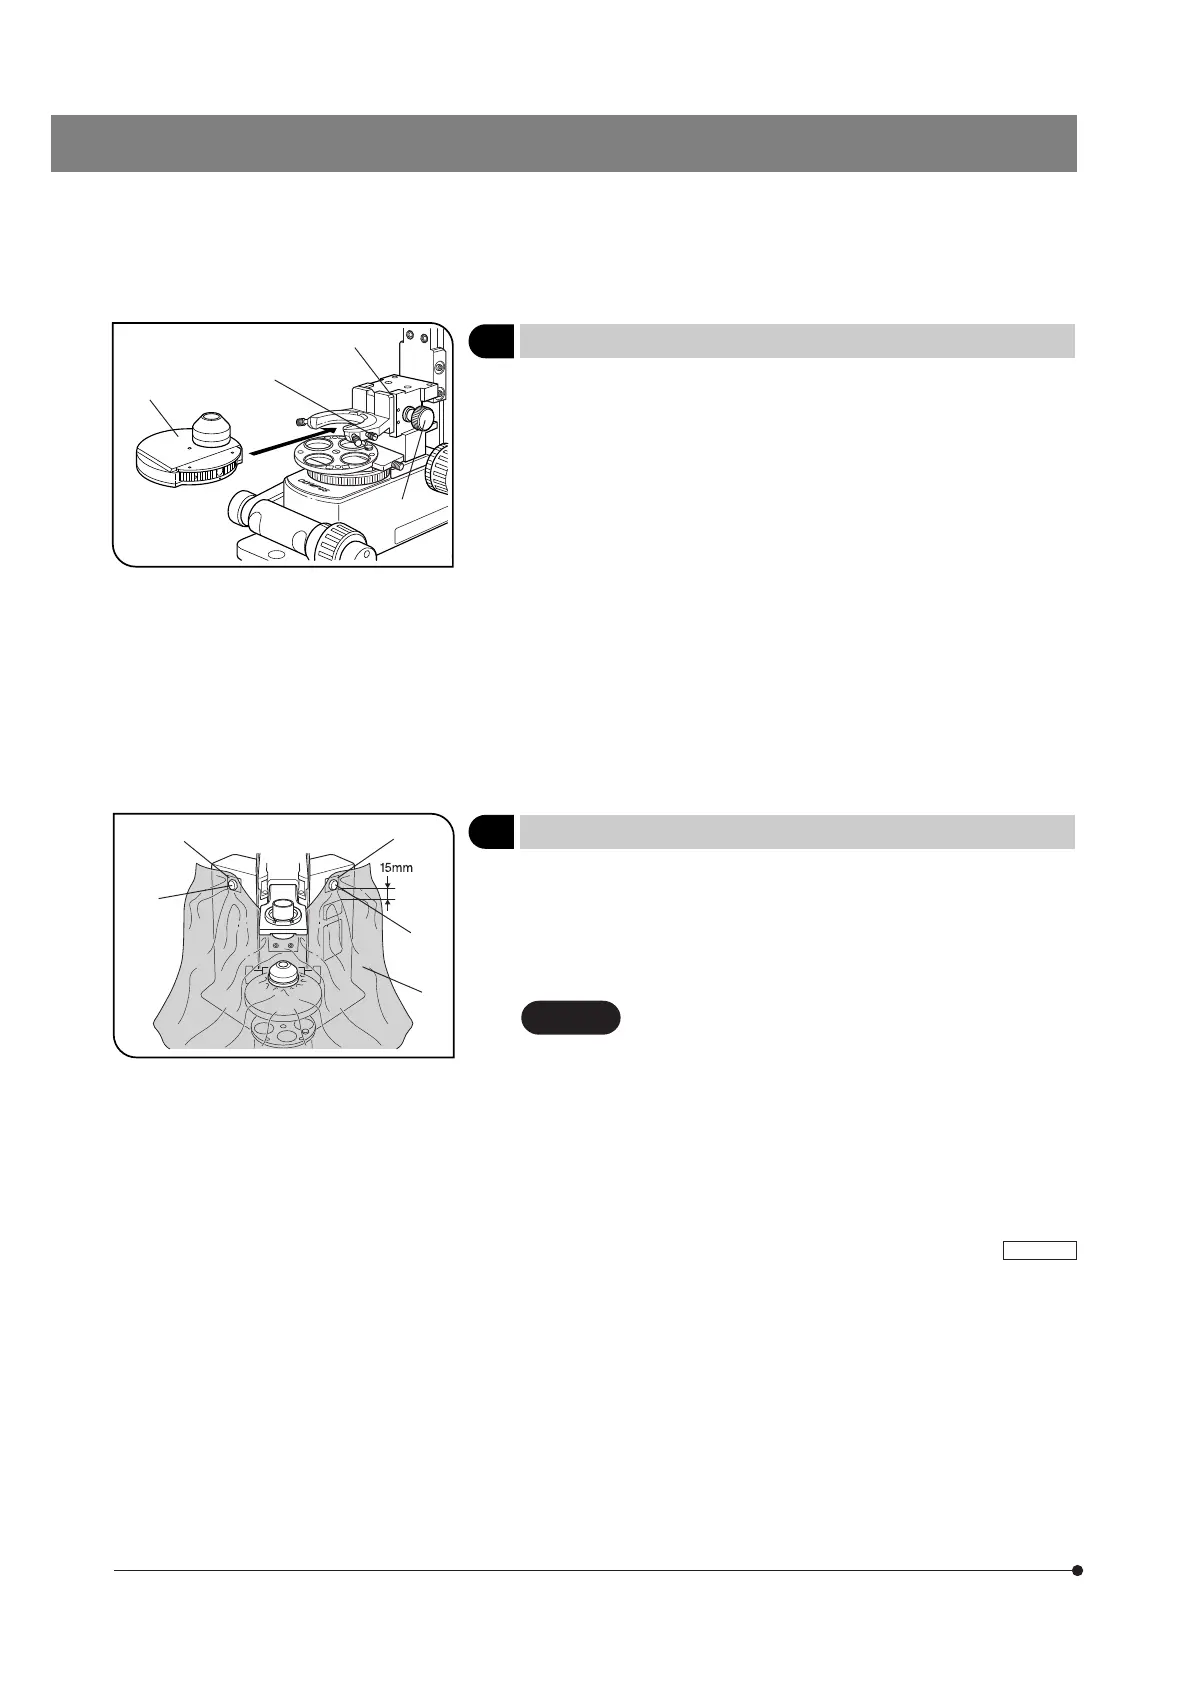
Fig. 50
4 Attaching the Condenser
(Fig. 49)
#When attaching a condenser other than the WI-UCD, remove the
upper limit stopper screw @ of the condenser holder with an Allen
screwdriver.
}In DIC observation, attach the DIC prism (for condenser) before attaching
the condenser onto the microscope frame (page 20). However, with the
WI-DICD condenser, the DIC prism should be attached after adjusting the
polarizer position.
1. Rotate the condenser height adjustment knob ² to raise the condenser
holder to an optimum height.
2. Fully loosen the condenser clamping knob ³.
3. Slide in the condenser | from the front along the mount dovetail all the
way until it is stopped.
# When the microscope frame has a positioning pin on the rear position
of the condenser, align the condenser with the groove on the con-
denser holder.
4. Tighten the condenser clamping knob and lower the condenser holder
to the lowest limit position.
5 Attaching the Waterproof Cover
(Fig. 50)
}Attach the waterproof cover onto the condenser if required.
The waterproof cover is applicable only to the WI-UCD, WI-DICD and WI-
OBCD condensers.
1. Fit the hole of the waterproof cover @ in the extremity of the condenser
and clamp with the clamping band.
In DIC observation, the condenser has to be removed
and attached during adjustments. Therefore, in this case,
do not attach the clamping band but just fit the hole of
the waterproof cover in the extremity of the condenser
and attach the clamping band after completing the ad-
justments.
2. To fix the skirt of the waterproof cover, attach the double-side adhesive
tape of the magnetic support plates ² to both sides of the microscope
frame.
}The magnetic support plates ² are most effective when they are at-
tached symmetrically at positions by about 15 mm above the
indications.
3. Fix the waterproof cover using magnets ³.
}When the cross stage is used, the stage mounting screw holes (x 4 on
the front and rear) are hidden by the waterproof cover. However, this does
not pose problem because the screws can later be attached by passing
through the waterproof cover.
CAUTION
BX51WI
@
²
³
@
²
³
²
³
|