EasyManua.ls Logo

Olympus BX53 - User Manual

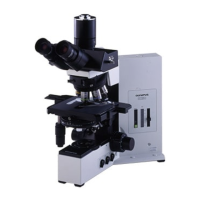
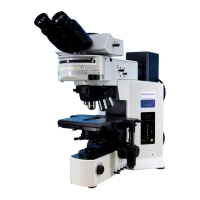
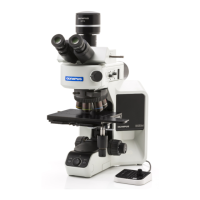
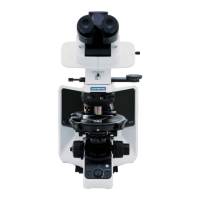
Olympus BX53
48 pages
Print Icon
To Next Page IconTo Next Page
Loading...
INSTRUCTIONS
BX53
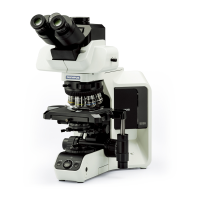
SYSTEM MICROSCOPE
This instruction manual is for the Olympus System Microscope Model BX53.
To ensure the safety, obtain optimum performance and to familiarize yourself fully with the use
of this microscope, we recommend that you study this manual thoroughly before operating the
microscope.
Retain this instruction manual in an easily accessible place near the work desk for future reference.
A X 7 8 5 5

Table of Contents

Other manuals for Olympus BX53

Questions and Answers

  • D
    dennisfitzgeraldAug 20, 2025
    How to fix an Olympus BX53 when the bulb does not light?
    • G
      Gregory HolmesAug 20, 2025
      If the bulb of your Olympus Microscope doesn't light, first replace it, keeping in mind there may be a wire disconnection in the terminal section even if the filament looks normal. If that doesn't work, check if the power cord is properly plugged into the power outlet.
  • S
    Shannon RiosAug 22, 2025
    Why does the Olympus Microscope bulb intermittently light and go out?
    • J
      James KingAug 22, 2025
      If the bulb of your Olympus Microscope intermittently lights and goes out, it may be nearly burned out, so replace it. Also, check all connectors to ensure they are properly connected.
  • H
    Heather SmithAug 25, 2025
    Why is the coarse adjustment knob hard to turn on my Olympus BX53 Microscope?
    • K
      Kevin MunozAug 25, 2025
      If you're having trouble turning the coarse adjustment knob on your Olympus Microscope, it might be because the tension adjustment ring is too tight. Try loosening the ring. Also, ensure the pre-focusing lever is unlocked if you're trying to raise the stage without using the coarse adjustment knob.
  • C
    coxchristopherAug 26, 2025
    Why is one side of the image blurred on my Olympus BX53 Microscope?
    • C
      Cynthia AdamsAug 26, 2025
      If one side of the image appears blurred on your Olympus Microscope, ensure the objective is correctly engaged in the light path and that the revolving nosepiece clicks into place correctly. Also, check that the revolving nosepiece and stage are correctly mounted, and that the specimen is correctly placed and secured on the stage.
  • D
    Drew HawkinsAug 27, 2025
    Why does the image appear to waver on my Olympus BX53 Microscope?
    • A
      andersonjessicaAug 27, 2025
      If the image in your Olympus Microscope appears to waver, ensure the revolving nosepiece is correctly mounted and that it clicks into place correctly. Also, check that the condenser is properly centered.
  • W
    wrightlindsayAug 29, 2025
    What causes the stage to drift down on my Olympus BX53 Microscope?
    • M
      Melissa CollinsAug 29, 2025
      If the stage of your Olympus Microscope drifts down by itself or the focus is lost during observation, try tightening the tension adjustment ring.
  • A
    Adam BrownAug 31, 2025
    How to remove dirt from the field of view on my Olympus BX53?
    • M
      Maria GonzalezAug 31, 2025
      If you notice dirt or dust in the field of view of your Olympus Microscope, thoroughly clean the eyepiece.
  • A
    Andrew HowardSep 2, 2025
    Why is the field of view obscured on my Olympus BX53?
    • J
      Jodi CrawfordSep 2, 2025
      If the field of view of your Olympus Microscope is obscured or not evenly illuminated, ensure the light path selector knob is set correctly for your observation method and that the revolving nosepiece clicks into place properly. Also, check that the condenser is correctly attached and centered, and that you're using a condenser appropriate for your objective. Adjust the field iris diaphragm to an optimum size and ensure the bulb is mounted correctly.
  • R
    Rebecca Watson DVMSep 4, 2025
    Why is the field of view dark on my Olympus BX53 even when the bulb is on?
    • N
      natasha32Sep 4, 2025
      If the field of view of your Olympus Microscope remains dark even when the bulb is operating, check that the aperture and field iris diaphragms are opened wide enough and adjust them to the proper sizes. Also, adjust the condenser height and make sure the light path selector knob is in the correct position.
  • J
    Jonathan DuncanSep 6, 2025
    Why does the image look reddish on my Olympus Microscope?
    • A
      Aaron SimpsonSep 6, 2025
      If your Olympus Microscope image looks reddish, engage the LBD filter in the light path.

Summary

5-6 Immersion Objectives

1 Using Immersion Objectives

Steps for using immersion objectives, including oil application and focusing.

5-7 Objectives with Correction Collar

Adjustment Procedure

How to adjust the correction collar for optimal performance with cover glass thickness.

6 CAMERA RECORDING

1 System Chart

Diagram showing the setup for camera recording with the microscope.

2 Selecting the Camera Adapter Magnification

Choosing camera adapter magnification based on sensor size.

7 TROUBLESHOOTING GUIDE

1. Observation;Illumination System Issues

Covers bulb issues, dark field of view, obscured view, and dirt/dust.

f) Poor Visibility and Image Quality

Addresses issues like poor image, contrast, indistinct details, and glare.

g) Blurred or Wavering Image

Covers one-sided blur, image wavering, and brightness issues.

j) Reddish Image and Electrical System

Deals with reddish images, bulb issues, and brightness control problems.

3. Coarse;Fine Adjustment Issues

Addresses adjustment knob stiffness, stage drift, and focusing problems.

4. Observation Tube and Stage Issues

Covers problems with matching fields of view, blurred images, and stage movement.

8 SPECIFICATIONS

1. Optical System and Illumination

Details on optical system type, illumination, bulb, and power specs.

3. Focusing and Revolving Nosepiece

Specifications for focusing mechanism, stage height, and nosepiece types.

5. Observation Tube

Specs for observation tubes including field number, tilt, and light path selector.

7. Condenser Specifications

Details on condenser types, NA, aperture iris, and objective ranges.

8. Operating Environment

Conditions for use, altitude, temperature, humidity, and voltage fluctuations.

9 OPTICAL CHARACTERISTICS (UIS2 Series)

Objective Series Data

Table detailing magnification, N.A., W.D., cover glass thickness, resolution, etc. for objectives.

10 ASSEMBLY

10-1 Assembly Diagram Overview

Visual guide showing the sequence of assembling microscope modules.

10-2 Detailed Assembly Procedures: Bulb Installation

Step-by-step guide for installing or replacing the halogen bulb.

10-2 Detailed Assembly Procedures: Optical Components

Instructions for attaching eyepieces, revolving nosepiece, and condenser.

10-2 Detailed Assembly Procedures: Power Connection

Steps for connecting the lamp housing cable and power cord.

11 LAMP HOUSING INSPECTION SHEET

Inspection Checklist

A table of checks for lamp housing condition, performance, and safety.

PROPER SELECTION OF THE POWER SUPPLY CORD

Specifications for Power Cord

Details on voltage, current, temperature, and fittings for the power cord.

Table 1 Certified Cord Agencies

List of agencies and their certification marks for power supply cords.

Table 2 HAR Flexible Cord Marking Methods

Approval organizations and cordage harmonization marking methods for flexible cords.

Olympus BX53 Specifications

General IconGeneral
TypeUpright Microscope
IlluminationLED
FocusCoarse and fine focus
Observation TubeTrinocular
Observation MethodsBrightfield, Darkfield, Phase Contrast, Fluorescence, DIC
Magnification RangeDepending on the objectives used
Objective Turret5 or 6 positions
Condenseruniversal condenser
Power SupplyAC 100-240V, 50/60 Hz
StageRectangular Ceramic-Coated Stage with Slide Holder

Related product manuals