42
Fig. 55
Fig. 56
Fig. 57
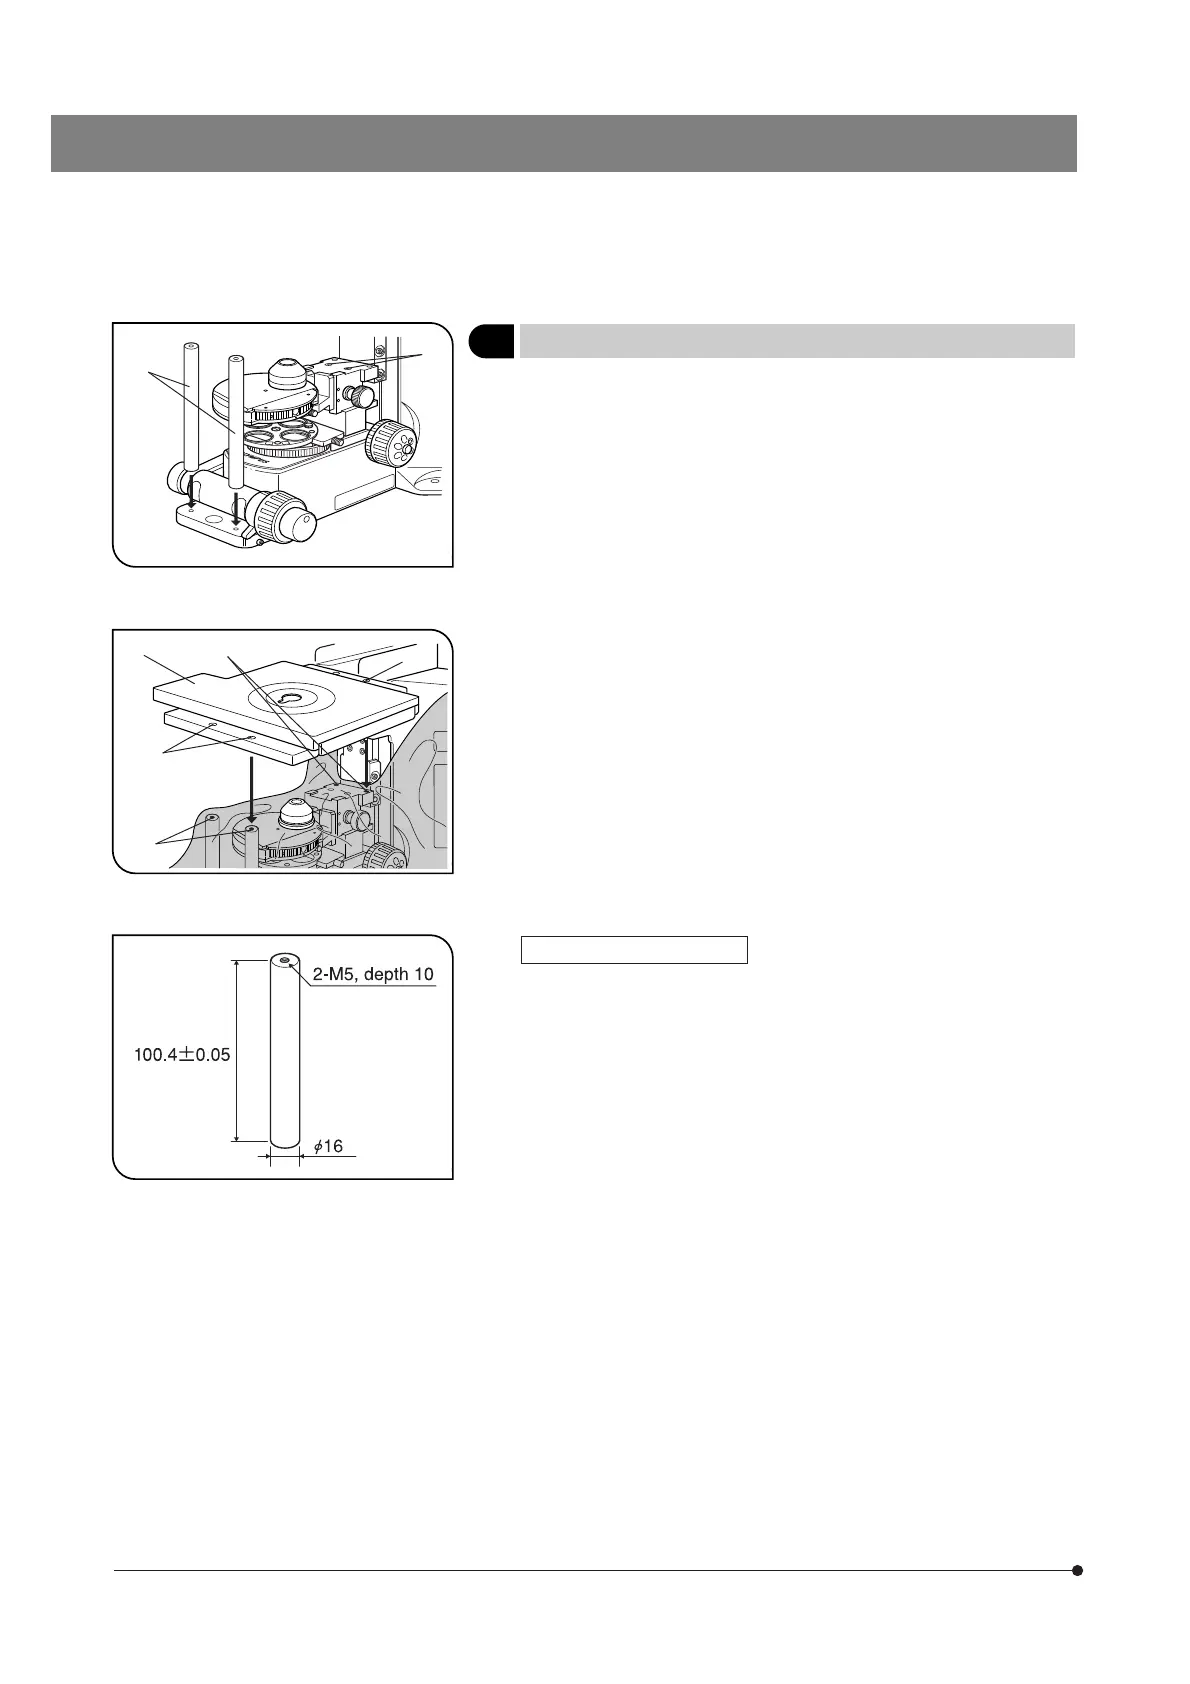
7 Attaching the Cross Stage
(Figs. 55 & 56)
}When using a commercially marketed bridge stage, attach it by referring
to its instruction manual.
1. Align the two WI-FSH fixed stage adapters @ with the front of the micro-
scope base and clamp the adapters by tightening the hex-socket screws
from the bottom side using the Allen wrench provided with the micro-
scope frame.
2. Lower the condenser, align the mounting holes ³ and ƒ of the IX-SVL2
cross stage ² with the mounting screw holes | and …, and clamp the
cross stage by tightening the hex-socket screws with the Allen wrench
provided with the microscope frame.
}When the waterproof cover is used, attach hex-socket screws to the screw
holes | and … by passing through the waterproof cover.
Lowering the Stage Height
When no condenser is used, the stage height can be lowered by 50 mm
by loosening the 2 condenser holder clamping screws († in Fig. 55) and
removing the holder.
In this case, however, the length of the WI-FSH fixed stage adapter be-
comes excessive. To deal with this, order custom fabrication of two support
pillars as shown in Fig. 57 or fabricate them by yourself.
@
²
³
|
…
ƒ
†