9
USING THE CONTROLS
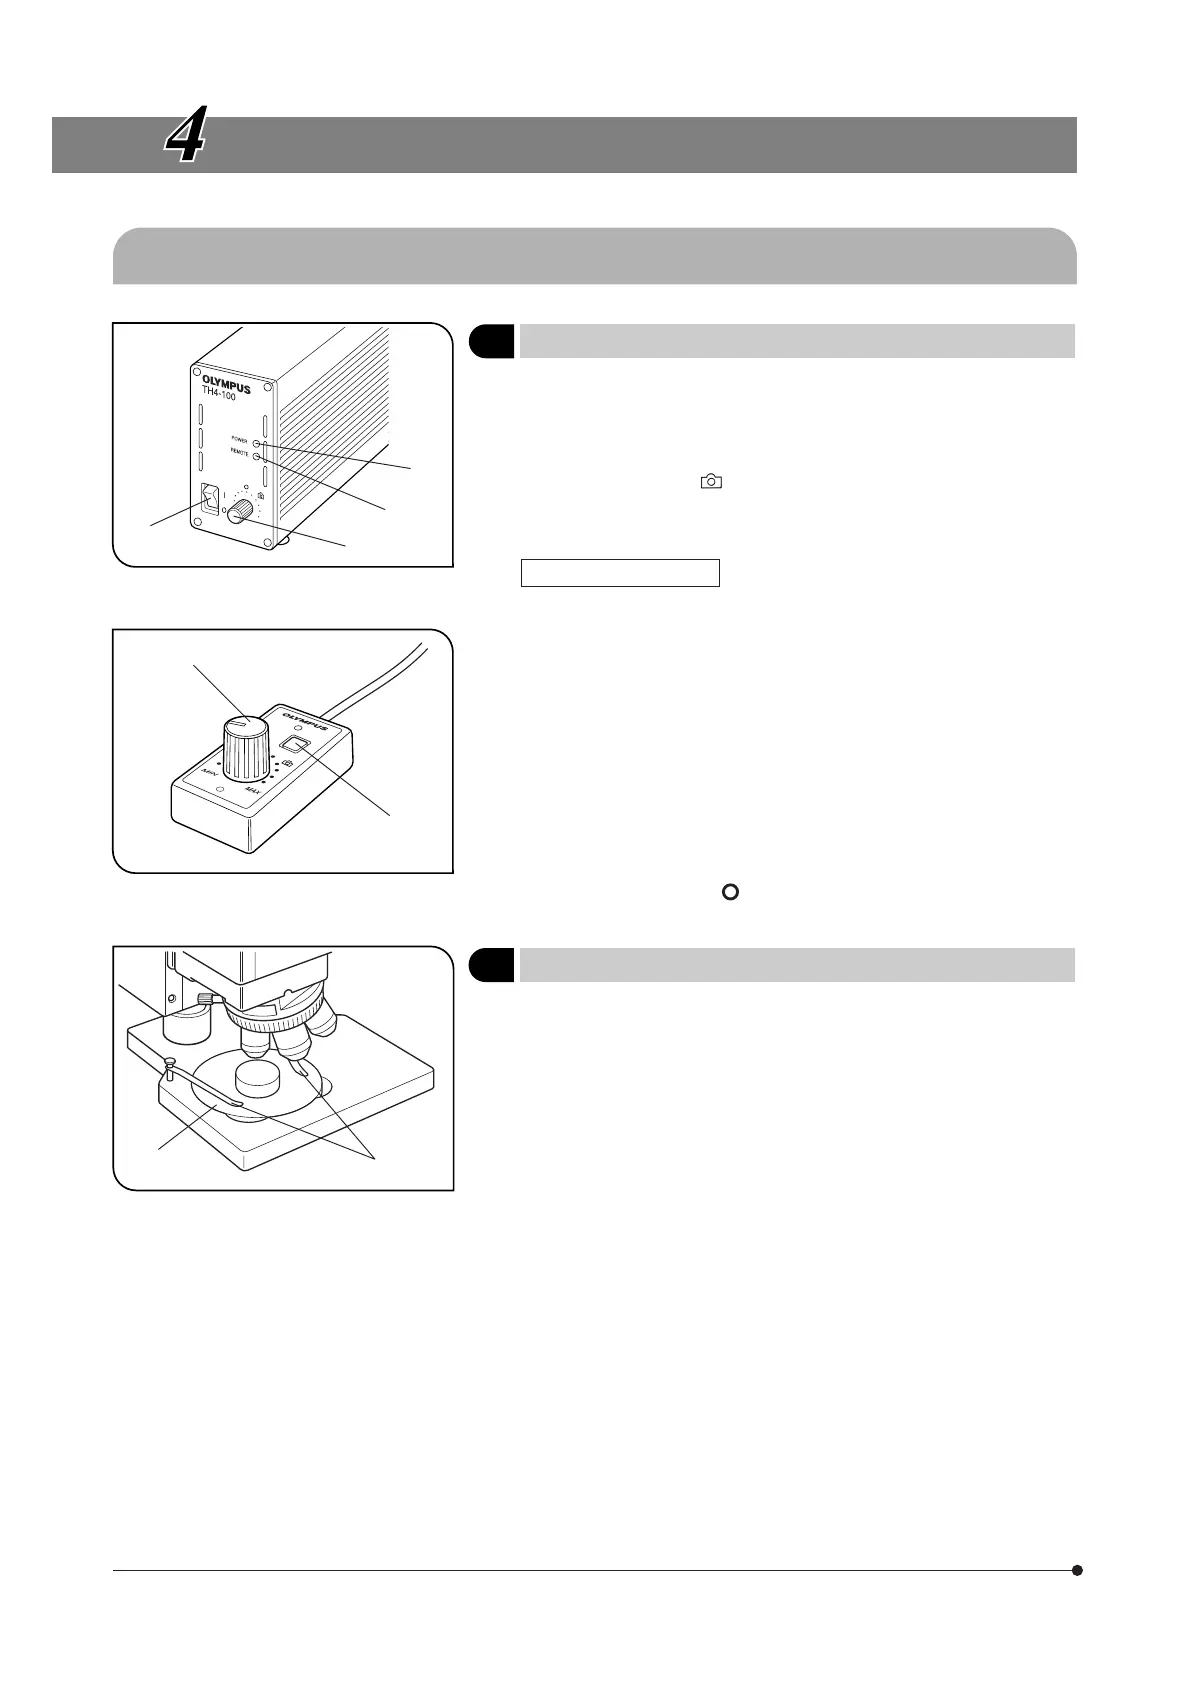
4-1 Base and Power Supply
1 Voltage Indication
(Figs. 3 & 4)
1. Ensure that the brightness control knob @ is set to MIN (lowest voltage)
then set the main switch ² to “ I ” (ON). (The POWER LED ³ lights.)
2. Turn the control knob @ toward MAX (highest voltage) to increase the
voltage intensity and brighten the illumination.
}The position marked indicates the position with which daylight suit-
able for photography can be obtained when the U-25LBD filter is en-
gaged in the light path.
Hand Switch Operation
}When the hand switch is connected, (the REMOTE LED | lights,) the
brightness control knob @ is defeated but the brightness control knob ƒ
of the hand switch is activated.
The hand switch is supplied together with double-side adhesive tape so
that the hand switch can be used in the easiest-to-use position for each
user.
1. Press the lamp ON-OFF switch … and adjust the brightness with the
control knob ƒ.
2. Press the lamp ON-OFF switch … to turn the lamp OFF.
# When the REMOTE LED | is lit, the hand switch in standby mode
and consumes about 2.5W of power.
When the unit is not to be used for an extended period of time, set
the main switch ² to “ ” (OFF).
2 Placing the Specimen
(Fig. 5)
Place the specimen on the stage plate @. If required, hold the specimen
with the specimen holder ².
}The specimen should be parallel and planar. Otherwise, the reflected
light cannot reach the objective, rendering observation impossible.
Fig. 3
Fig. 4
Fig. 5
@
²
³
|
ƒ
…
²
@
 Loading...


