16
Operation
Before Printing (Continued)
4
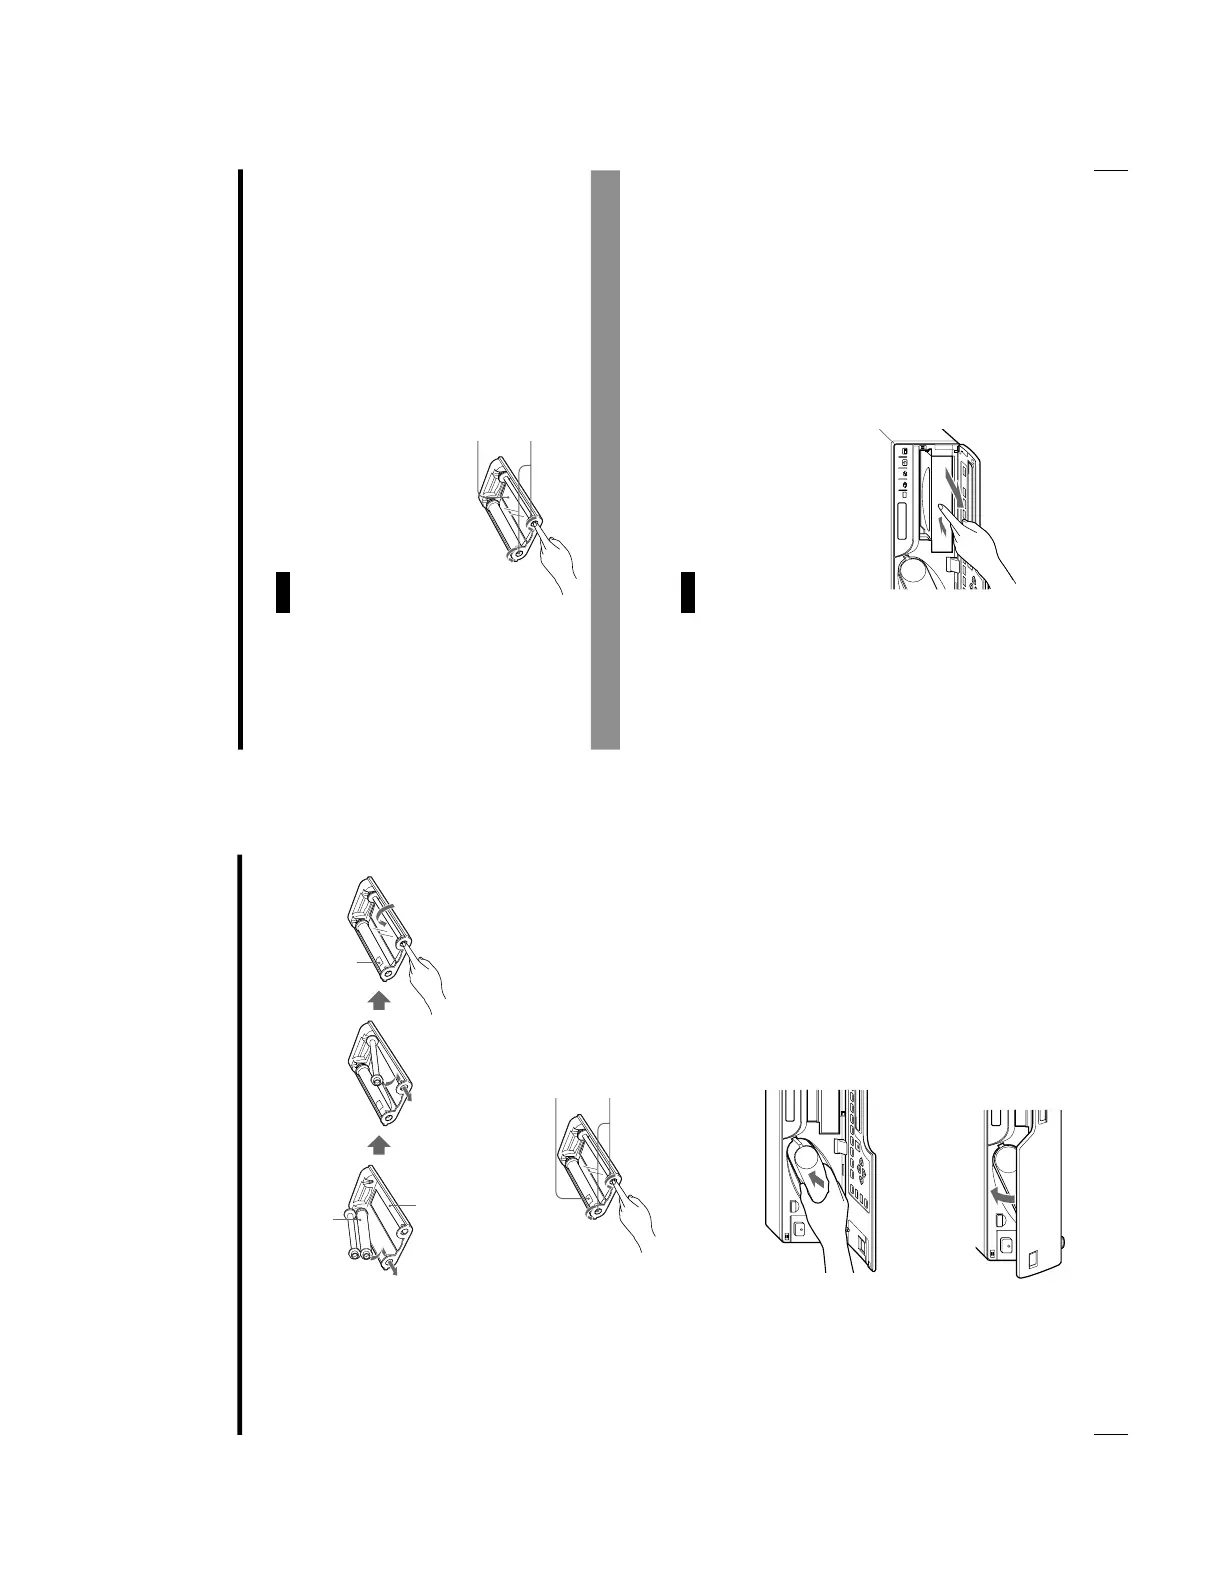
Load the new ink ribbon into the ink ribbon holder.
5
Remove any slack from the ink ribbon.
If the ribbon is left slack, it may be damaged when inserted.
6
Insert the ink ribbon cartridge firmly until it clicks.
Confirm that the ink ribbon cartridge is surely inserted.
If the ink ribbon cartridge stops midway, stop inserting it. You may use the
wrong ink ribbon holder. Be sure to use the ink ribbon holder that is designed
for this printer.
When the ink ribbon cartridge cannot be inserted
Turn the power off, then back on gain. Then, insert the ink ribbon cartridge
again.
7
Close the front panel.
Spool holding the ink ribbon
Ink ribbon
holder
Start position mark
1 Load the spool holding
the ink ribbon into the
left-hand part of the
holder.
2 Fit the other spool into
the right-hand part of the
holder.
3 Wind the spools of the ink
ribbon as illustrated until a
start position marker
appears.
Wind the spools alternately
until the start position marker
faces upward.
Start position marker
Notes
When storing ink ribbon cartridge:
• Avoid placing the ink ribbon in a location subject to:
— high temperatures
— high humidity
— excessive dust
— direct sunlight
• Store a partially used ink ribbon cartridge in its original packaging.
If your ink ribbon should tear
Repair the tear with transparent tape. There should be no problem with using the
remaining portion of the ribbon.
Loading Paper
To load paper, follow the procedure below. Be careful not to touch the printing
surface.
Notes
• You can load paper regardless of whether the power is on or off. However,
turning off the power will cause the image stored in the memory to be lost.
• Use the only paper that we recommend. Failing to do so is likely to result in
malfunctions such as paper jam.
(See “Ink Ribbon and Paper
” on page 129.)
1
Open the front panel by pulling the front panel top towards you.
2
Push the paper tray.
The paper tray pops out.
Transparent tape
Turn the spools in the direction of the arrow
to remove any slack until the transparent
tape cannot be seen.
Continue to the next page c