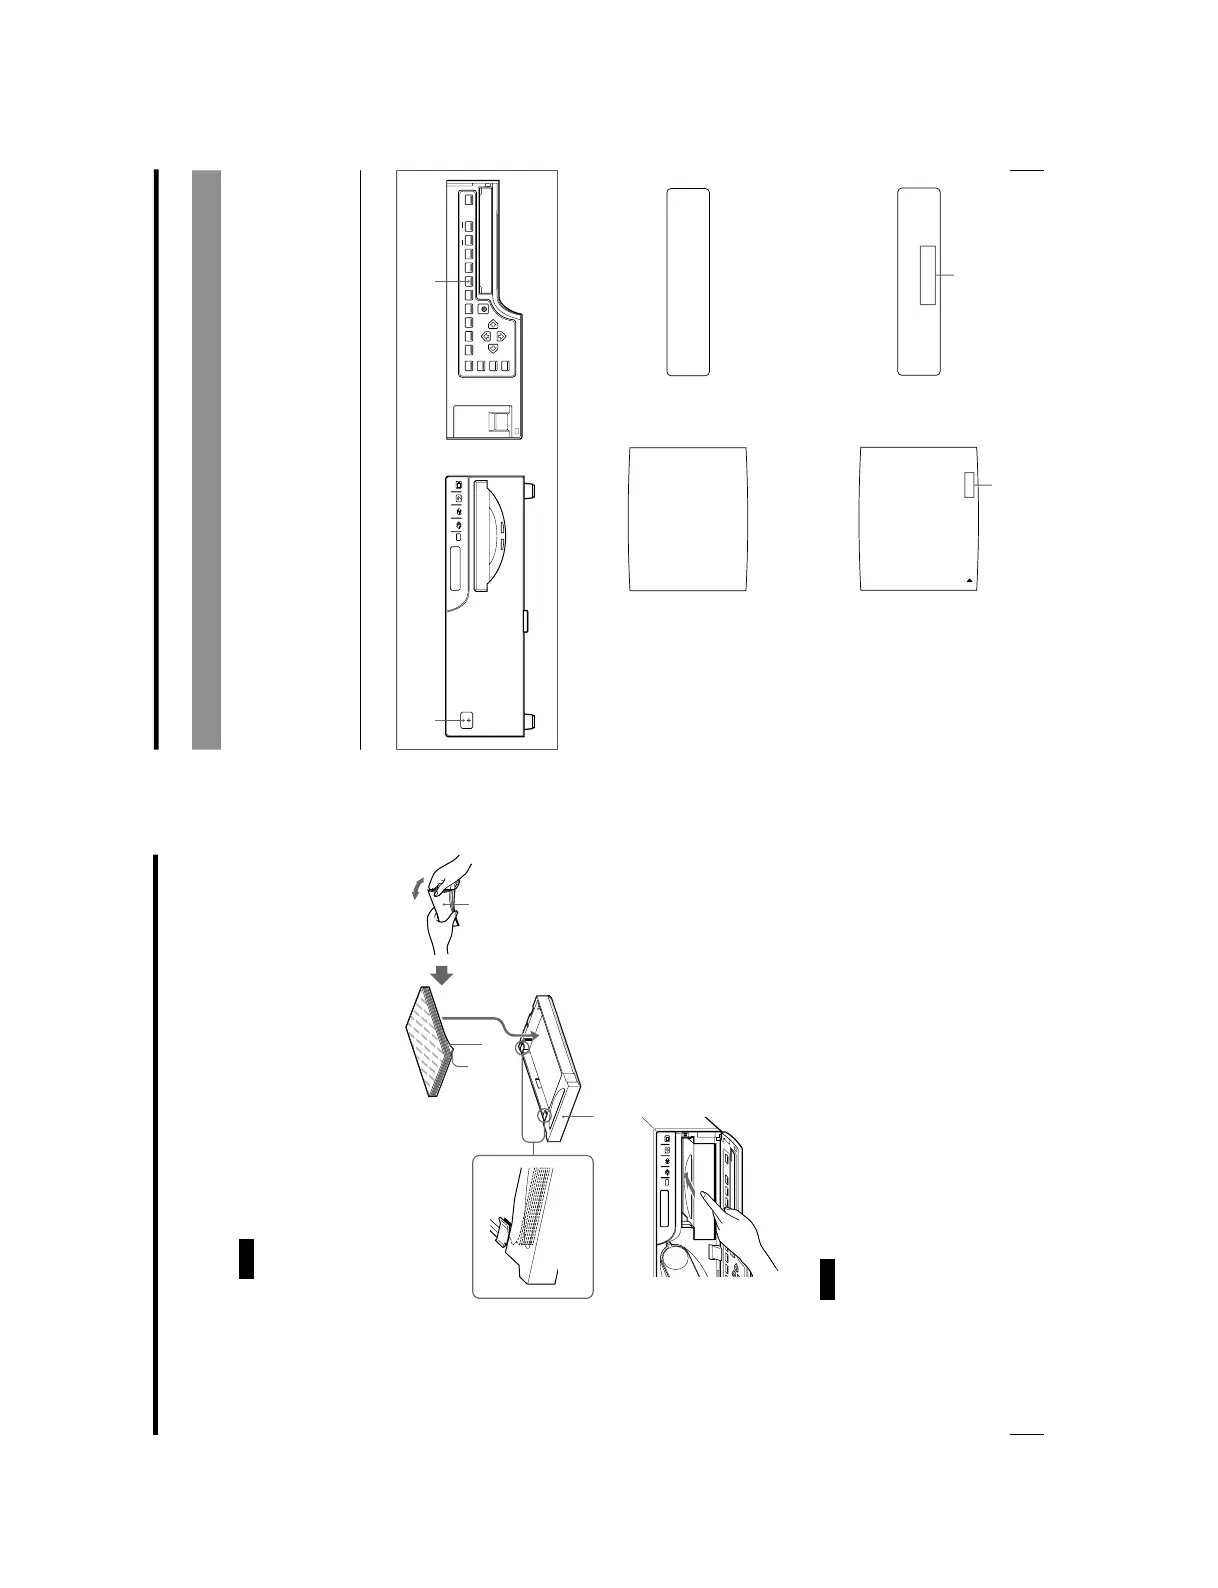
Printing
surface
Set the paper securely
under the tab.
Riffle the paper
with the
protection sheet.
Front
Protection sheet
3
Place the paper in the paper tray so that the printing surface faces down with
the protection sheet.
Notes
• The paper tray holds up to about 100 sheets of paper. When adding paper to a
partly full tray, be careful that the total number of sheets does not exceed the
limit. If you exceed this limit, paper jams may occur.
• Load the paper so that it lays flat in the paper tray. If the paper is curled, it
will overflow from the paper tray and the paper may not be fed properly. Be
sure to riffle the paper with the protection sheets before attempting to place
the paper in the paper tray. If the printing position shifts, load fewer sheets in
the paper tray.
• Do not place different types of paper in the tray.
4
Slide the paper tray back into the printer until it clicks into place.
5
Close the front panel.
Notes
When handling the paper
Do not touch the printing surface. Dust or finger prints are likely to cause
unsatisfactory printing or malfunction of the head. Hold the paper by the printing
surface protection sheet.
When storing the paper
• Avoid storing the paper in a location subject to:
— high temperatures
— high humidity
— excessive dust
— direct sunlight
• Use the original package for storing unused paper.
Place the paper in the
paper tray with the
printing surface facing
down.
Selecting the Input Signal
Before printing, select the input signal (the input connector to which the signal to
be printed is being input)
—VIDEO, S-VIDEO, or RGB. Once you have selected
the input signal, this setting remains effective until you select another source.
The following two methods are available to select the input signal:
• Using the INPUT SELECT button
• Using the menu
Selecting the input signal by using the INPUT SELECT button
1
Turn on the video monitor and the printer.
The following appears once the printer is ready to operate.
2
Press the INPUT SELECT button.
The currently selected input signal appears. The selected signal is lit in green
on the video monitor screen and spelled out in the printer window display.
If you do not perform any operation after you press the INPUT SELECT
button, the currently set item appears for about 3 seconds, after which it
disappears.
1
2,3
Video monitor screen
Printer window display
The currently selected input signal
is lit in green and is spelled out.
The currently selected input
signal is spelled out.
Continue to the next page c