4 Installation Step 3: Selecting the camera driver
15
You can connect the camera to the microscope and PC as soon as you've installed
the software. Do the following:
1) Remove the SC100's protective cap.
2) Screw the camera onto the microscope's camera adaptor.
3) Plug the end of the USB cable with the type B plug into the camera socket.
4) Plug the end of the camera's USB cable with the type A plug into a free USB
socket of your PC. Please note that it has to be a USB 2.0 socket. If you are
not certain, try all suitable sockets, also located on your PC's back side, until
the camera is recognized and the hardware wizard starts.
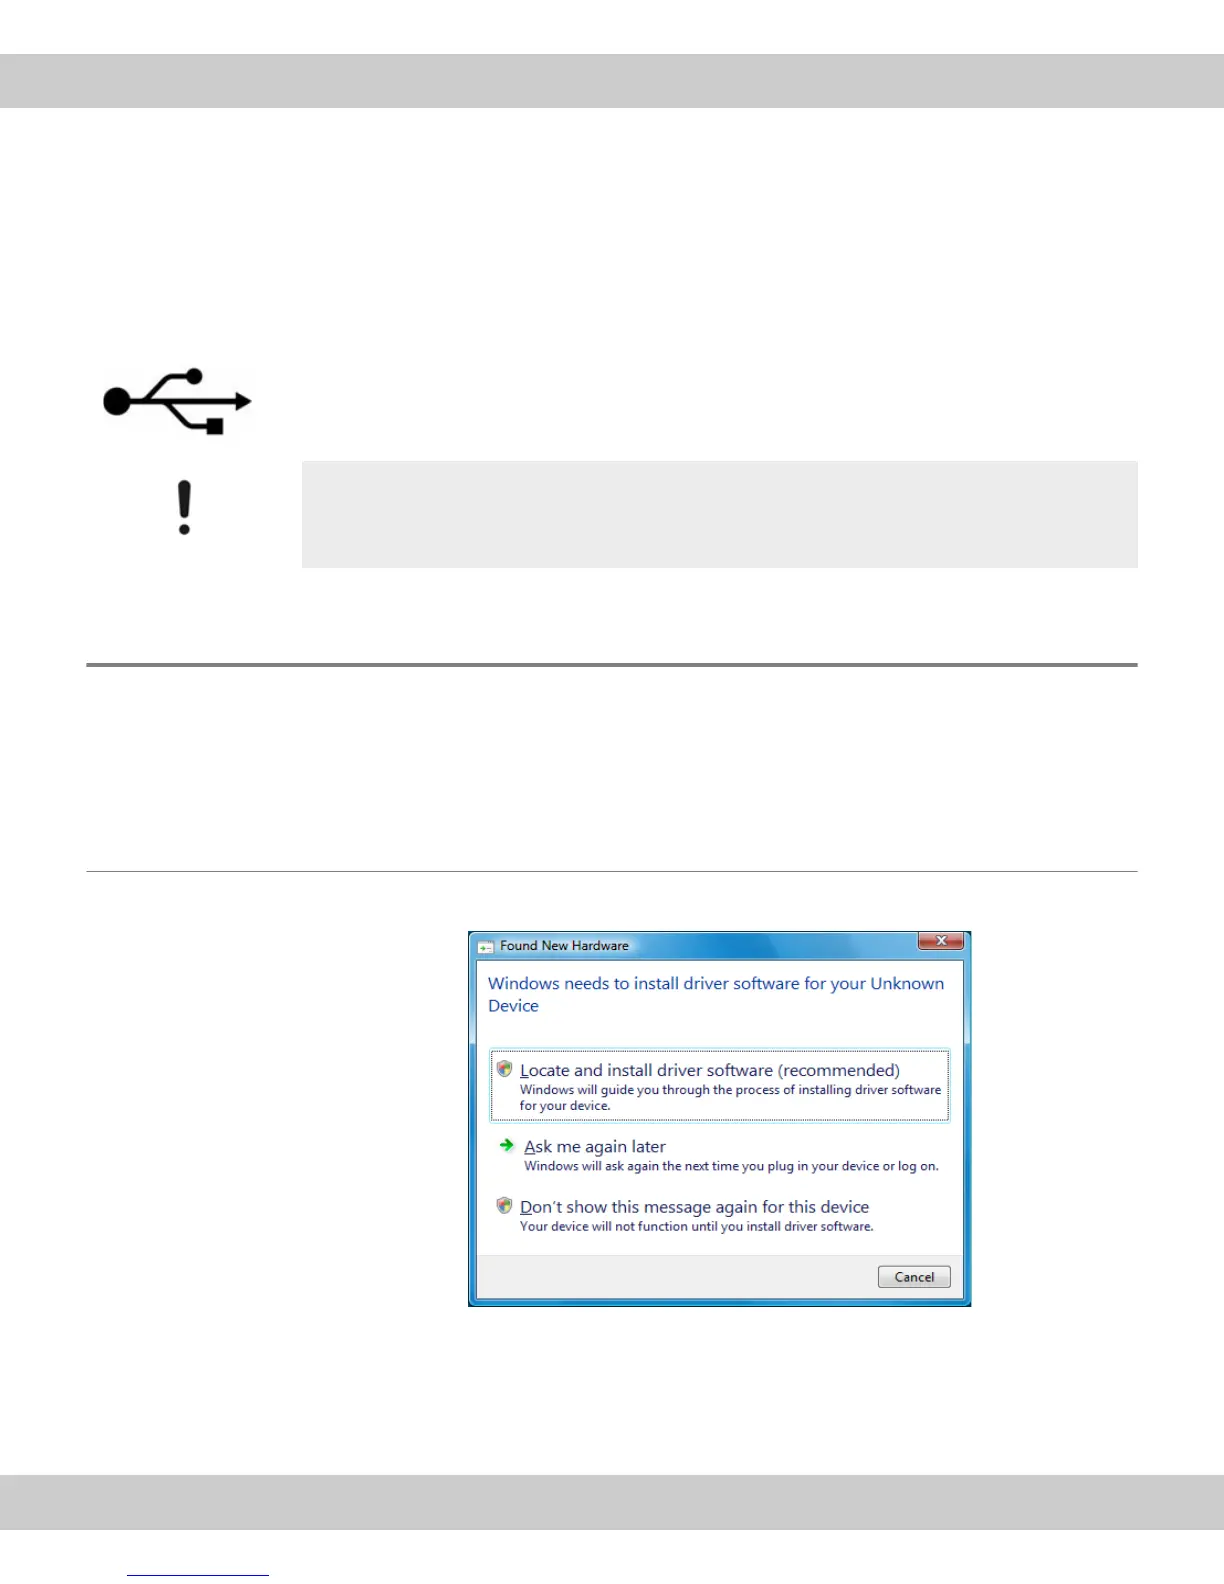
4.3 Step 3: Selecting the camera driver
When you've finished connecting the camera to your PC, the operating system auto-
matically starts the Found New Hardware Wizard. There are different procedures for
the installation of the camera driver, depending on which operation system you use.
Simply follow the instructions for your operating system.
4.3.1 Operating system MS-Windows Vista
1) Click the Locate and install driver software (recommended) entry.
MS-Windows Vista asks for permission to activate the device driver.
2) Confirm this by clicking the Next > button.
Make sure that the plug is the right way round
The USB plugs are not symmetrical. Make sure that the plugs are the right way
round, when you plug them into the corresponding camera ports.