Page7
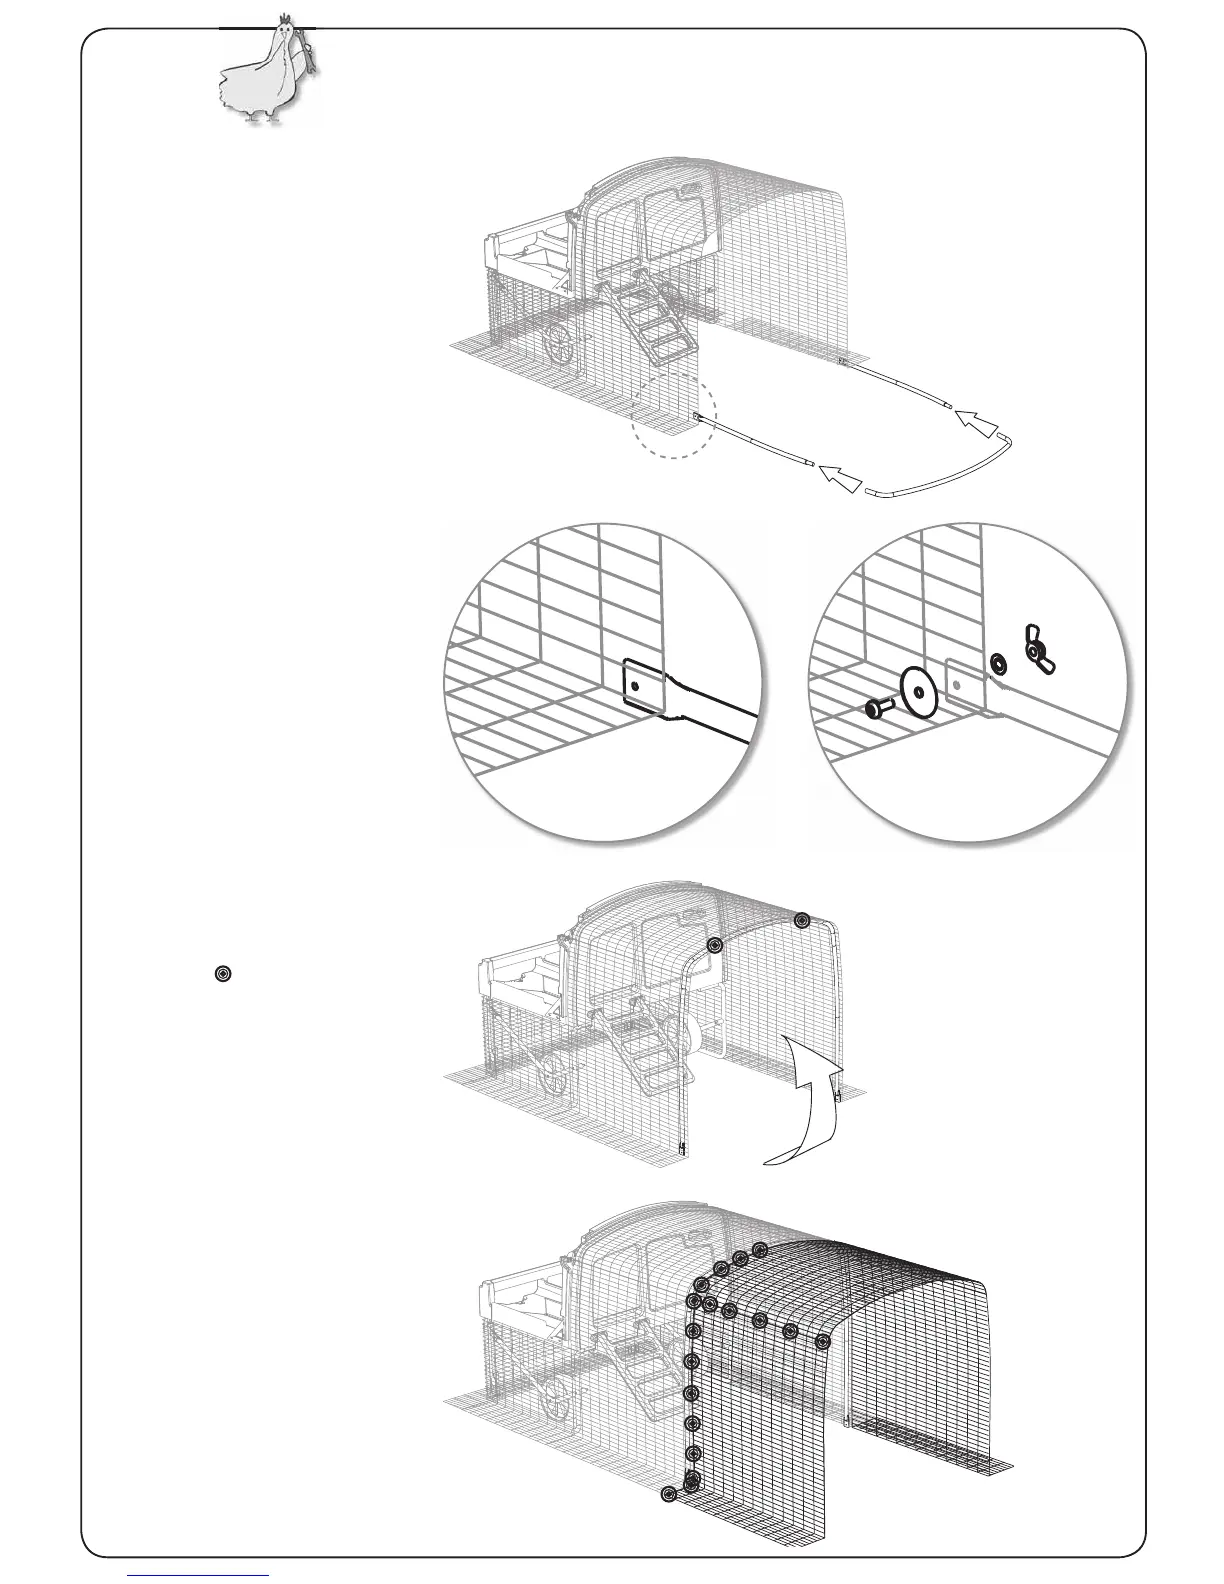
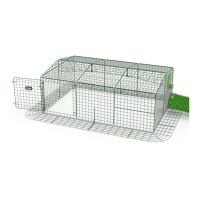
Lay the Frame sections on the
ground infront of the eglu. The
curved section of the Frame simply
slides onto the two side pieces.
Line up the frame with the run
making sure that the fl at sides
of the tube ends are against the
inside of the run.
Also ensure that the hole in the
tube is half way along the fi rst
recatangle in the mesh.
Swing the Frame into a vertical
position. Secure the Frame in place
using two zip ties in the positions
shown by a
To ensure the frame does not
change position ensure the
wingnuts are nice and tight.
Attach both ends of the frame
loosely to the run using the
following: Small Bolt, Large Washer,
Serrated Washer and Wingnut.
Special Steps - How to attach an Extension
If you do not have an extension goto step 12
Step A - Connect the Run Frame together
Step B - Attach the Frame to the Run
Step C - Swing the Frame into position
You can now clip the Large Side
Panels and Roof Panel sections of
your extension, putting the clips in
the positions shown.
Go to Step 12
Step D - Attach Extension Panels