21
8 IO-Link Master Unit Communications Setup
8
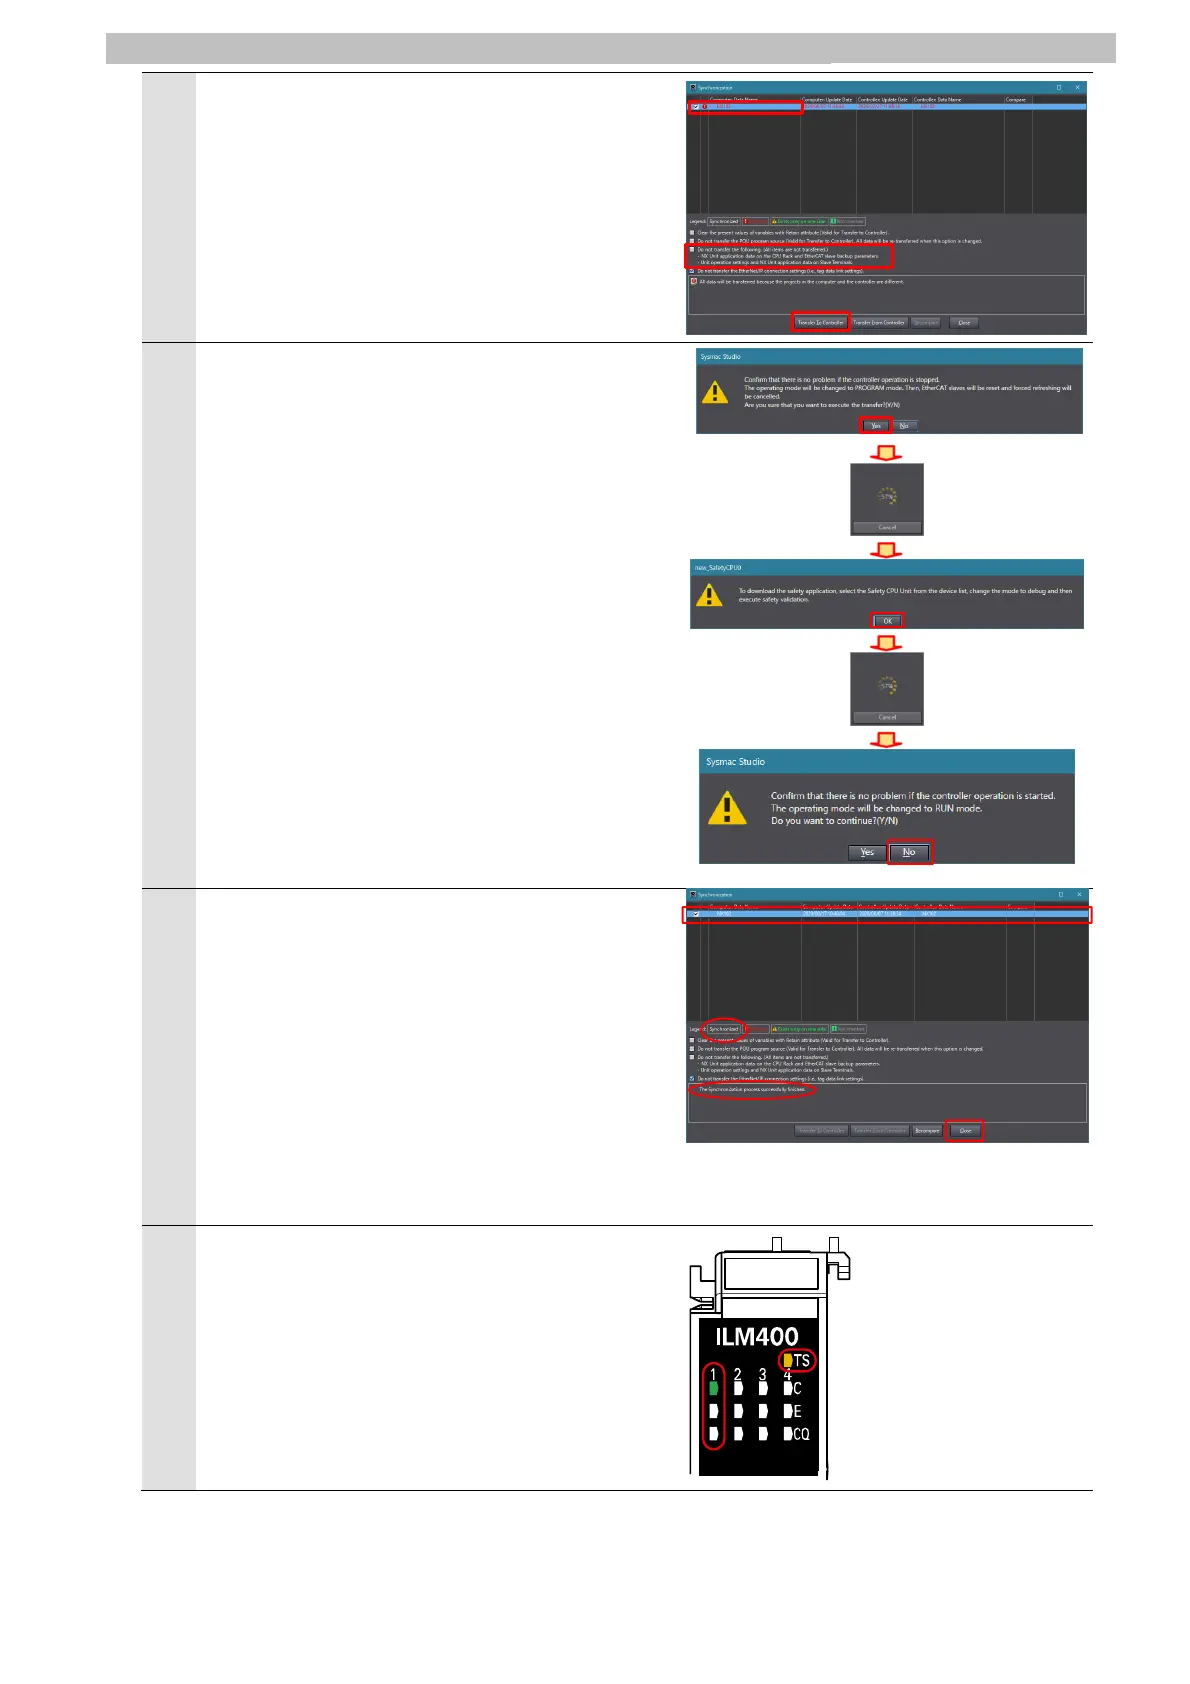
The Synchronization dialog box is displayed.
Make sure that the check box of the data to transfer
(in the figure on the right, NX102) is selected.
Clear the Do not transfer the following. (All items
are not transferred.) check box, and click Transfer
to Controller.
Note: When Transfer to Controller is executed,
Sysmac Studio data is transferred to the
controller and data is synchronized.
9
The dialog box on the right is displayed. Confirm that
there are no problems, and click Yes.
The synchronization in progress window is
displayed.
The dialog box on the right is displayed. Confirm that
there are no problems, and click OK.
The synchronization in progress window is
displayed.
The dialog box on the right is displayed. Confirm that
there are no problems, and click No.
Note: Do not return the mode to Run Mode....
10
Make sure that the color of the text of the
synchronized data is the same color as the text at
Synchronized displayed in the legend at the right,
that the message The Synchronization process
successfully finished. is displayed, and click
Close.
Note: That the color of the text of the synchronized
data is the same color as the text at
Synchronized indicates that Sysmac Studio
project data matches the data on the
controller.
Note: If synchronization fails, check the wiring, and
repeat the procedure from Step 1.
11
Check that the IO-Link Master Unit is ready for
communication by the following LED indications:
TS : Lit yellow
1-C : Lit green
1-E : Not lit
C/Q : Not lit
 Loading...