4. Press the M button to mark the test as a control solution test. Once
the M button is pressed, the control solution symbol will appear on
the display.
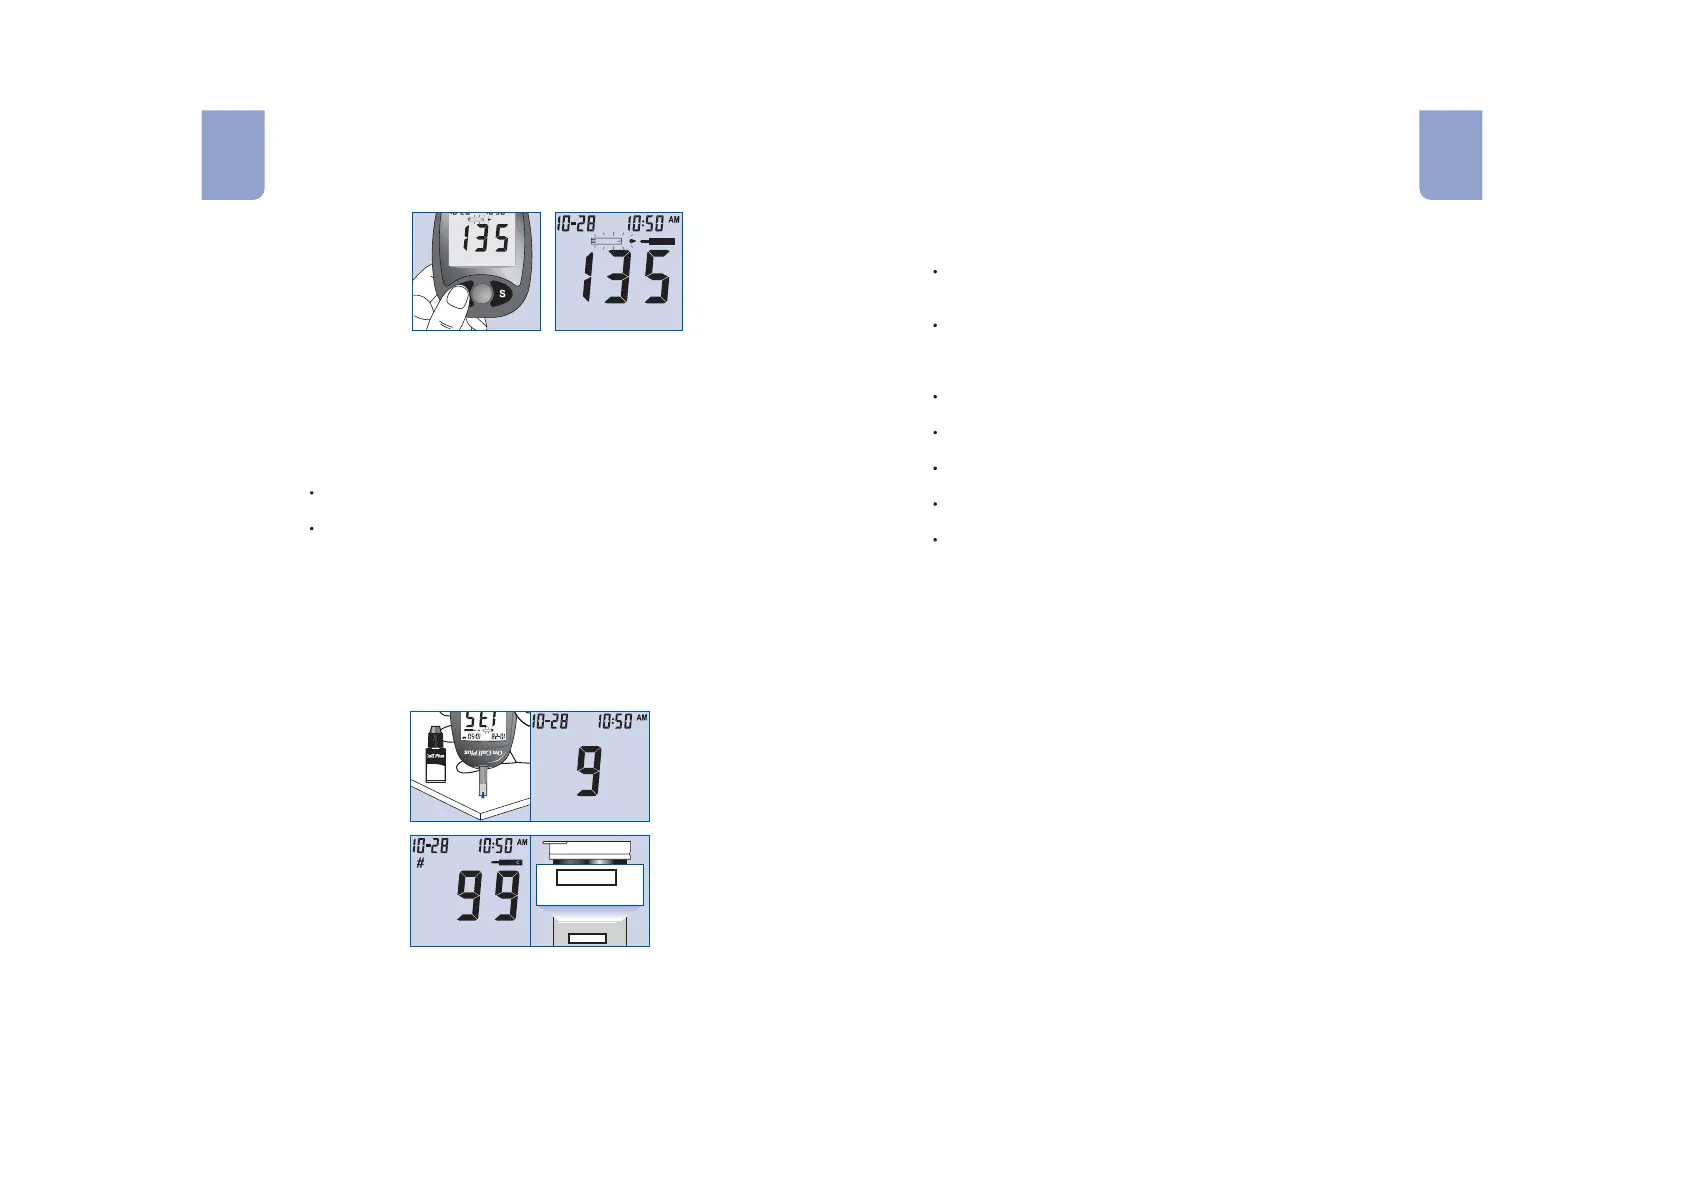
5. Shake the control solution bottle well, then squeeze it gently and
discard the first drop. If the tip clogs, tap the tip gently on a clean,
hard surface, shake again, and then use. Squeeze out a second
small drop on a clean nonabsorbent surface. Touch the sample tip
of the test strip to the control solution drop. If the audio option is
turned on, the meter will beep to indicate a sufficient sample has
been applied.
Notes:
Do not apply control solution to the test strip directly from the
bottle.
If the control solution sample does not fill the check window, do
not add a second drop. Discard the test strip and start over with
a new test strip.
6. Once sufficient sample has been applied, the meter display will
count down from 9 to 1 and then display the result. The control
solution test results should be within the control range (CTRL1)
printed on the test strip vial (or on the foil pouch). This means that
your blood glucose monitoring system is working properly and that
you are performing the procedure correctly.
Test results are displayed either in mmol/L or mg/dL depending on the
unit of measure most common in your country. The meter will be set to
mg/dL by default when sold in the United States.
mg
dL
l
CTRL 2
CTRL 2
mg/dL
81-121
mg/dL
81-121
7. Remove and discard the test strip.
The display should also show a pound sign (#) indicating the test is
a control solution test. This shows that the number will not be
counted in the 7, 14 and 30-day averages. The pound sign (#) will
also be displayed when reviewing the results stored in memory.
If the result falls outside the indicated control range:
Confirm you are matching the correct range. Control Solution 1
results should be matched to the CTRL 1 range printed on the
test strip vial (or on the foil pouch).
Check the expiration date of the test strip and control solution.
Make sure that the test strip vial and control solution bottle have
not been opened for more than 3 months. Discard any test
strips or control solution that has expired.
Make sure that the test strip vial and control solution bottle have
been tightly capped.
Make sure code number on the strip vial label or on the foil
pouch matches the code number appears on the meter display.
Confirm that you are using the same brand of control solution
that was provided with your kit.
Make sure that you followed the test procedure correctly.
After checking all of the conditions listed above, repeat the quality
control test with a new test strip. If your results still fall outside of the
control range shown on the test strip vial (or on the foil pouch), your
meter may be defective. Please contact Customer Support at 1-800-
838-9502 for help.
Two levels of control solution are available labeled Control Solution 1
and Control Solution 2. Control Solution 1 is sufficient for most all self-
testing needs. If you think your meter or strips may not be working
correctly, you may also want to do a level 2 test. The ranges for both
(CTRL 1 and CTRL 2) are displayed on the test strip vial (or on the foil
pouch). Simply repeat step 4 through 6, using Control Solution 2.
For confirmation of results, Control Solution 1 tests should fall within the
CTRL 1 range, and Control Solution 2 tests should fall within the CTRL
2 range. If the control solution test results do not fall within the
respective ranges, DO NOT use the system to test blood, as the system
may not be working properly. If you cannot fix the problem, please
contact Customer Support at 1-800-838-9502 for help.
Please contact Customer Support at 1-800-838-9502 for more
information on obtaining the control solution kit, which
contains Control Solution 1 and Control Solution 2.
Confirm the temperature in which you are testing is between
.
59
and 104 F (15-40 C)
oo
On Call Plus
®
15 16
En En
CODE
CODE
Control Solution
ión de Control
diagnostic use onl
-86 F
O
NLaboratories,Inc.
125MesaRim Road,
Diego,CA92121, USA
rSupport:1-800-838-9502
G123-311