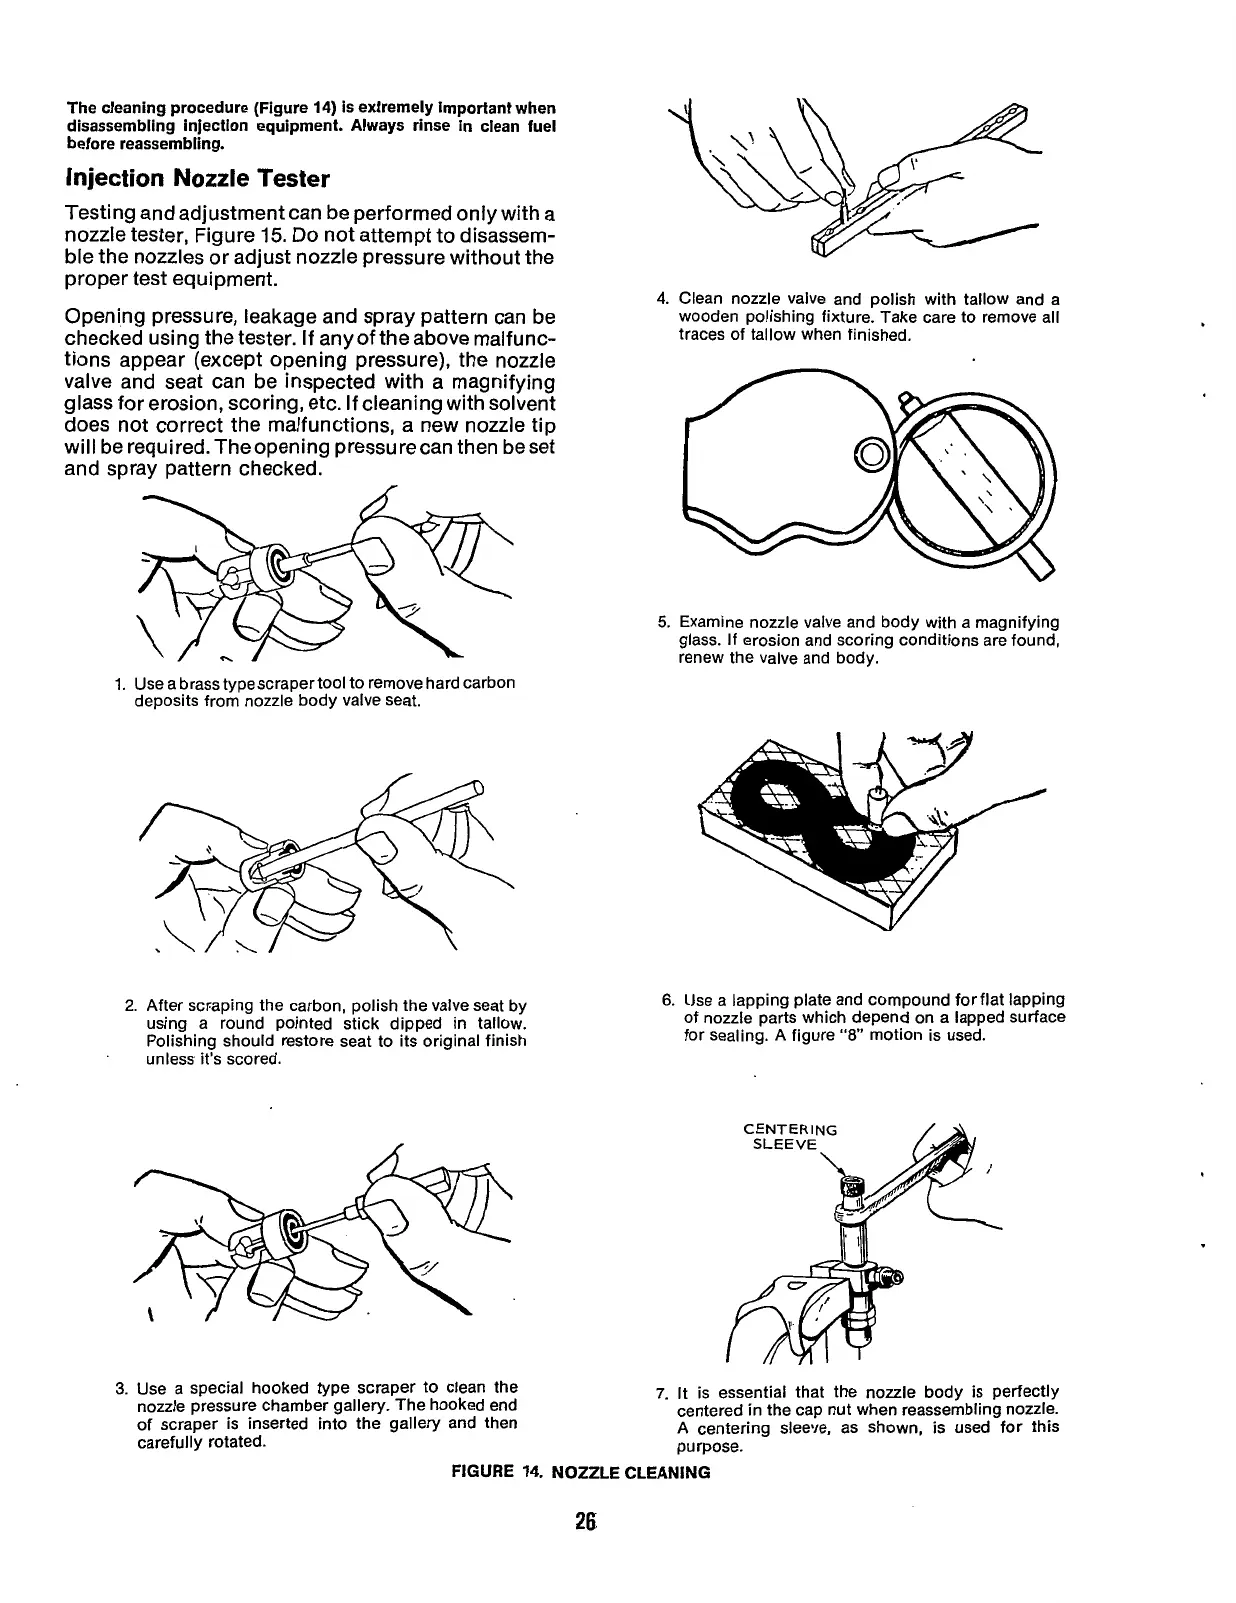
The cleaning procedure (Figure
14)
is extremely Important when
disassembling injection equipment. Always rinse
in
clean fuel
before reassembling.
Injection Nozzle Tester
Testing and adjustment can be performed only with a
nozzle tester, Figure
15.
Do
not attempt to disassem-
ble the nozzles or adjust nozzle pressure without the
proper test equipment.
Opening pressure, leakage and spray pattern can be
checked using the tester. If any of the above malfunc-
tions appear (except opening pressure), the nozzle
valve and seat can be inspected with a magnifying
glass for erosion, scoring, etc. If cleaning with solvent
does not correct the malfunctions, a new nozzle tip
will be required. Theopening pressure can then beset
and spray pattern checked.
1.
Use a brass type scraper tool to remove hard carbon
deposits from nozzle body valve seat.
2.
After scraping the carbon, polish the valve seat by
using a round pointed stick dipped in tallow.
Polishing should restore seat to its original finish
unless it’s scored.
4.
Clean nozzle valve and polish with tallow and a
wooden polishing fixture. Take care to remove all
traces of tallow when finished.
5.
Examine nozzle valve and body with a magnifying
glass.
If
erosion and scoring conditions are found,
renew the valve and body.
6.
Use a lapping plate and compound for flat lapping
of nozzle parts which depend on a lapped surface
for sealing. A figure
“8”
motion is used.
3.
Use a special hooked type scraper to clean the
nozzle pressure chamber gallery. The hooked end
of scraper is inserted into the gallery and then
carefully rotated.
7.
It is essential that the nozzle body is perfectly
centered in the cap nut when reassembling nozzle.
A
centering sleere, as shown, is used for !his
purpose.
FIGURE
14.
NOZZLE CLEANING
26
Redistribution or publication of this document,
by any means, is strictly prohibited.