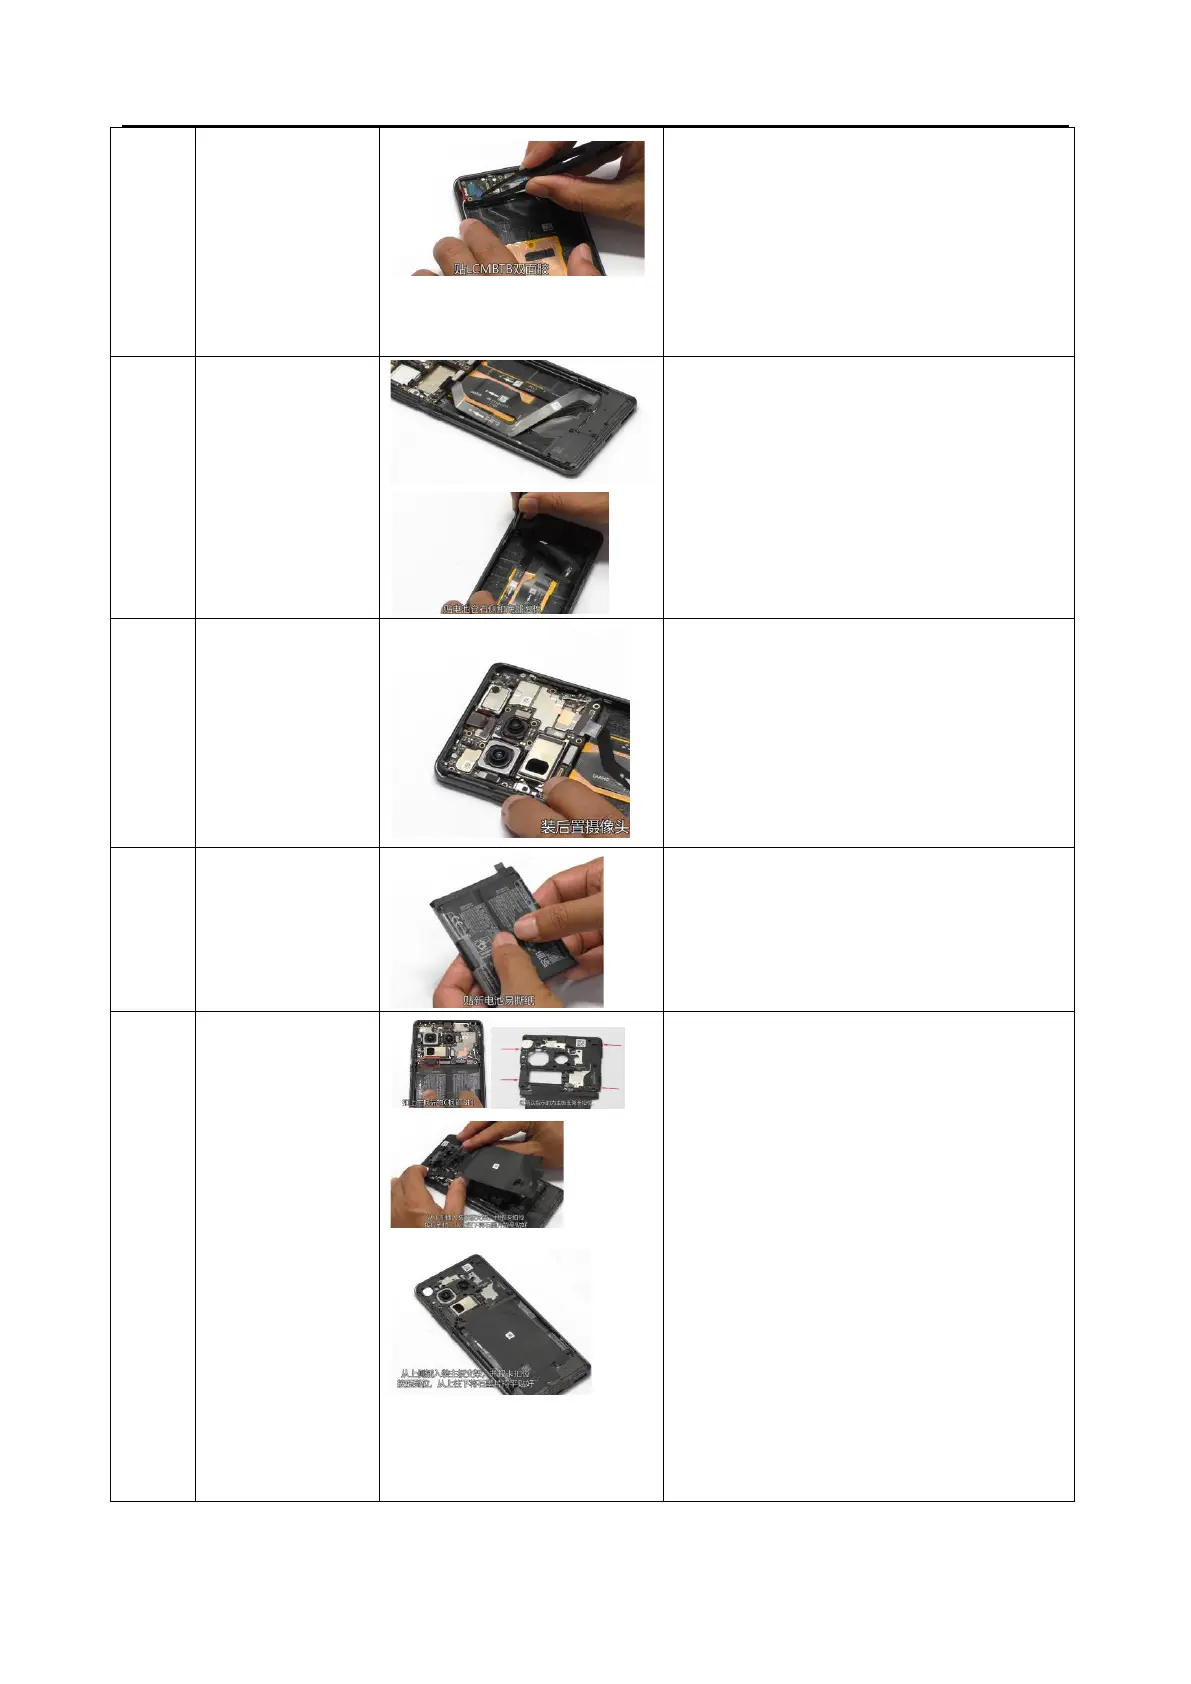
1. Install the L board and apply LCMBTB double-
sided adhesive on the small board;
2. Install U-board and C-board;
3. Secure the BTB;
4. Buckle the RF cable at the small board end and
incorporate the RF cable into the cable tray;
5. Install the small board bracket
1. Install the speaker BOX bracket and lock the
screws with 8Pcs;
2. Apply RF wire foam;
3. Stick foam at the bottom of the battery
compartment;
4. Stick foam on the top of the battery
compartment.
Stick the battery easy to tear sticker, fasten the
battery BTB buckle and press it firmly;
1. Install the C board
2. Install the main board bracket, insert it from
the top side, press it from top to bottom
according to the buckle position, and use your
hand to smooth out the graphite sheet from
top to bottom.
3. Install the screws 20PCS.
Remark:
① Check if the conductive cloth of the camera is
intact
② Check if the conductive foam on the wide-angle
BTB clamping steel plate of the antenna bracket is
intact
③ If disassembling the camera is involved, check if
the conductive cloth on the middle frame is intact