17
Basic operation
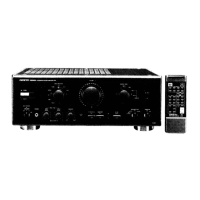
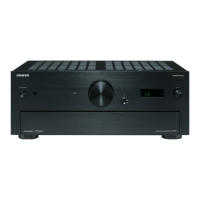
DIGITAL AUDIO
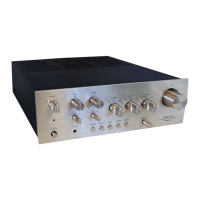
SELECTOR
SMART SCAN CONTROLLER
ENTER
SURROUND
PARAMETER
3-D BASS
MAIN
REMOTE
SPEAKERS
REC OUT
MULTI SOURCE
Re-EQ
MIDNIGHT
THEATER
C DPHONOTUNERTAPE-2
MONITOR
TAPE-1
M D
VIDEO-2
VCR-2/TV
VIDEO-1
VCR-1
DVDINPUT
SELECTOR ®
MULTI-CH
INPUT
MASTER VOLUME
TREBLEBASS
AUDIO VIDEO CONTROL AMPLIFIER
A-DS650
MAXMIN
SYSTEM
POWER
ON
PHONES
STAND-BY
OFF
MULTIPLE SOURCE
REMOTE SYSTEM
HIGH DEFINITION
Re-EQ
TM
DOLBY SURROUND
PRO
•
LOGIC
MULTI-CH
INPUT
SOURCE
SELECTOR
VOLUME
π/†
SPEAKERS MAIN
MASTER
VOLUME
3-D BASS
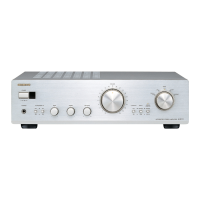
DIGITAL AUDIO SELECTOR
Input selector
BASS
TREBLE
MULTI-CH INPUT
POWER
SLEEP
DVD
VIDEO-1
VIDEO-2
TAPE-1 TUNER PHONO C D
SOURCE SELECTOR
DVD
SUBTITLE
ON/OFF
PAUSE
/STEP
DISC
GROUP
VOLUME
TAPE
DIMMER
TAPE-2
POWER
POWER
VOLUME
C H
TV/VCR
MUTING
/REMOTE
SPEAKER
LEVEL
REMOTE CONTROLLER
CH SEL
TEST
TONE
SENDING/
LEARNING
LEARN
SUBROOM
PRESET
AB
PROGRAMMABLE AREA TV/VIDEO
TUNER
CD
MULTI-CH
INPUT
RC-374M
SUR
MODE
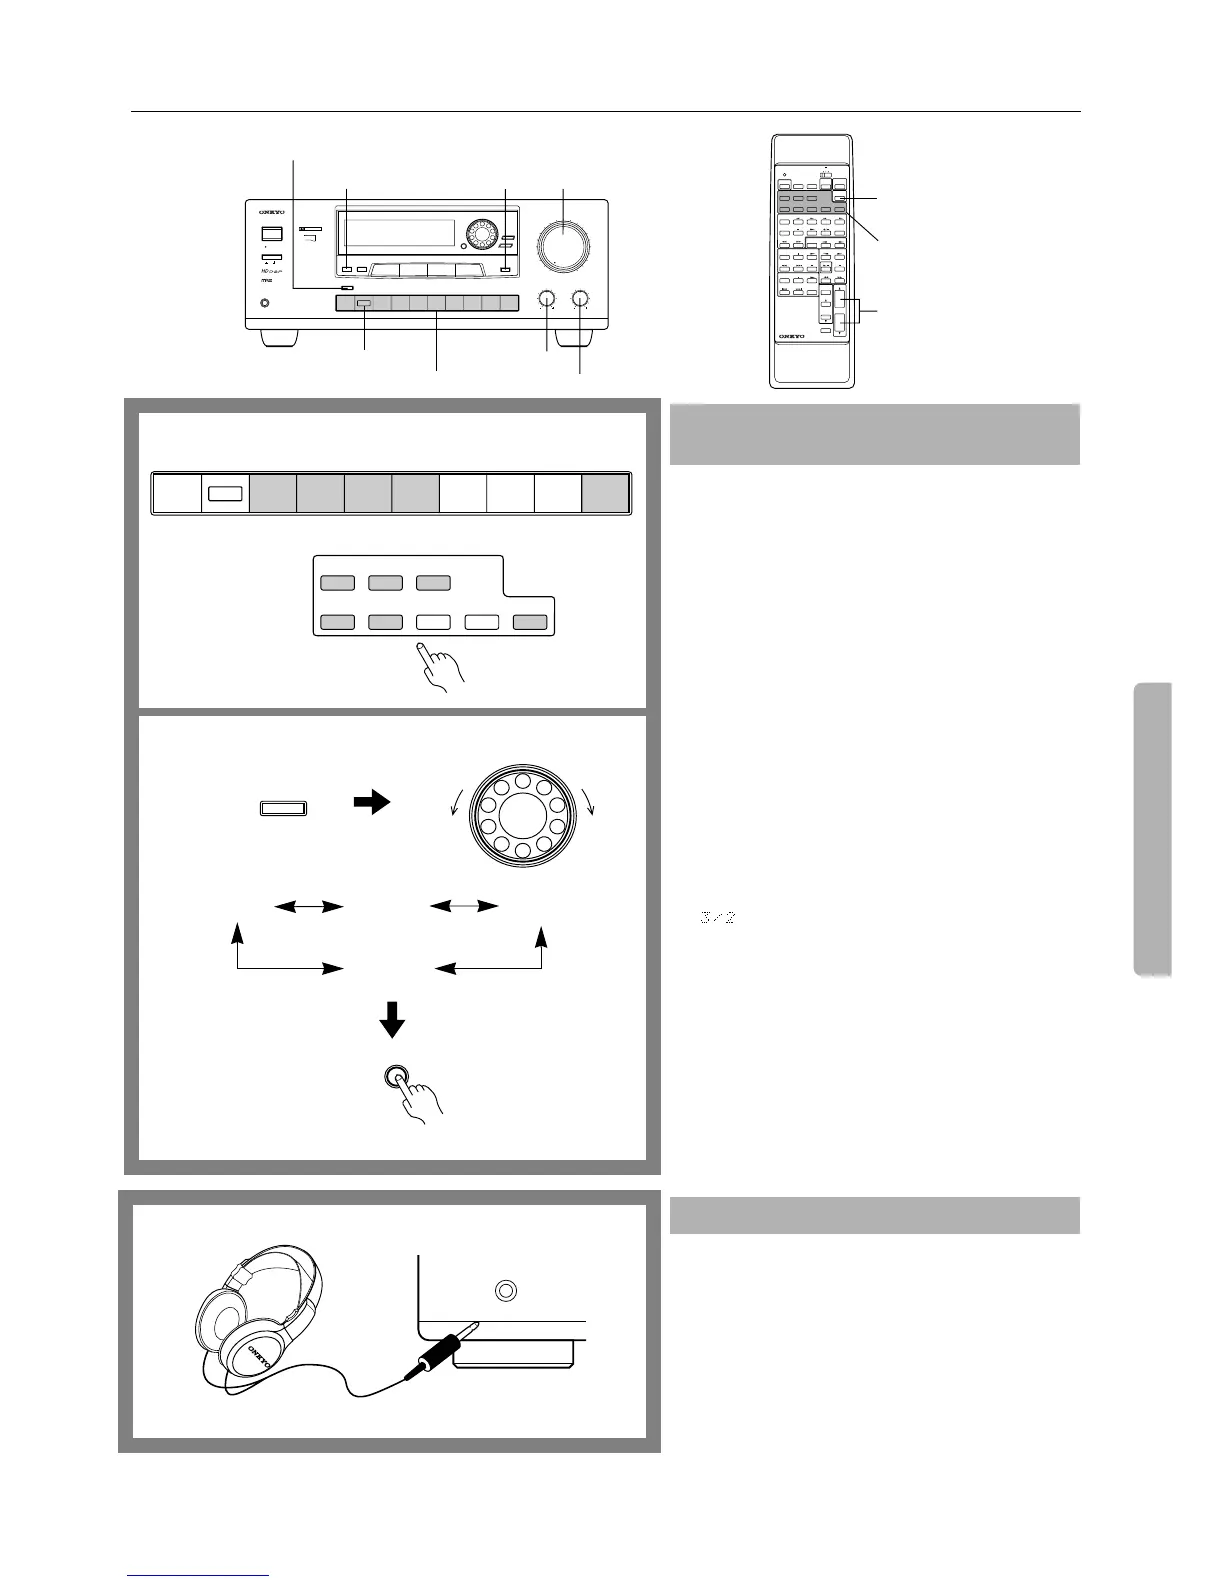
1. Press an input selector button (other than the TAPE-2
MONITOR, MULTI-CH INPUT, TUNER, or
PHONO button).
2. Press the DIGITAL AUDIO SELECTOR button.
The current selection appears on the display. (See the
illustration on the left for the options.)
3. Turn the SMART SCAN CONTROLLER until the
number of the digital input appears, then press the
ENTER button.
4. With the assignment complete, press the input selector
button to automatically select the digital input.
To cancel a digital input assignment, press the corresponding
input selector button, then press the DIGITAL AUDIO
SELECTOR button. Turn the SMART SCAN CONTROL-
LER to select ANALOG, then press the ENTER button.
•
Even when the digital inputs are used, the analog connect-
ing cables must be left in place. Otherwise, the multi-room
remote system, TAPE OUT, and REC OUTs will not work.
(See page 8.)
•
When a Dolby Digital source is played, for example
“ ”, appears on the display, indicating which of the
three front channels and two surround channels are avail-
able for sound reproduction.
Warning:
•
Do not play CD-ROM discs that contain computer data as
they may cause speaker damage when amplified by the
amplifier.
•
The multi-room remote system, TAPE-1 and TAPE-2
REC OUTs can output signals from analog sources, but
not from digital sources. If your DVD player or a compo-
nent equipped with digital output has both analog and
digital outputs, connect both of them so that you can lis-
ten to and record both signals at the same time.
You can connect stereo headphones to the PHONES jack
using a standard stereo plug.
If you connect headphones, the unit will enter STEREO
mode will be entered automatically, and no sound will be
poduced from the speakers. If you have selected MULTI-CH
INPUT, you will hear only the audio from FRONT L and R
of MULTI-CH INPUT.
Assigning the digital inputs to input selec-
tor buttons:
Listening with headphones
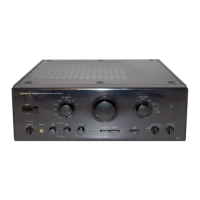
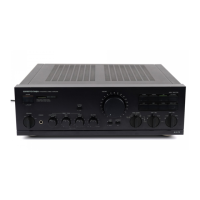
C DPHONOTUNERTAPE-2
MONITOR
TAPE-1
M D
VIDEO-2
VCR-2/TV
VIDEO-1
VCR-1
DVDINPUT
SELECTOR ®
MULTI-CH
INPUT
DVD
VIDEO-1
VIDEO-2
TAPE-1 TUNER PHONO C D
SOURCE SELECTOR
TAPE-2
DIGITAL AUDIO
SELECTOR
SMART SCAN CONTROLLER
ENTER
1
2, 3
Remote controller
ANALOG
DIGITAL-1
(OPTICAL)
DIGITAL-2
(COAXIAL)
DIGITAL-3
(COAXIAL)
ch
PHONES
 Loading...