Do you have a question about the Onkyo TX-DS676 and is the answer not in the manual?
Information regarding compliance with FCC rules for digital devices and potential interference.
Cautionary notes for the Canadian model regarding radio noise emission regulations.
Statement declaring compliance with relevant technical standards for the ONKYO product.
Lists and illustrates the accessories included with the unit for setup and operation.
Explains the unit's memory back-up system for preserving settings during power failures.
Details the rigorous quality and performance tests required for THX Select certification.
Instructions for setting the AM band tuning steps based on regional frequency standards.
Guidance on selecting the correct voltage for the unit based on the local power supply.
Step-by-step instructions for inserting batteries into the remote controller.
Guidelines for operating the remote controller and its sensor for proper functionality.
Details on connecting digital audio sources like CD players, MD recorders, and DAT decks.
Information on connecting digital recorders using the optical digital output.
Guidance for connecting turntables with moving magnet cartridges and grounding.
Details on connecting other audio devices to the receiver's switched AC outlets.
How to connect Onkyo components with RI connectors for remote control operation.
Instructions for connecting digital audio sources like DVD players and CD players for optimal sound.
Recommendations for ideal placement of front, surround speakers, and subwoofer for optimal sound.
Instructions for connecting a subwoofer with or without a built-in amplifier.
Details on connecting antenna cables to the 75/300 ohm adapter for North American and European models.
Advice on using a directional linkage type splitter for common FM/TV antennas.
Instructions for assembling the AM loop antenna for indoor use.
Steps for connecting the antenna cable to the AM loop antenna.
Guidance on connecting the FM indoor antenna and the AM loop antenna for optimal reception.
Considerations for locating an FM outdoor antenna to avoid noise sources and ensure safety.
Tips for connecting an AM outdoor antenna, emphasizing horizontal stretching and grounding.
Instructions for setting the OSD format to NTSC or PAL for European/worldwide models.
Step-by-step guide on navigating menus and making settings using the OSD and remote controller.
Details on adjusting background color, superimpose mode, immediate display, and character position.
How to adjust speaker distances using the OSD menu and remote controller.
Procedure to adjust speaker output levels using the built-in test tone.
How to adjust speaker output levels via the OSD menu and remote controller.
Steps to initiate speaker level adjustment using the TEST button on the remote.
Steps to configure digital input settings for DVD, CD, VIDEO, and TAPE sources.
How to tune into FM or AM radio stations using the TUNING UP/DOWN buttons.
Tips for listening to stereo FM stations and enabling mono reception for weak signals.
Steps to store selected radio frequencies into memory using the CHARACTER/MEMORY button.
Instructions for removing stored radio stations from memory.
How to select the desired audio input source using the receiver's front panel buttons.
How to set the sleep timer to automatically turn off the unit after a specified period.
Alternative method to select input sources using the OSD menu and remote controller.
Configuring digital input signal formats (Automatic, Digital, Analog, PCM, DTS) for optimal decoding.
Detailed steps for setting digital input connectors and formats, including DTS considerations.
Important notes and precautions for playing back DTS encoded sources to avoid noise or damage.
How to switch between connected speaker systems A and B for playback.
How to cycle through different display modes for FM/AM stations and other sources.
How to temporarily turn off sound output to speakers and headphones using the MUTING button.
How to set the sleep timer for automatic power-off after a specified duration.
How to adjust bass and treble levels using dedicated buttons or the on-screen display.
How to select a stored radio station using the CH (+/-) buttons and tuning knob.
How to select a stored radio station using the on-screen display and remote controller.
Procedure to set the receiver for multichannel input sources and assign video sources.
How to adjust output levels for each speaker in multichannel mode using front panel or OSD.
Explanation of different surround sound and listening modes available for immersive audio experiences.
Details on Onkyo's proprietary modes like ACTION, MUSICAL, MONO MOVIE, ORCHESTRA, UNPLUGGED, STUDIO-MIX, TV LOGIC.
How to select listening modes directly using the unit's buttons or remote controller.
Guidance on activating THX mode for movies mixed for large theater environments.
How to select listening modes using the on-screen display and remote controller.
How to adjust listening mode parameters like Front Effect and Reflect Level using physical buttons.
How to adjust listening mode parameters using the on-screen display for detailed control.
Enables or disables Re-EQ to reduce brightness in home cinema sound for theater-like playback.
Compresses dynamic range for easier listening at low volumes, especially for movies.
Adjusts the Low Frequency Effect (LFE) level for Dolby Digital, MPEG, or DTS software.
Enables or disables additional reverberation for live recordings with acoustic effects.
Adjusts the strength of direct sound reflection based on playback source and room acoustics.
Adjusts the depth of acoustic reverberation based on source material and room conditions.
Changes the virtual hall size simulation for each surround mode.
How to assign a video source to audio inputs like CD or PHONO using selector buttons.
How to assign a video source to audio inputs using the on-screen display menu.
Procedure to assign custom names to input sources like DVD, CD, and VIDEO using the remote controller.
How to assign custom names to preset FM/AM radio stations.
How to fine-tune individual speaker output levels using the CH LEVEL button and SMART SCAN CONTROLLER.
How to adjust speaker output levels using the CH SEL and LEVEL +/- buttons on the remote.
Options to display volume settings as Absolute or Relative scale.
Automatically adjusts volume levels for different input sources to maintain consistent listening.
Steps to record audio from one source while listening to it, outputting to TAPE/VIDEO jacks.
Procedure to select a source for recording, outputting to TAPE/VIDEO jacks.
How to add CD or MD sound to video recordings using video cassette recorder connections.
Using the OSD menu to select output jacks for recording signals from selected input sources.
Explains RDS signals (PS, PTY, TP, RT) and provides a list of PTY classifications.
How to search for radio stations broadcasting specific program types (PTY) using the PTY/TP button.
How to search for radio stations broadcasting traffic information (TP) using the PTY/TP button.
How to view Radio Text (RT) information broadcast by RDS stations using the DISPLAY button.
Explanation of the RC-392M remote controller's layout and general operation principles.
How to turn the receiver's power on and off using the POWER ON/STNBY button.
Instructions for operating an connected Onkyo CD player using the remote controller's MODE CD function.
Instructions for operating a connected Onkyo DVD player using the remote controller's MODE DVD function.
How to operate a connected Onkyo MD recorder using the remote controller's MODE MD/AUX function.
How to operate a connected Onkyo tape deck using the remote controller's MODE AUDIO/TAPE function.
Information on programming these buttons to control other devices via remote codes.
Step-by-step guide for learning remote controller codes from other devices into the RC-392M.
How to erase learned remote control codes from individual buttons on the RC-392M.
How to erase learned remote control codes from MODE buttons on the RC-392M.
Explains how to program a series of button operations into a single button for simplified control.
Step-by-step instructions for programming button sequences into macro buttons on the remote.
How to memorize a series of operations into the MACRO DIRECT button for one-touch control.
How to erase learned button operations from the MACRO MODE buttons.
How to erase learned button operations from the MACRO DIRECT button.
Procedure to erase all learned codes and macro operations, restoring factory presets.
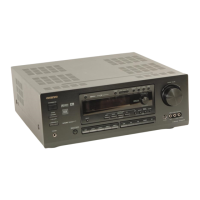
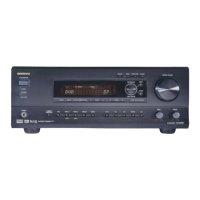
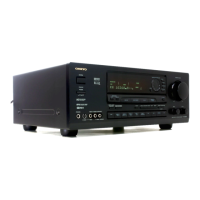
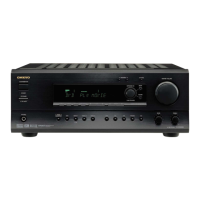
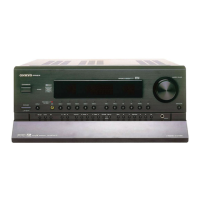
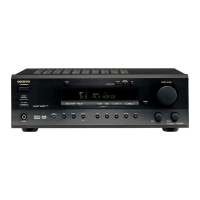
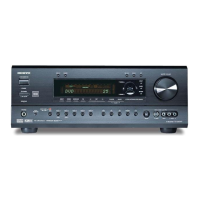
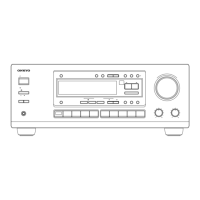
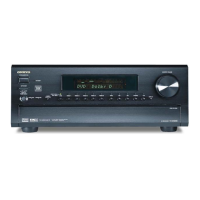
Identification and page references for all buttons and knobs on the receiver's front panel.
Explanation of the various indicators and the multi-function display on the receiver's screen.
Detailed list and page references for all buttons and functions on the RC-392M remote controller.
| Type | AV Receiver |
|---|---|
| Audio Channels | 5.1 |
| Amplifier Type | Discrete |
| Frequency Response | 10 Hz - 100 kHz |
| Total Harmonic Distortion | 0.08% |
| Input Sensitivity | 200 mV |
| Signal to Noise Ratio | 100 dB |
| Input Connections | RCA, Optical, Coaxial |
| Surround Sound | Dolby Digital, DTS |
| Tuner Type | AM/FM |
| Preset Stations | 40 |
| Video Outputs | 1 Composite |
| Output Connections | Speaker terminals |
| Audio Inputs | 6 |
| Dimensions (mm) | 435 x 175 x 390 |