Ocularis Web User Guide Configuring Ocularis Web
To Create an Ocularis Web Local View
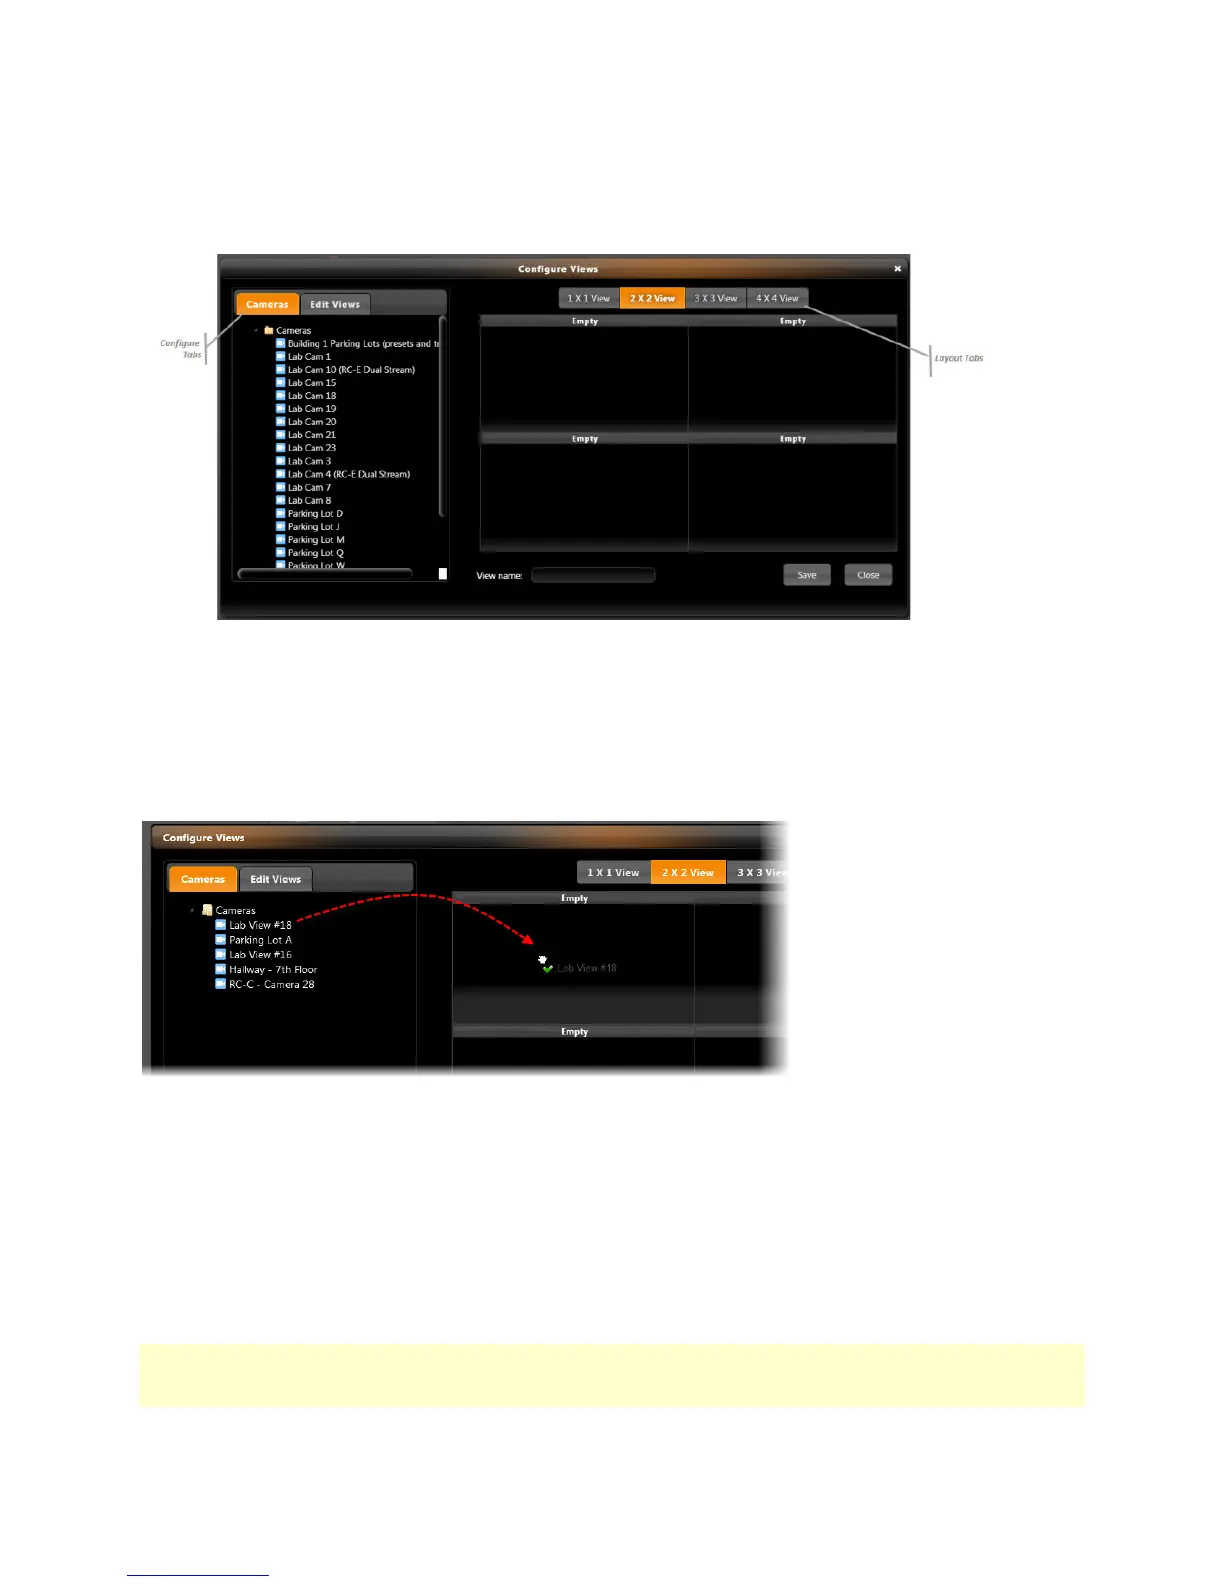
In Ocularis Web, select the Views menu and choose Configure Views.
Figure 1: Configure Local Views
The Configure Views screen allows you to create different views populated by the cameras you choose in the layout
selected.
Select the desired layout from the Layout Tabs. Available selections include: 1 x 1 View, 2 x 2 View, 3 x 3 View and 4
x 4 View. The screen will adjust accordingly based upon the view selected.
Each section or rectangle making up the view is called a pane. To populate each pane, simply drag and drop a camera
displayed in the list on the Cameras tab to the desired pane.
Drag and drop to populate a pane with a camera stream
1. Continue to drag and drop cameras for each available pane. If you change your mind about which camera
should populate which pane, simply drag a new camera and drop it on top of the existing camera in the pane.
2. When complete, enter a name for the view in the View name field. The name is displayed in the Views menu for
you to access later. View names should be created so that you can easily identify the cameras it includes. View
names are not case sensitive and may include spaces.
3. Click Save.
4. You may continue to create additional views. When finished, click Close.
Note: Remember that local views are saved with the browser settings on the local machine. If you open another
manufacturer’s browser, move to another PC, or clear the browser’s cache, you will need to reconfigure local views from
scratch.
On-Net Surveillance Systems, Inc. 9