8 9
Installation
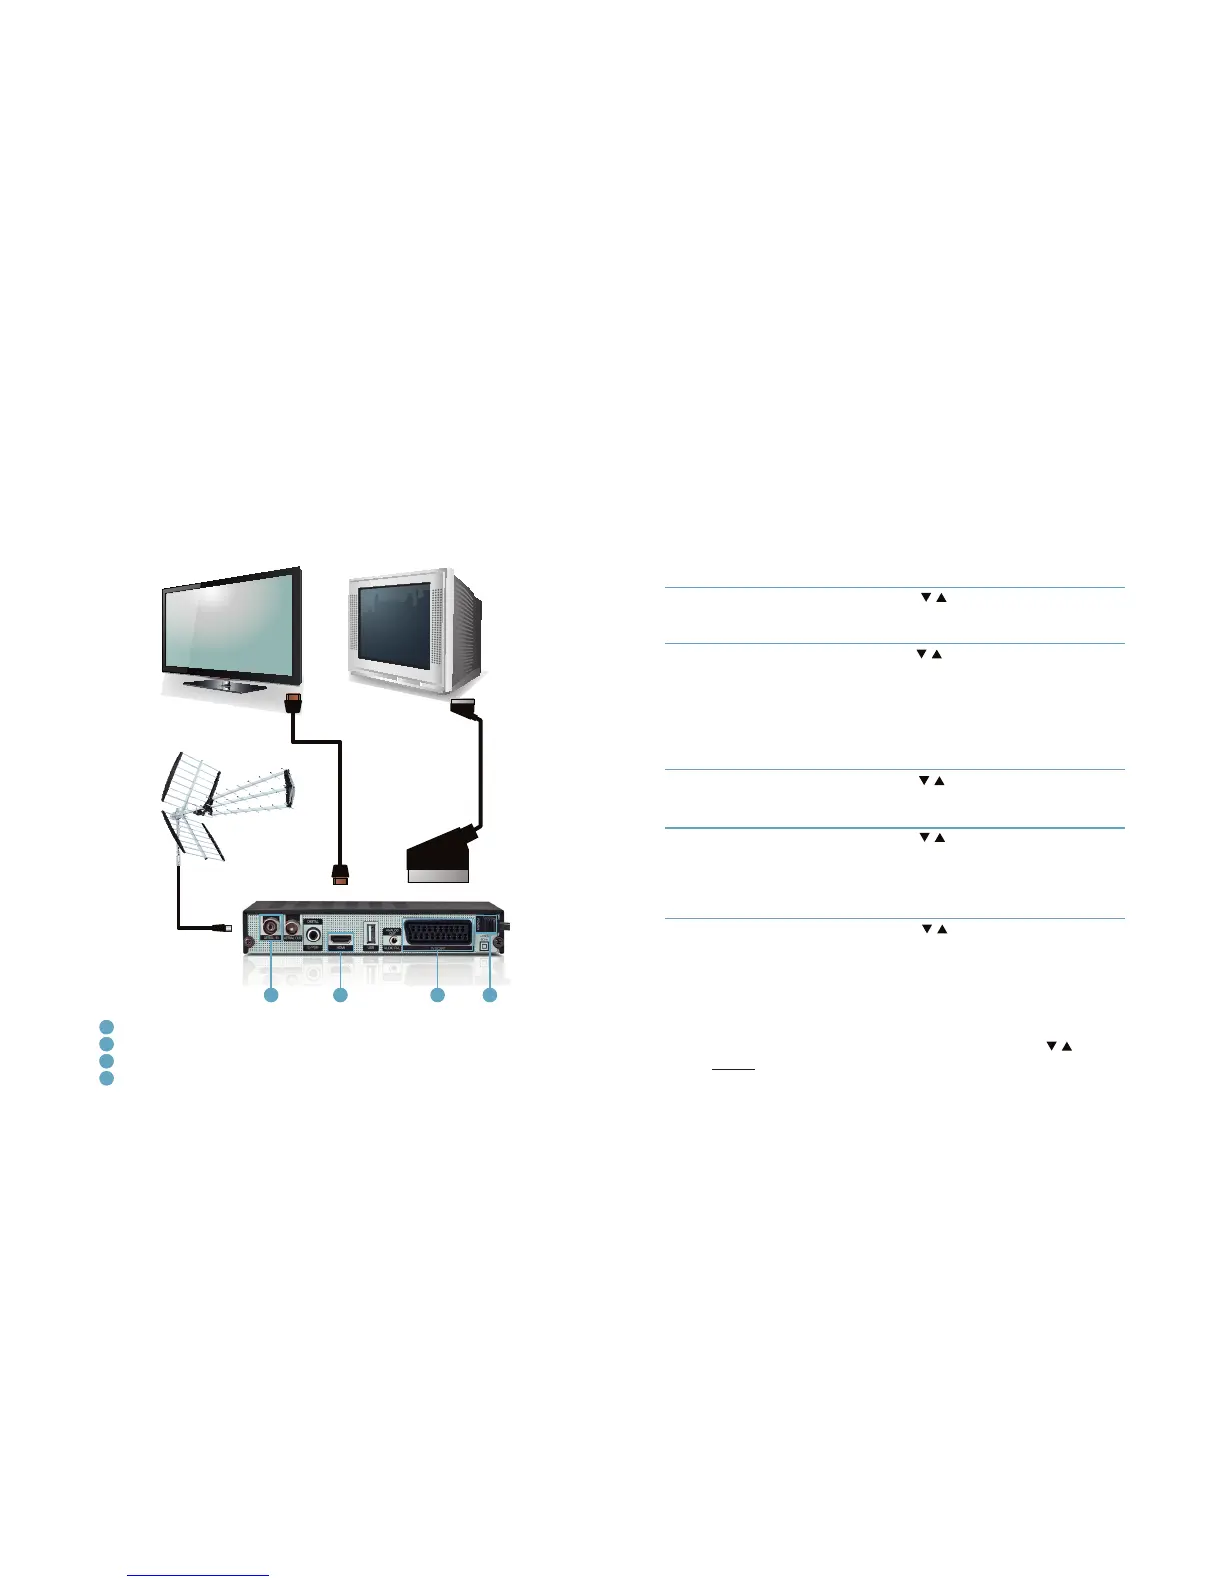
• Connect an antenna to receiver’s AERIAL IN connector.
• Using HDMI cable connect the receiver with at panel TV or
• Using SCART cable connect it with classic TV.
• At the end connect the main cord to the main socket.
Installation
2
Read this chapter to learn how to connect the receiver to a TV set, congure
the receiver, use USB drive and more.
2.1 Connection
2.2 Starting up for the rst time
1
1
2
2
3
3
4
4
1/5 Select language Using / buttons choose menu lan-
guage. Conrm your choice using blue
button on remote control.
2/5 Choose tv and aspect Using / buttons choose TV and aspect
mode. Choose 4:3 for standard TV or 16:9
for at panel TV (LCD,LED). You can also
choose option that your TV will manage
aspect recognition (SCART connection
is required). Conrm your choice using
blue button on remote control.
3/5 Select menu style and color Using / buttons choose menu color.
Conrm your choice using blue button
on remote control.
4/5 Select summer time Using / buttons choose if you want
to select summer time. It is important for
proper working of EPG (Electronic Pro-
gram Guide). Conrm your choice using
blue button on remote control.
5/5 Select country Using / buttons choose a country
where you will receive terrestrial TV
signal. Conrm your choice using blue
button on remote control.
Turn on the TV Set. After a while on TV Set you should see receiver’s OSD.
If the TV Set is not displaying receiver’s OSD, probably a signal source is set
wrong. Check the TV Set documentation for information how to change the
signal source.
Generally once the receiver is switched on, the Welcome Screen emerges. To
enter Installation Guide menu use OK button on the remote control or wait
few seconds.
If you want to return to previous level in this Guide, use red button.
If after switching on the receiver, you cannot see the Installation Guide
menu, use MENU button to enter the main menu and using / buttons
choose TOOLS menu and select Load Factory Settings and conrm it using
OK button (default password is 0000).