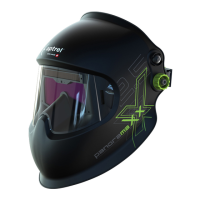
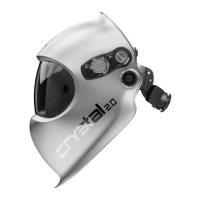
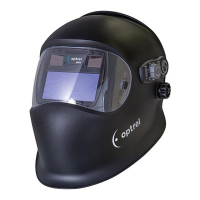
Introduction
A welding helmet is an item of headgear that is used to protect the eyes, face and neck from
burns, UV light, sparks, infrared light and heat during certain welding operations. The helmet
consists of several parts (see spare parts list). An automatic welding filter combines a passive
UV filter and a passive IR filter with an active filter whose light transmittance in the visible
range of the spectrum varies depending on the light intensity in the welding arc. The light
transmittance of the automatic welding filter has a high initial value (light state).
After switching on the welding arc and within a defined response time, the light transmittance
of the filter changes to a low value (dark state). Depending on the model, the helmet can be
combined with a safety helmet and/or a PAPR (Powered Air Purifying Respirator) system.
Safety instructions
Read the instruction manual before using the helmet. Make sure thefront cover lense is
mounted correctly. If faults cannot be remedied, the helmet must no longer be used. For
further information, please contact your authorised retailer.
Precautions & protective restrictions / risks
During the welding process, heat and radiation are released; this can cause eye and skin
injuries. This product provides protection for the eyes and face. Your eyes are always protected
against ultraviolet and infrared radiation when wearing the helmet, regardless of the protection
level selected. Appropriate protective clothing must also be worn to protect the rest of your
body. Particles and substances released during the welding process can trigger allergic skin
reactions in persons with this disposition. With sensitive persons, skin contact with the head
part can lead to allergic reactions. The welding helmet may only be used for welding and
grinding and not for other applications. The manufacturer accepts no liability if the welding
helmet is not used as intended or not used in accordance with the instructions for use.It`s not
allowed to apply stickers, prints or similar to the helmet. The helmet is suitable for all common
welding processes, except gas and laser welding.
Please note the protection level recommendation according to EN169 in this manual. The
helmet does not replace a safety helmet. The helmet can be combined with a safety helmet.
The design features of the helmet may affect the field of vision (no peripheral vision without
turning the head) and the light transmittance of the automatic darkening filter may affect colour
perception. As a result, signal lamps or warning indicators may not be seen. Furthermore,
there is a risk of impact due to the larger contour (head with helmet). The helmet also impairs
hearing and reduces the sensation of heat.
Warning: For the overall marking of the safety class of the helmet, the lowest of all
components used is always decisive.
For use in extreme temperatures, pay attention to the appropriate labeling: FT, BT or AT. When
wearing glasses, shocks can be transferred directly from the helmet to the head.
Colour view
To increase convenience and safety, you can recognize colours with this welding helmet.
Sleep mode
The ADF has an automatic switch-off function that increases the battery life. If less than 1 lux of
light reaches the ADF for approx. 10 minutes, the ADF switches off automatically. To switch the
cassette back on, the solar cells must be briefly exposed to daylight. If the ADF can no longer
be activated or does not darken when the welding arc is ignited, the batteries must be replaced.
Warranty & liability
The warranty conditions can be found in the instructions of the manufacturer's national sales
organisation. Contact your authorised retailer for more details. A warranty is only given for
material and manufacturing defects. In the event of damage due to improper use, unauthorised
intervention or use not provided for by the manufacturer, the warranty and liability are void.
The liability and warranty are alsoavoid if spare parts other than those distributed by the
manufacturer are used.
Expected Lifetime
The welding helmet doesnot have an end-of-life date. The product can be used as
long as no visible or invisible damage or malfunctions occur.
Application (Quick Start Guide p. 4-5 / Functions p. 6-7)
Correct adjustment of the headband is very important for this product, because the benefits
of the large field of view are only ensured if the headband is correctly adjusted.
1. Headband head size/circumference. Adjust the rear dial to your head size. Make sure that
your eyes are approximately in the centre of the field of vision. (p. 5 no.3a)
2. Eye distance. With the dovetail connection, the distance between the helmet and eyes
is adjusted.Position the helmet as close as possible to the eyes (the closer the ADF is to
the eyes, the larger your field of vision will be). Adjust both sides equally without tilting.
(p. 5 no.3b).
3. Helmet angle (excentre) The helmet angle can be adjusted using the rotary knob. Adjust
the angle so that the nose does not touch the cut-out for the nose. Carefully perform a
test to ensure that the helmet shell does not touch your nose, even when you nod (use the
supplied nose pad to protect your nose). (p. 5 no.3c).
4. ShadeTronic/manual mode. You can use the slide switch to select the protection level
adjustment mode. In automatic (ShadeTronic) mode, the protection level is automatically
adapted to the intensity of the arc by means of sensors (EN 379:2003 standard). In manual
mode, the protection level can be set by turning the knob (p. 7 No. III + IV).
5. Protection level. Manual mode: In "Manual" mode, you can choose between protection
levels by turning the protection level control knob. (Protection mode correction is disabled
in manual mode). (p. 7 No. IV)
ShadeTronic: In ShadeTronic mode, the protection level is automatically adjusted and
corresponds to protection level according to EN 379 when the rotary knob is set to position
"N". By turning the knob, the automatically set protection level can be corrected by up to two
protection levels upwards or downwards depending on your personal preferences (the absolute
minimum and maximum protection levels, respectively cannot be undershot or exceeded,
regardless of the correction setting). (p. 7 No. III)
6. Opening time controller/delay. The opening time controller (Delay) (p. 6) allows you to select
the opening time delay from dark to light. The rotary knob supports continuous adjustment
from dark to light between 0.1 and 2.0 s (p. 6 no. II)
7. FadeTronic: The smooth transition from dark to light of the "FadeTronic" twilight effect offers
even better protection for the eyes against fatigue and irritation from afterglow objects and
gives the eye the time it needs to get used to the brightness. (p. 6 no. II) CAUTION: For quick
tack welding, do not set the rotary knob to the Twilight range. The “Tack” range with a minimal
opening delay is best suited.
8. Sensitivity. With the sensitivity button the light sensitivity is adjusted according to the welding
arc and the ambient light. This can be individually adjusted by turning the rotary knob. A very
high light sensitivity is achieved in the "Super High" range; this guarantees darkening even
with weak arcs. (p. 6 no. I)
9. Sensors. This welding helmet has 5 sensors. 4 sensors detect the welding light and 1 sensor
is responsible for detecting the light intensity (automatic mode) and the innovative Stay-Dark
function.
Cleaning and disinfection
The ADF must be cleaned regularly with a soft cloth. Do not use strong cleaning agents,
solvents, alcohol or cleaning agents containing abrasives. Scratched or damaged lenses should be
replaced.
Storage
The welding helmet should be stored at room temperature and low humidity. The helmet should
be stored in the light.
Replacing the front cover lens (p. 8) / inside cover lens (p. 4 nr. 4)
1. The front cover lens is removed from the anchorage, pull the tab on the inside, and push the
side lever to release the fastening.
2. Hook the new front cover lens into a lateral clip. Pull the finisher to the second side clip and
lock it in place. This manual action requires some application of pressure for the seal on the
finisher to have the desired effect.
Battery/charging process (p. 9)
The helmet has a high performance lithium polymer (LiPo) battery. Before using the battery
for the first time, fully charge it with the supplied Micro-USB cable via a commercially available
USB connector (not included). After charging, the Micro-USB socket on the helmet must be
protected from dust and dirt with the protective cap. The battery is also charged by external light
sources (ceiling light, welding light) via the solar cell. If the helmet is used frequently, the battery
will very rarely need charging. We recommend charging the helmet completely every 6 months.
If the battery is discharged, charging for approx. 15 minutes is sufficient for an operating time
of approx. 8 hours.
State of charge:
1) Red flash: Battery is almost discharged (charge immediately)
2) Orange permanently lit: Battery is charging
3) Green permanently lit: Battery is fully charged
If the helmet fails to darken when the welding arc is ignited, please check the state of charge (press the
grinding button: if the LED no longer f lashes blue, the battery is completely discharged). If the ADF does
not function correctly when the battery is charged, contact your authorised retailer.
A defective battery can be replaced by the manufacturer or an approved optrel service partner.
Hard Hat
See extra manual for the Hard Hat.
Troubleshooting
ADF fails to darken
→ A dju st t he se ns it i vi ty ( p. 6 n o. I )
→ C lea n t he s en s or s or f ro nt c ov e r le ns → Ch ar ge t he ba tt er y (p . 9) )
→ S wi tch o f f t he op en in g d el ay - s wit ch t o " tac k " fo r fa st t ac k w el di ng (p . 6 no. II )
Protection level too bright
→ In manual mode, select a higher protection level (p. 7 no. IV) → Replace the front cover
lens (p. 8)
→ I n au to m at ic m ode , set t he r ot ar y kn ob t o +1 o r +2 (p. 7 )
Protection level too dark
→ I n ma nua l mo de, s el ec t a lo wer p rot ec ti on le ve l ( p. 7 no . IV )
→ I n au to m at ic m ode , set t he r ot ar y kn ob t o -1 o r -2 ( p. 7 n o. I I I)
ADF flickers
→ Ad j u s t t he p o si t io n o f t he o p en i n g ti m e c o n t r o l ( de l ay ) to s u it t h e w e l d in g p r oc e s s ( p . 6 n o . I I)
→ Ad j u s t t he s e ns i t i v i t y c o n t r o l le r t o su i t t h e w e ld i n g pr o c e s s (p. 6 n o. I )
→ Ch a r g e t h e b a t t e r y (p . 8 )
Poor visibility
→ C le an t h e fr o nt c o ve r le ns or A D F
→ I n m a n ua l m o d e, ad ju st t he pr ot ec t i on le ve l to su it t he we ld in g p r o c e s s ( p. 7 n o . I V )
→ In automa tic mode adapt the protection lev el corr ecti on to sui t the welding proc ess (p . 7 no. III)
→ I nc r ea se t he am b ie nt l i gh t
Welding helmet slips
→ R e - a d ju s t/ t i g h t e n t h e h e a d b a n d ( p . 5 n o . 3 a - 3 c)
Flip up does not work
Check if the cover lens is inserted correctly.
If the fastening tab is pointing inwards, the inner flip may be jammed.
ENGLISH
14
 Loading...