14
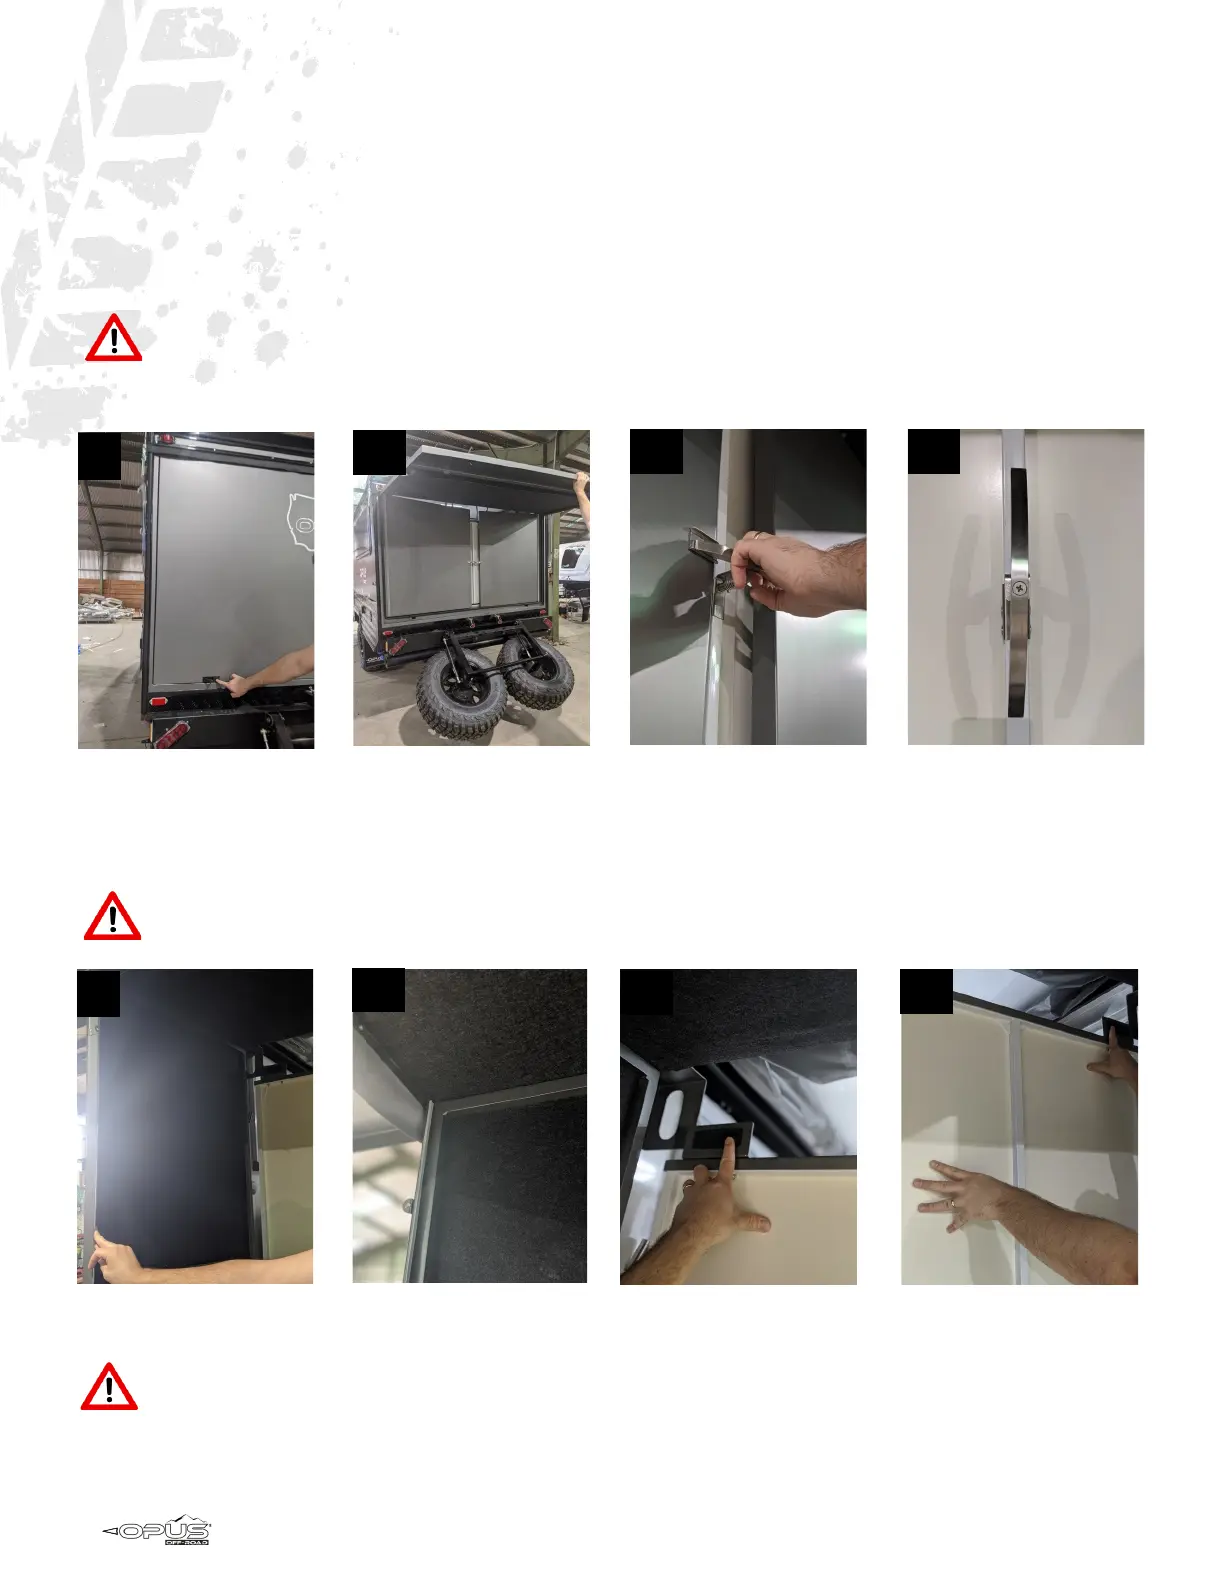
STEP 8 - Use the push-buons to open the rear panel securing locks. Li the back panel upwards to the roof posion.
WARNING! Please note that this panel will not yet remain in this posion without compleng the next step.
STEP 9 - Using one hand or a helper to hold the roof panel up, pull and rotate the spring bolt that secures the side panel unl it is
in the vercal posion. This will allow the side panels to swing outwards.
STEP 10 - Open the le side panel fully through 90 degrees, ensuring the panel meets the top le corner groove of the roof panel
to complete the set-up and achieve a full seal. Repeat with the right ride panel.
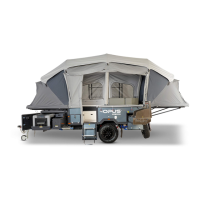
STEP 11 - Holding the bed panel securely, release the two rear bed panel securing latches and fold down the bed panel.
WARNING! Please ensure you or a helper are holding the fold down bed panel before releasing the latches as this panel
can shi if you are on any incline or the camper is not completely level. Failure to support the panel fully at this point
could result in serious injury or damage to the trailer.
STEP 12 - Carefully lower the rear bed panel into the horizontal posion.
WARNING! This panel is heavy especially considering the angle and reach required to hold it. We recommend two people
complete this stage of the set up together for the rst several uses unl you are familiar with its weight and movement
and condent that you can complete the set up individually.
STEP 13 - Use the handle to li the rear end wall panel in place. Slide the two locking pins in place and then secure with the latch
clamps.
SETTING UP YOUR OP15 cont.
9b 9a
8b
8a
11b
11a
10b
10a