Install a Fan Module
This section describes removing a fan module from Oracle Database Appliance Version 1.
Caution - Equipment damage. When removing a fan module from a powered on system, it
must be replaced within two minutes of removal.
1.
Identify the faulty fan module with its amber LED.
When a fan fails, the Service Required LED lights amber. For information about fan status
LEDs, see “Server Node Fan Indicators” on page 55.
2.
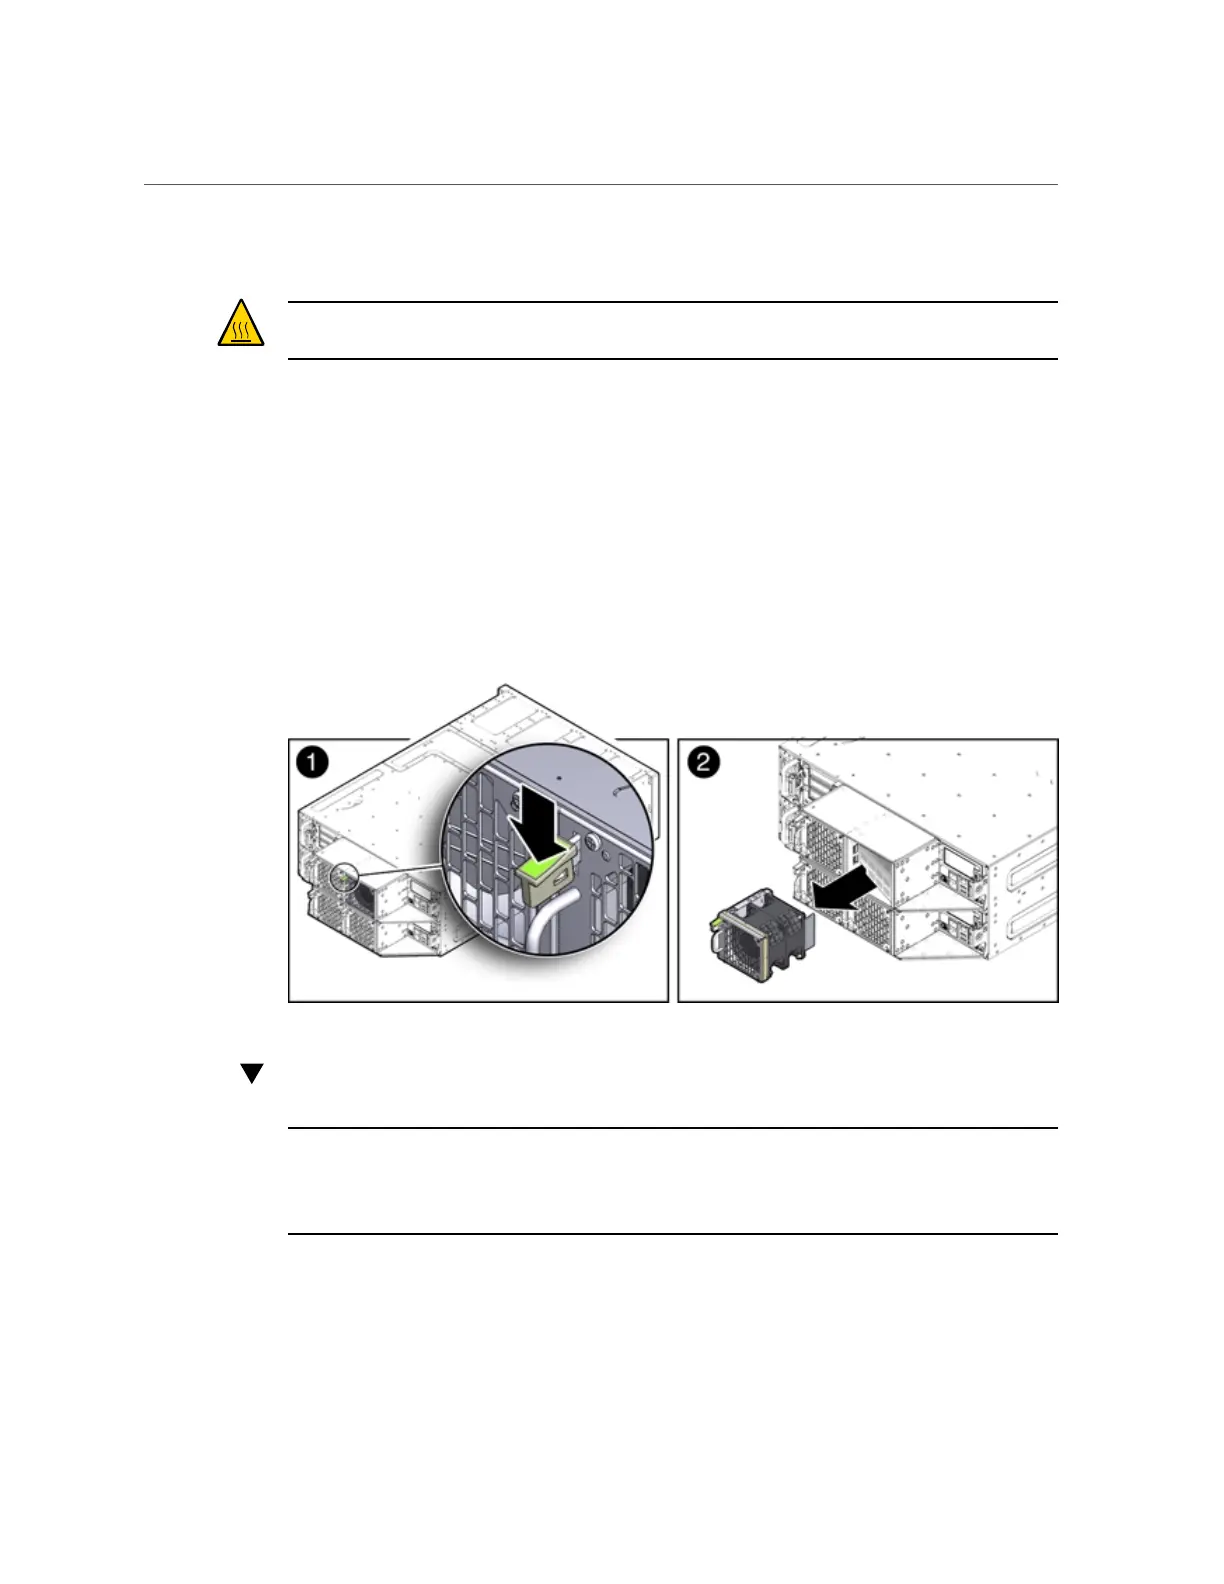
To remove the faulty fan module, press down on the fan release lever [1].
3.
While holding the release lever down, use the handle on the fan module to pull it
out of the server node [2].
The fan door swings shut to ensure proper cooling.
Install a Fan Module
Note - Information in this appendix does NOT apply to Oracle Database Appliance X3-
2, Oracle Database Appliance X4-2, Oracle Database Appliance X5-2 or Oracle Database
Appliance X6 series. Refer to the preceding chapters in this document for information on
servicing those systems.
This section describes installing a fan module in Oracle Database Appliance Version 1.
Appendix A • Servicing the Oracle Database Appliance Version 1 161